Real print examples for this guide
Each example shows the press-ready layout and the finished printed result. Open a template to inspect its dimensions, marks, bleed, and tool chain.

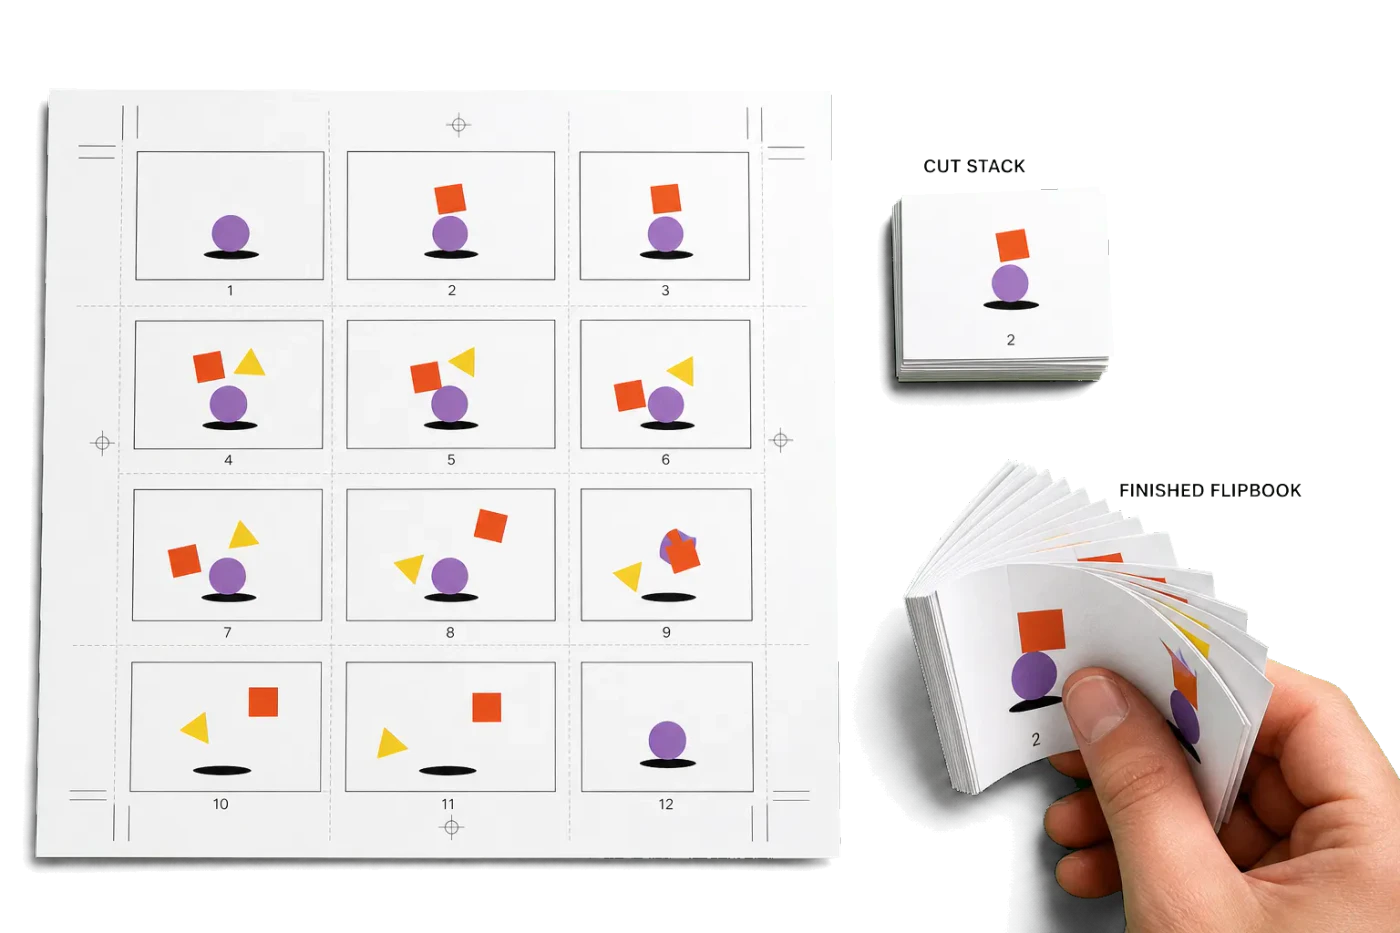
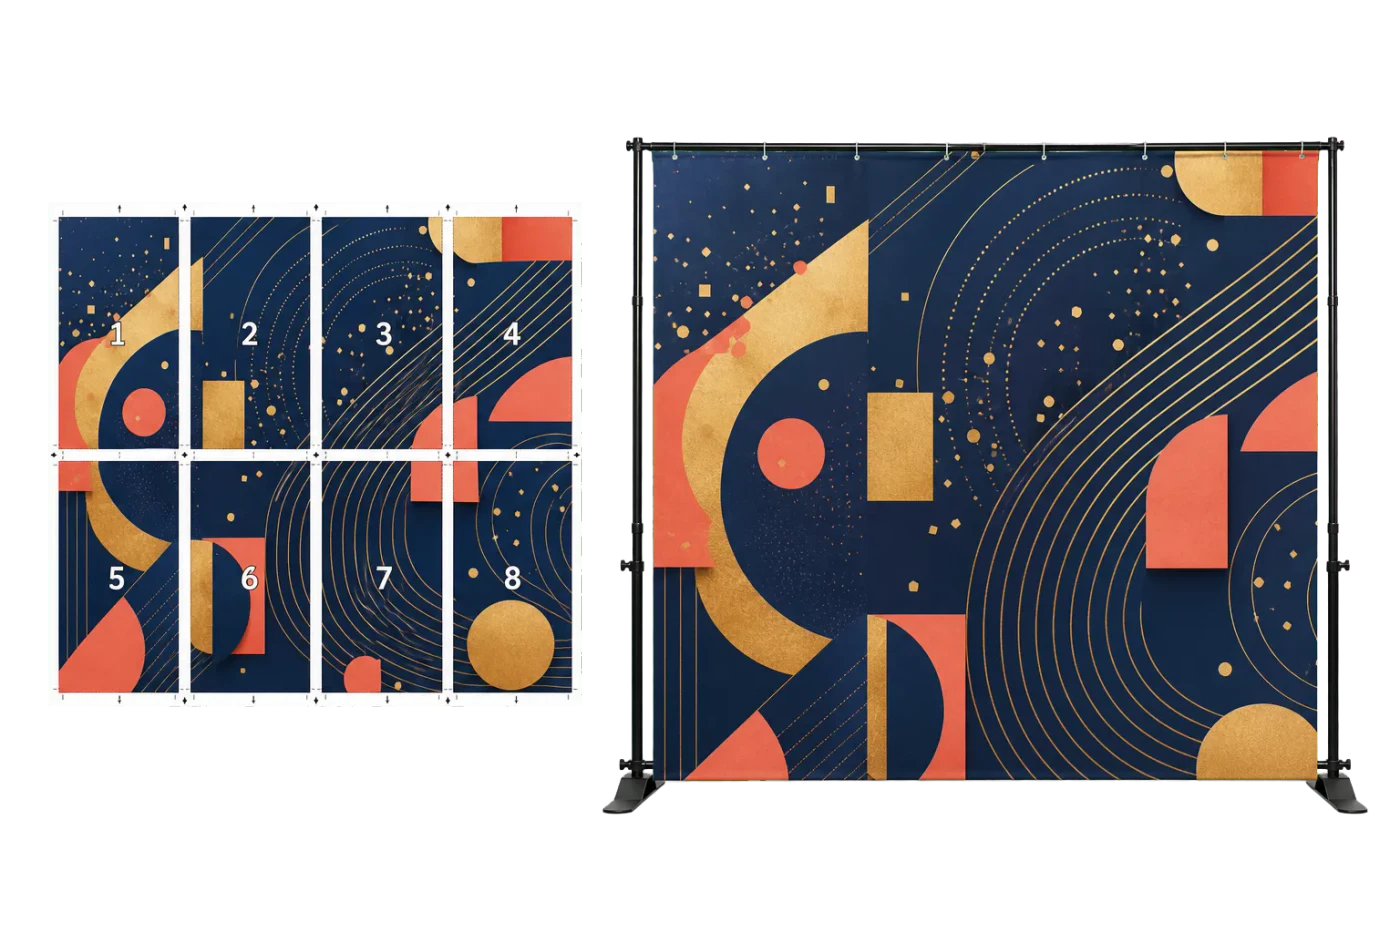
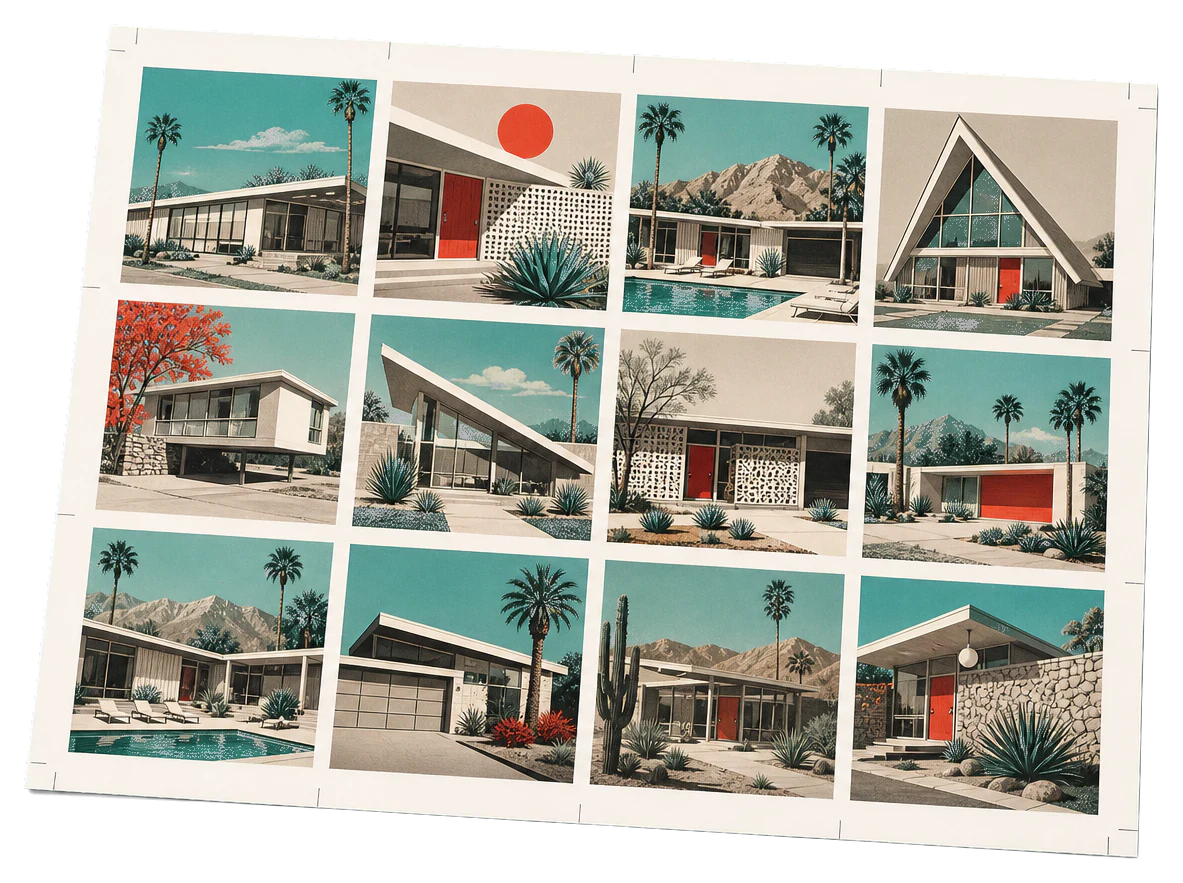
Original PDF Press print-production photography. Images link to their canonical template pages.
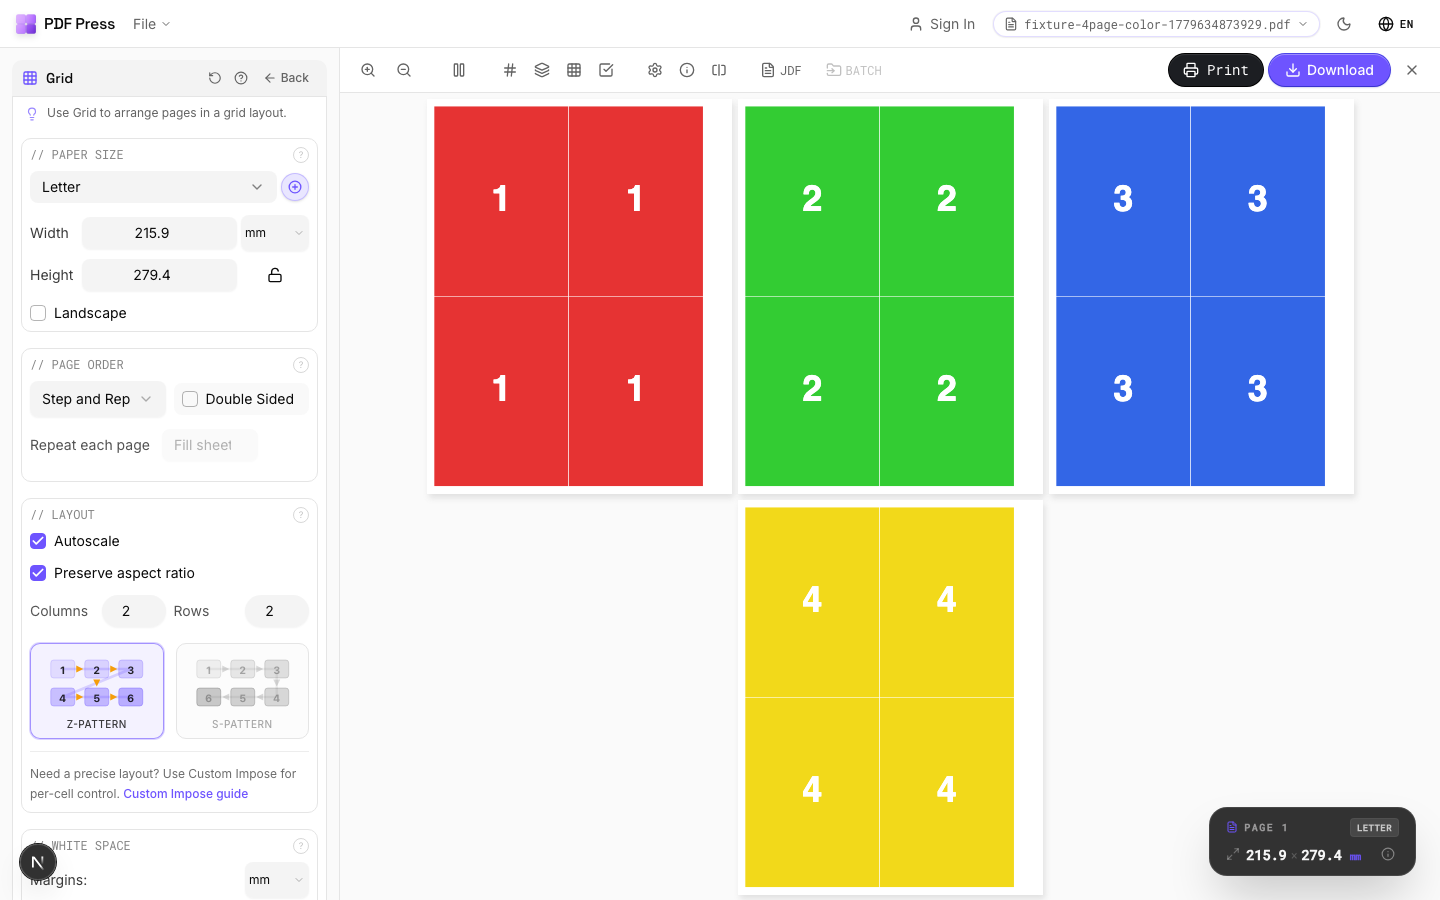
Grid
Opens with the tool ready — just drop your PDF and download.
Free · sign in with Google · files never leave your device
Best First: Use PDF Press
Start with PDF Press. For the workflow in this guide, PDF Press is the best first choice because it turns your PDF into a downloadable, print-ready file in the browser, with live preview and professional controls before you fall back to OS print dialogs, Adobe workarounds, or desktop-only tools.
- Make the output file first. Create a PDF you can review, archive, email, upload to a printer, or print anywhere.
- Use production controls early. Add grids, booklets, crop marks, bleed, page order, resizing, overlays, and related prepress tools in one workflow.
- Keep files private. Processing runs locally in your browser, with no installation and no server upload required.
The Art and Science of Print Finishing
In the world of commercial printing, the journey doesn't end when the ink hits the paper. In fact, for many high-end projects, the printing phase is just the beginning. Print finishing encompasses all the processes performed on printed material after it leaves the press to achieve its final aesthetic and functional form.
Whether you are producing a luxury brochure, a durable product manual, or a striking business card, the choice of finishing techniques can transform a standard print job into a premium experience. Finishing adds tactile appeal, visual depth, and essential protection against wear and tear. Understanding the nuances of print coating options and mechanical finishing is vital for any prepress professional or print buyer looking to elevate their brand.
At PDF Press, we understand that the success of complex finishing—like die-cutting or multi-page binding—starts with precise imposition. If your gutters aren't calculated for the creep of a saddle stitch or the bleed requirements of a full-wrap laminate, the most expensive finish in the world won't save the project.
Prepress Foundation: Where Finishing Begins
Before diving into specific finishes, it is critical to address the technical foundation. Every finishing process has physical requirements that must be accounted for during the prepress workflow. For example, heavy lamination can add thickness to a sheet, affecting how it folds. Similarly, embossing requires specific clearances to avoid interfering with trim lines.
Modern workflows rely on automated tools to ensure these tolerances are met. Using PDF Press, professionals can generate print-ready PDFs that include the necessary marks for registration, folding, and trim, specifically tailored for the finishing equipment being used. Without this precision, you risk registration errors that can ruin an entire production run of foil-stamped or embossed pieces.
Watch the workflow
Print finishing sequence
- Tool: Cutter Marks
Lamination Printing: Protection Meets Style
Lamination printing involves applying a thin layer of plastic film to the surface of the printed sheet. This is typically achieved using heat and pressure (thermal lamination) or liquid adhesives (cold lamination). Lamination serves two primary purposes: durability and aesthetics.
There are several common types of lamination used in the industry today:
- Gloss Lamination: Provides a high-shine finish that makes colors appear more vibrant and saturated. It is highly resistant to fingerprints and dirt.
- Matte Lamination: Offers a non-reflective, sophisticated look. It is popular for high-end marketing materials but can be more susceptible to "scuffing" or fingernail marks unless a scuff resistant lamination is chosen.
- Soft Touch Lamination: Often compared to the feel of a peach or soft suede, this finish provides a unique tactile experience that encourages engagement. When debating soft touch lamination vs matte, the decision usually comes down to the desired "luxury" feel versus budget.
Lamination is essential for items handled frequently, such as restaurant menus, book covers, and pocket folders. It provides a barrier against moisture and prevents the ink from cracking at the folds—a common issue with heavy cardstocks.
Print Coating Options: Aqueous and UV
While lamination uses a film, coatings are applied as liquids during or after the printing process. Choosing between aqueous coating vs UV coating depends on the required turnaround time, budget, and the level of gloss desired.
Aqueous Coating (AQ): This is a water-based coating applied inline on the printing press. It dries quickly and is environmentally friendly. It provides a decent level of protection against fingerprints and is available in gloss, satin, and matte finishes. Because it is applied inline, it is generally the most cost-effective way to protect a print job.
UV Coating: This coating is cured using ultraviolet light, resulting in an extremely hard and durable finish. It can achieve a much higher gloss level than aqueous coatings. However, UV coating can sometimes crack when folded, so it is often avoided on the spine of a book unless the paper is scored deeply first.
One of the most popular uses of this technology is Spot UV. This involves applying the coating only to specific areas of the design—such as a logo or a photo—to create a contrast between gloss and matte surfaces. The spot UV coating benefits include increased visual hierarchy and a premium "3D" effect that catches the light as the user moves the piece.
Hot Foil Stamping: The Gold Standard
The hot foil stamping process uses heat, pressure, and a metallic paper (foil) to apply a design to a surface. Unlike metallic inks, which can look dull on certain stocks, foil provides a true mirror-like reflection. While gold and silver are the most common, foils are available in hundreds of colors, holographic patterns, and even clear "tint" foils.
The process requires a metal die, usually made of brass, copper, or magnesium. The die is heated and pressed against the foil and the paper, "stamping" the design into the fibers. This technique is often combined with embossing to create a "foil emboss," where the metallic design is also raised from the surface of the paper.
Foil stamping is a staple of luxury packaging, wedding invitations, and high-end stationery. Because it is a "dry" process, it can be applied to almost any substrate, including textured and dark-colored papers where traditional ink would not be visible.
Embossing and Debossing: Adding Dimension
Embossing and debossing are the twin techniques of altering the paper's surface to create a three-dimensional effect. They rely on "male" and "female" dies that sandwich the paper to reshape it.
Embossing: The process of creating a raised image or text. Blind embossing techniques refer to embossing without any ink or foil, relying purely on the shadow and light created by the physical deformation of the paper to convey the design. This creates an incredibly subtle and elegant look.
Debossing: The opposite of embossing, where the design is pressed *into* the paper, creating an indentation. Debossing in commercial printing is frequently seen on letterpress-style business cards and leather-bound books. It provides a "pressed-in" feel that suggests craftsmanship and permanence.
Both techniques work best on thick, long-fiber papers that can stretch without tearing. When planning for these finishes in your PDF Press layouts, remember that the "reverse" side of an embossed area will be debossed, which may impact your design on the back of the sheet.
Die Cutting: Beyond the Rectangle
Most print jobs are trimmed into rectangles using a straight-blade guillotine. However, when you need a custom shape—like a star-shaped ornament, a pocket folder with a curved flap, or a window in a box—you need die cutting.
A "die" is essentially a cookie cutter made of steel rules embedded in a wood base. This die is mounted in a press and punched through the paper. For smaller runs, digital die-cutting (using a laser or a plotting blade) is becoming more common, as it eliminates the need for an expensive physical die.
For more details on preparing files for this process, see our comprehensive die-cutting guide. Precise registration is the biggest challenge here; if your print doesn't align perfectly with the die, the finished product will look amateurish.
Folding and Creasing: Engineering Precision
Folding seems simple, but in commercial printing, it is a complex engineering task. As paper thickness increases, the fibers on the outside of a fold can stretch and break, leading to unsightly "cracking." To prevent this, heavy stocks must be scored or creased before folding.
A crease creates a "hinge" by compressing the paper fibers, allowing them to bend without breaking. This is particularly important for digitally printed pieces, where the toner sits on top of the paper and is prone to flaking. When using PDF Press, you can specify fold marks that guide the finishing department, ensuring that the panels of a tri-fold or gate-fold brochure align perfectly after the physical "creep" of the paper is accounted for.
Binding Methods: Structuring the Content
If your project has multiple pages, you must choose a binding method. This decision impacts the imposition layout significantly. A 16-page booklet bound with saddle stitching requires a completely different page order than the same 16 pages bound with a coil.
Common binding methods include:
- Saddle Stitching: Pages are nested and stapled through the fold. It is cost-effective but limited by the thickness of the paper.
- Perfect Binding: The style used for most paperback books, where the pages are glued into a wrap-around cover. This requires a "flat" spine.
- Case Binding: The traditional "hardcover" method, offering maximum durability and prestige.
For a deep dive into these options, check out our binding methods overview. Choosing the right method early in the design phase is crucial for ensuring your margins and gutters are set correctly in your imposition software.
Specialty Finishes: Engaging the Senses
In a crowded marketplace, some brands go beyond the standard options to include specialty finishes that engage more than just sight and touch.
Thermography: Often called "poor man's embossing," this involves a special powder that is added to wet ink and then heated, causing it to swell and create a raised, plastic-like texture. It is common on traditional business cards and stationery.
Fragrance (Scratch and Sniff): Micro-encapsulated scents can be applied as a coating. When the surface is scratched, the capsules break and release a fragrance—ideal for perfume samples or food-related marketing.
Glow-in-the-Dark and Fluorescent Inks: These can be applied as specialty coatings to add functional or novelty value to posters, event tickets, and safety signage.
Quality Control in the Bindery
The bindery is often where the most mistakes happen because it is the final stage of production. A mistake in the finishing department means throwing away finished, printed sheets—a massive waste of time and materials.
Key quality control checks include:
- Registration Check: Ensuring that spot UV or foil aligns perfectly with the printed image.
- Adhesion Test: Using a tape test to ensure that lamination isn't peeling away from the ink, especially on digital prints with high oil content.
- Fold Accuracy: Verifying that the folds occur exactly where they were intended, without "dog-ears" or misaligned panels.
By using professional tools like PDF Press to generate your layouts, you provide the bindery with clear, standardized marks that reduce the chance of human error during setup and execution.
Combining Coatings, Foils and Embossing for Greater Impact
The most memorable printed pieces rarely rely on a single effect. The real craft of print finishing is layering techniques so they amplify rather than fight one another. A matte laminate, for example, makes an adjacent spot-UV or foil element pop dramatically because the eye reads the contrast between dull and shiny. Combine that with an embossing finish and you add a third, tactile dimension on top of the visual one.
Common high-impact combinations include:
- Soft-touch lamination + spot UV: a velvety background with glossy, raised-looking highlights on the logo or title.
- Foil stamping + embossing (combination "combo" die): registering a foil and an emboss in a single pass so the metallic area is also raised — the hallmark of luxury packaging and business cards.
- Matte laminate + blind emboss: a subtle, monochrome, texture-only effect that feels premium without shouting.
Tips for combining techniques without overwhelming the design:
- Pick one hero. Let a single element (logo, title, or icon) carry the special finish. When everything is emphasized, nothing is.
- Respect registration tolerances. Stacked effects must align; give the bindery generous trapping and avoid hairline alignment between separate foil and emboss dies unless you order a combination die.
- Mind the substrate. Heavily textured stocks fight foil and fine embossing; smoother, heavier stocks hold crisp detail.
- Leave breathing room. Keep finished elements clear of folds and trim, and keep negative space around them so the effect reads.
- Proof the stack. Order a physical draw-down or proof when layering three or more effects — combinations behave differently in person than on screen.
All of these effects are added in the bindery after printing, but they depend on an accurate imposed file. Use PDF Press to set crop marks, bleed, and registration so the finishing house can align each layer precisely.
Print Finishing as a Branding and Marketing Tool
Beyond protection and durability, print finishing is a marketing decision. In a world saturated with screens, a physical piece that feels substantial in the hand earns attention that a flat sheet cannot. Finishing is how a brand signals quality before a single word is read.
Why finishing matters for the brand:
- Perceived value and prestige: a foiled, embossed business card or a soft-touch brochure communicates that the brand invests in details — a proxy customers use to judge the product itself.
- Memorability: tactile and visual contrast makes a piece more likely to be kept, handled, and remembered rather than discarded.
- Differentiation: when competitors send plain mailers, a finished piece stands out in the stack.
- Consistency: a repeatable finishing spec (the same spot-UV treatment, the same stock) becomes part of a recognizable brand system across cards, packaging, and collateral.
The takeaway for designers and print buyers: choose finishes that match the message. A law firm or jeweler leans into restrained embossing and matte stocks for understated prestige; a consumer brand might use bold foils and gloss for energy. Either way, the finish should reinforce the brand, not merely decorate it — and it starts with a clean, press-ready file from PDF Press.
Conclusion: Designing for the Finish
Successful print projects are designed with the end in mind. Whether you are choosing lamination printing for durability or blind embossing techniques for elegance, your finishing choices should support the project's goals and budget.
Remember that the more complex the finish, the more important the prepress foundation becomes. Accurate imposition, clear communication with your printer, and a solid understanding of material tolerances will ensure that your vision is realized perfectly in the final physical product. At PDF Press, we are dedicated to providing the tools you need to bridge the gap between digital design and physical perfection.
Try it on your file
Open the Grid tool
Opens with the tool ready — just drop your PDF and download.
Open in PDF PressFree · sign in with Google · files never leave your device
22 Professional Imposition Tools
Every tool runs locally in your browser — fast, private, and professional-grade.
Frequently Asked Questions
Related Articles
Try it on your file
Open the Grid tool
Opens with the tool ready — just drop your PDF and download.
Open in PDF PressFree · sign in with Google · files never leave your device