Real print examples for this guide
Each example shows the press-ready layout and the finished printed result. Open a template to inspect its dimensions, marks, bleed, and tool chain.

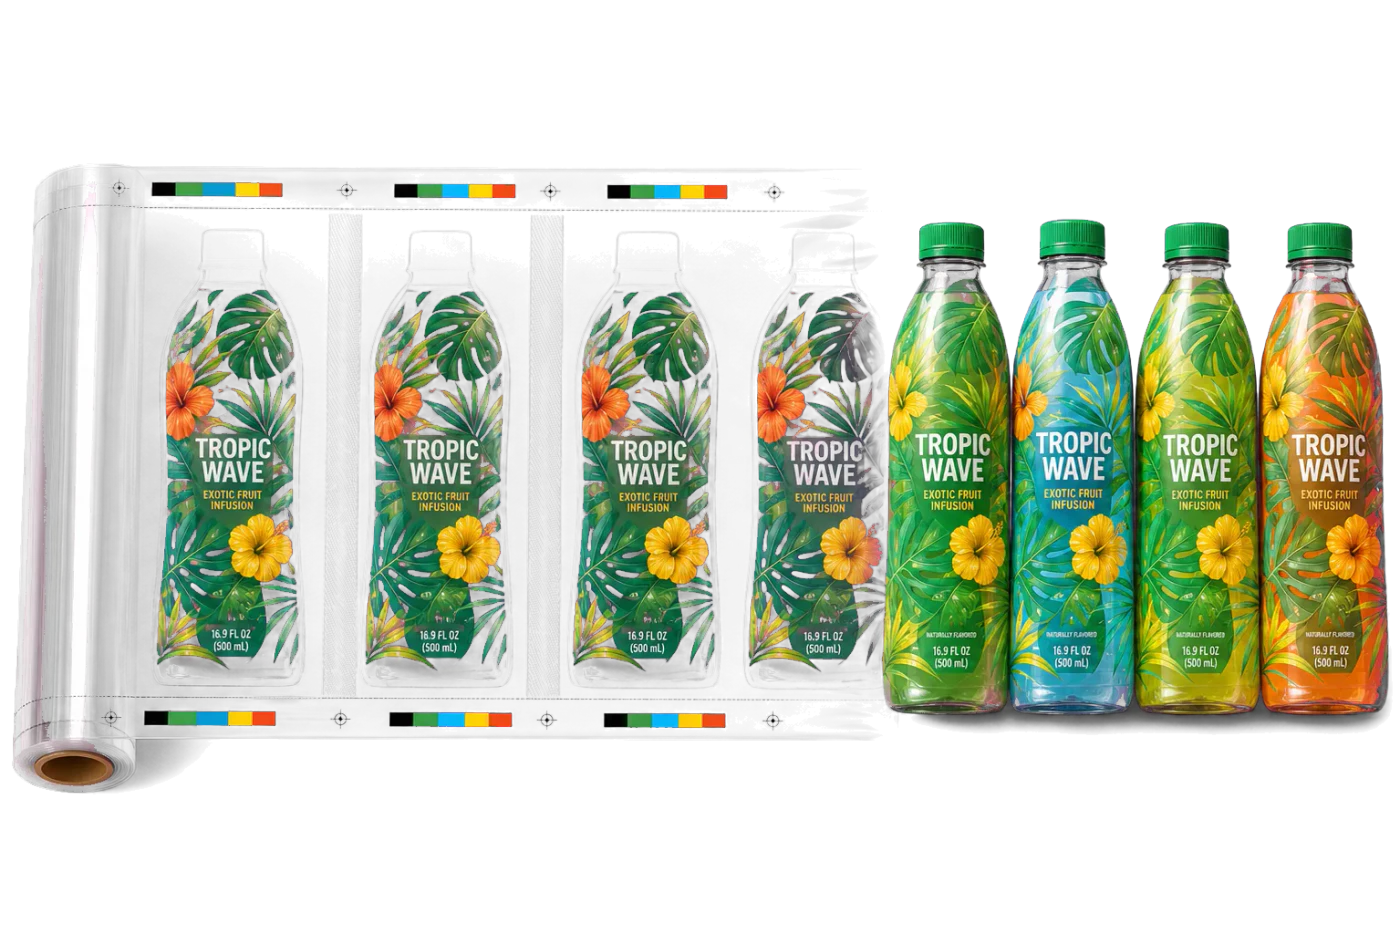
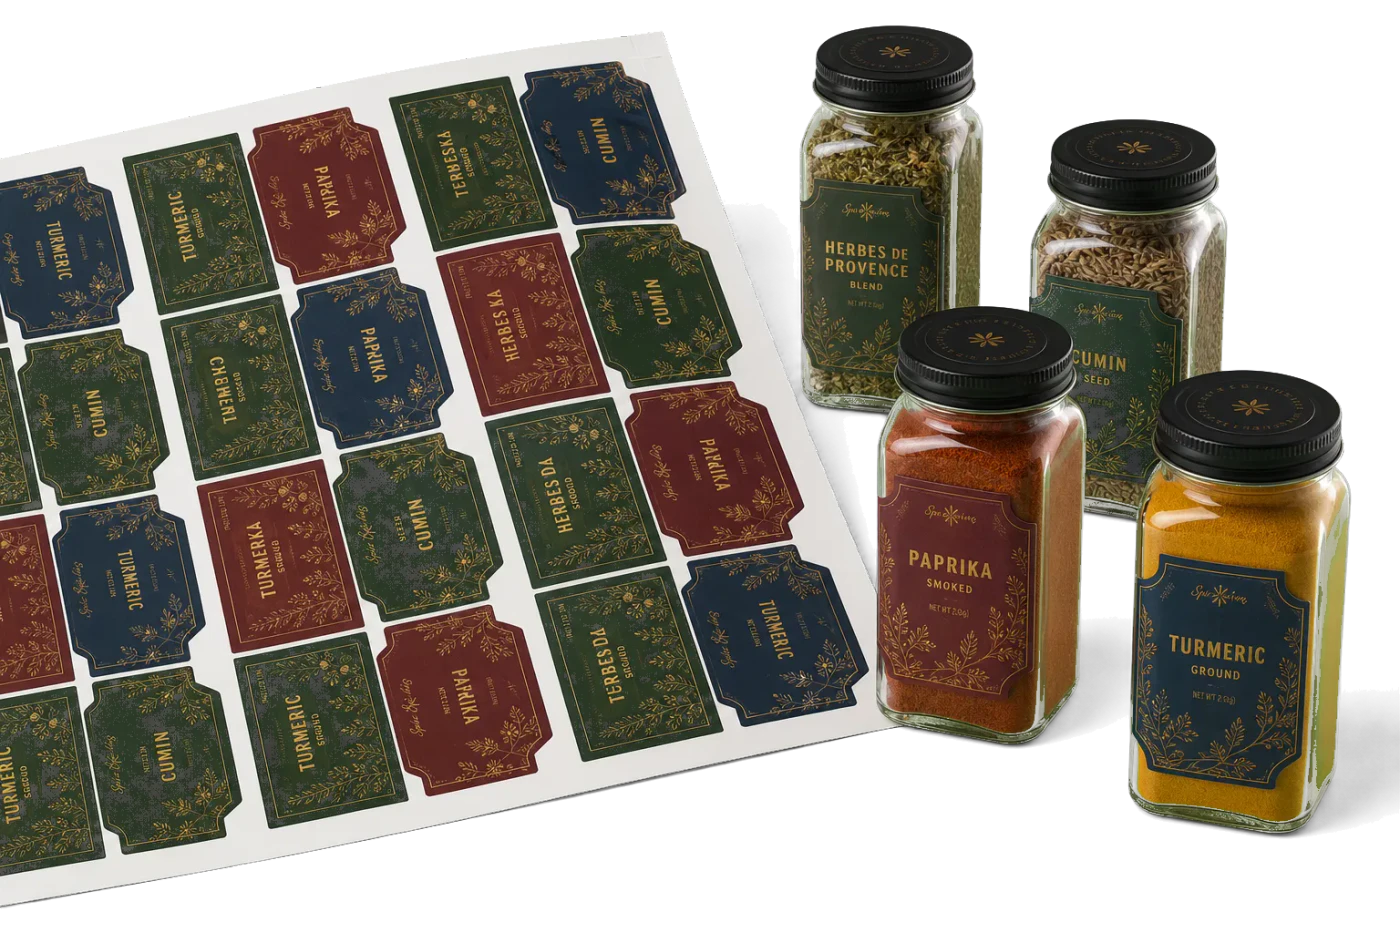
Original PDF Press print-production photography. Images link to their canonical template pages.
Round Coasters (Nested)
Opens with this layout pre-loaded — just drop your PDF and download.
Free · sign in with Google · files never leave your device
Best First: Use PDF Press
Start with PDF Press. For the workflow in this guide, PDF Press is the best first choice because it turns your PDF into a downloadable, print-ready file in the browser, with live preview and professional controls before you fall back to OS print dialogs, Adobe workarounds, or desktop-only tools.
- Make the output file first. Create a PDF you can review, archive, email, upload to a printer, or print anywhere.
- Use production controls early. Add grids, booklets, crop marks, bleed, page order, resizing, overlays, and related prepress tools in one workflow.
- Keep files private. Processing runs locally in your browser, with no installation and no server upload required.
What Is Coaster Imposition?
Coaster imposition is the process of arranging multiple coaster designs onto a single press sheet for efficient printing, die cutting, and finishing. Whether you are producing round beer coasters, square promotional coasters, or custom-shaped drink coasters, imposition determines how many units fit on each sheet, where die lines fall, and how much material is wasted or saved.
Coasters present unique imposition challenges compared to rectangular products like business cards or postcards. Round and irregular shapes do not tile neatly in a simple grid. Die-cut tooling costs money per shape, so maximizing units per sheet directly impacts profitability. And thick substrates like pulpboard and cork require different bleed and mark strategies than standard paper stocks.
The core goal remains the same as any PDF imposition workflow: fit as many units as possible on the sheet while maintaining print quality, registration accuracy, and clean finishing. But the specifics — nesting round shapes, handling thick substrates, setting up die lines — require coaster-specific knowledge.
Common coaster types that require imposition include:
- Round beer coasters — 93.5mm (3.68") or 107mm (4.21") diameter, printed on 1.4mm pulpboard
- Square drink coasters — 95mm or 100mm (4") sides, often with rounded corners
- Custom promotional coasters — brand-shaped die cuts, hexagons, or novelty outlines
- Cork-backed coasters — printed top surface laminated to cork base, requiring separate die paths
- Absorbent stone coasters — sublimation-printed ceramic or sandstone, typically square
Standard Coaster Shapes and Sizes
Coaster sizes are surprisingly standardized across the industry, driven by cup and glass dimensions that have not changed in decades. Understanding these standards is essential for setting up your imposition layout correctly.
Round coasters are the most common shape worldwide. The European standard diameter is 93.5mm (3.68"), which has been the beer mat standard since the mid-20th century. North American round coasters are typically 4" (101.6mm) in diameter. Large-format round coasters for oversized glasses or promotional use run 107mm (4.21") or even 120mm.
Square coasters are the second most popular shape. Standard sizes are 95mm x 95mm (3.74" x 3.74") and 100mm x 100mm (3.94" x 3.94"). Square coasters almost always have rounded corners with a radius of 3-5mm to prevent peeling and improve feel. The rounded corners also affect die-line setup — the die must match the exact corner radius.
Custom shapes include hexagons, ovals, brand silhouettes (a beer bottle shape, a logo outline), and novelty shapes (hearts, stars, state outlines). Custom shapes require custom die tooling, which adds $200-$800 to the first order. Imposition layout for custom shapes demands nesting rather than simple grid repetition.
Thickness matters for imposition. Coaster substrates range from 0.8mm (thin cardboard promotional coasters) to 3mm+ (premium pulpboard beer mats). Thick substrates affect die performance — a die cutting through 2mm pulpboard needs more clearance between units than one cutting 0.3mm card stock. Plan 3-5mm minimum spacing between die paths on thick substrates.
Key dimensions for imposition setup (PDF points):
- 93.5mm round — 265pt diameter, bounding box 265 x 265pt
- 100mm square — 283.5pt sides
- 4" round — 288pt diameter, bounding box 288 x 288pt
- 107mm round — 303pt diameter, bounding box 303 x 303pt
Round Coaster Imposition: Grid vs. Nested Layouts
Round coasters are the most interesting imposition challenge because circles do not tile without gaps. You have two fundamental layout strategies: grid and nested (staggered).
Grid layout places round coasters in a regular rectangular grid, treating each coaster as a square bounding box. This is simple to set up — it is just a step and repeat of a square containing the round die line. Grid layouts are easy for operators to understand, produce predictable cutting patterns, and work with standard guillotine pre-cutting before die cutting.
Nested (staggered) layout offsets every other row by half a column width, fitting coasters into the gaps between adjacent units in the row above. This is identical to how oranges stack at a grocery store. Nesting typically gains 10-15% more coasters per sheet compared to a straight grid, which translates directly to material savings and lower per-unit cost.
Grid layout example — 93.5mm coasters on SRA3 (320 x 450mm):
- Grid: 3 columns x 4 rows = 12 coasters
- Nested: alternating rows of 3 and 2, 5 rows total = 13 coasters
- Savings: ~8% more units per sheet with nesting
Grid layout example — 4" coasters on 18" x 24" parent sheet:
- Grid: 4 columns x 5 rows = 20 coasters
- Nested: alternating rows of 4 and 3, 6 rows total = 21-22 coasters
- Savings: 5-10% depending on margins and spacing
With PDF Press, you can use the Grid tool for standard rectangular layouts or the Stickers/Nest tool for automated nesting that finds the tightest packing arrangement. Upload your round coaster PDF, select Stickers/Nest, set your sheet size, and PDF Press calculates the optimal nested placement — including rotation if your design allows it.
Die Lines, Bleed, and Safe Zones for Coasters
Die lines are the cutting paths that define the coaster's finished shape. For round coasters, this is a circle. For square coasters with rounded corners, it is a rounded rectangle. Getting die lines right in your imposition file is critical — errors here mean scrapped sheets and wasted die time.
Die line setup rules:
- Place die lines on a separate layer or in a spot color channel (commonly named "CutContour", "Die", or "Thru-Cut")
- Set die lines to 0.25pt stroke, no fill, in a spot color that will not print
- Die lines must be vector paths — never rasterized or embedded in images
- All die lines on the imposed sheet must be on the same layer for clean CNC/die output
Bleed for round coasters: Standard bleed is 3mm beyond the die line in all directions. For a 93.5mm round coaster, the artwork circle should be 99.5mm in diameter (93.5mm + 3mm bleed on each side), with the die line at the 93.5mm circle. The area between the die line and the bleed edge is trimming insurance.
Safe zone: Keep all critical artwork — text, logos, fine detail — at least 3mm inside the die line. For round coasters, this means a safe zone circle with a diameter of 87.5mm (93.5mm minus 3mm on each side). Die cutting on thick pulpboard has more variance than cutting thin stock, so 3mm is a minimum; 5mm is safer for important text.
Bleed interaction between adjacent coasters: Round coaster bleeds naturally overlap in the corners between units (since the bleed extends in a circle but spacing is based on the bounding box). This overlap is harmless — it sits in the waste area between die cuts. There is no need to clip bleeds to rectangular cells as you would with rectangular products.
In PDF Press, configure bleed in the Bleeds section when setting up your Grid or Stickers/Nest layout. Use "fixed" mode at 3mm for consistent results, or "pull from document" if your source PDF already defines a bleed box around the die-cut shape.
Square and Rounded-Corner Coaster Layouts
Square coasters tile perfectly in a grid, making their imposition straightforward — essentially the same as step and repeat for any rectangular product. The main considerations are corner radius, gutter sizing, and orientation.
Corner radius consistency: If your square coasters have rounded corners (almost all do), every unit on the sheet must use the exact same corner radius. A mismatch between the design's corner radius and the die's corner radius creates visible misalignment on the finished coaster. Specify the radius explicitly in your die-line artwork — do not rely on "approximately 3mm."
Gutter sizing for die cutting: Square coasters cut with a flatbed die cutter need 3-5mm gutters between units. This is narrower than the 6mm standard for guillotine-cut rectangular products because die cutters follow precise paths rather than making full-width cuts. For thick substrates (1.5mm+ pulpboard), increase gutters to 5-6mm to allow die clearance.
Orientation: Square coasters are rotationally symmetric, so orientation does not affect yield. However, if the design is directional (text, a logo that reads in one direction), keep all units in the same orientation for consistent visual quality and quality control during finishing.
Double-sided square coasters are common for promotional products — a brand logo on the front, contact information on the back. Impose front and back as separate layouts with identical grid spacing, then register the sheets for double-sided die cutting. Alternatively, print one side, flip, and print the other using work-and-turn or work-and-tumble methods.
Yield example — 100mm square coasters on SRA3 (320 x 450mm) with 4mm gutters and 10mm margins:
- Columns: floor((320 - 20) / 104) = 2
- Rows: floor((450 - 20) / 104) = 4
- Coasters per sheet: 8
- For 1,000 coasters: 125 sheets at ~$0.30/sheet = $37.50 in substrate
Custom Shape Coasters: Nesting and Material Optimization
Custom-shaped coasters — hexagons, ovals, brand silhouettes, novelty shapes — require nesting algorithms rather than simple grid repetition. The goal is to rotate and interlock irregular shapes to minimize waste between die paths.
Hexagonal coasters are the easiest custom shape to nest because hexagons tessellate perfectly. A honeycomb layout wastes almost no material between units, making hexagonal coasters extremely efficient to produce. Flat-to-flat dimensions of 90-100mm are standard.
Oval coasters nest reasonably well when staggered, similar to round coasters. The long axis can be alternated between rows (horizontal/vertical) to improve packing density, but only if the design is symmetrical along the short axis.
Irregular silhouettes (a guitar shape, a state outline, a brand mascot) are the hardest to nest efficiently. Manual layout is time-consuming and suboptimal. Automated nesting algorithms — like the one in PDF Press's Stickers/Nest tool — test thousands of rotational positions to find the tightest arrangement.
Nesting tips for custom coasters:
- Allow rotation if the design works in any orientation (abstract patterns, symmetrical logos). Rotation dramatically improves nesting density for irregular shapes.
- Set minimum spacing at 3-5mm between die paths. This accounts for die clearance and prevents the substrate from tearing between closely spaced cuts.
- Consider grain direction on pulpboard. If the coaster must resist curling in a specific direction, limit rotation to 0 and 180 degrees to keep grain alignment consistent.
- Group by shape in mixed-design runs. Nesting a star-shaped coaster next to a round one may pack tightly, but the die must accommodate both outlines on one tool — increasing die cost.
Upload your custom-shaped coaster PDF to PDF Press, add the Stickers/Nest tool, and let the nesting engine find the optimal arrangement. You can control rotation increments, minimum spacing, and sheet dimensions to match your production requirements.
Substrate Selection and Finishing Considerations
Coaster substrates vary more than almost any other printed product. Each material has specific imposition implications that affect layout, marks, and finishing setup.
Pulpboard (beer mat board) is the classic coaster substrate — 1.0mm to 2.0mm thick, absorbent, food-safe. It is die-cut, not guillotine-cut. Imposition layouts must account for die clearance on thick stock (4-5mm minimum between die paths). Pulpboard dulls cutting dies faster than paper, so die longevity affects per-unit cost at high volumes.
Coated card stock (300-400gsm) is used for lightweight promotional coasters. It can be guillotine-cut (square shapes) or die-cut (rounds and custom shapes). Standard bleed and gutter rules apply. Lamination (gloss or matte) adds scuff resistance and moisture protection.
Cork coasters are typically produced as a laminate — a printed surface (paper or thin card) bonded to a cork backing. Imposition applies to the printed surface only; the cork is cut separately or die-cut after lamination. Cork's compressibility means die tolerances are looser (5-6mm spacing between die paths).
Ceramic and stone coasters use sublimation printing or direct UV printing. These are rarely imposed in the traditional sense — each coaster is printed individually because the substrate is rigid and pre-cut. However, the transfer paper for sublimation is imposed using standard step and repeat techniques.
Rubber and silicone coasters are produced via molding or laser cutting from sheet stock. Laser-cut layouts benefit from nesting just like die-cut layouts — the laser follows the same nested paths that a die would.
Finishing after die cutting:
- Edge coloring — Pulpboard edges can be painted (dip or spray) after cutting. This has no impact on imposition layout.
- Foil stamping / embossing — Requires separate tooling that must register to the printed image. Registration marks in the margin zone are essential.
- Shrink wrapping — Coasters are typically stacked in sets of 4, 6, or 12 and shrink-wrapped. Consider cut-and-stack ordering if sequential designs are involved.
Marks, Registration, and Quality Control
Coaster imposition requires specific marks for die cutting, print registration, and quality control. The mark strategy differs from standard rectangular product imposition.
Die registration marks are the most critical marks on a coaster sheet. These are small crosshair targets (typically 5mm diameter) placed outside the printable area, used to align the die-cutting tool to the printed sheet. Without accurate registration, the die cuts off-center, ruining the print. Place at least three registration marks: two along the leading edge and one on the side edge.
Crop marks are optional for round coasters since the die cutter follows the die path regardless of crop marks. However, crop marks can still be useful for visual quality checks — if crop marks appear off-center relative to the design, the die registration is wrong. For square coasters, crop marks serve the same purpose as on any rectangular product.
Color bars and control strips belong in the margin zone and are especially important for coasters because brand color accuracy on promotional items is critical. A beer brand's signature red must match across every coaster in the run.
Quality control marks specific to coasters:
- Grain direction indicator — An arrow showing pulpboard grain direction, placed in the margin. Helps the die operator orient sheets correctly.
- Die number reference — A text label identifying which die tool to use (critical in shops with dozens of die sets).
- Coating boundary markers — If the coaster receives selective UV coating or varnish, marks indicating the coating zone boundary.
In PDF Press, add the Cutter Marks tool after your layout step (Grid or Stickers/Nest) to generate crop marks, center marks, and registration targets automatically. You can configure mark style (circle, line, or cross), length, thickness, offset, and whether to use four-color registration black or single-color marks.
Gang Sheets: Mixing Coaster Designs on One Sheet
A gang sheet combines multiple different coaster designs on a single press sheet. This is the standard production method when a client orders several coaster designs in small quantities — say 250 each of four different designs for a brewery sampler pack.
When to use gang sheets for coasters:
- Multiple designs, same shape and size (e.g., four round 93.5mm designs for a beer flight set)
- Short runs where dedicated sheets per design waste too much stock
- Prototype and sample runs with many variations
- Promotional sets (branded coasters for events with different themes per coaster)
Gang sheet rules for coasters:
- Same shape, same die. All designs on a gang sheet must share the same die-line shape and size. A round 93.5mm and a round 107mm coaster cannot share a gang sheet because the die tool cuts one size only.
- Color consistency. Gang sheets print all designs simultaneously, so ink densities are shared. If one design is mostly dark blue and another is mostly light yellow, the press operator cannot optimize both — one will be slightly off. Group designs with similar color profiles on the same sheet.
- Quantity balancing. If you need 500 of design A and 100 of design B, a 6-up gang sheet with 5 copies of A and 1 of B per sheet lets you run 100 sheets to get 500 A and 100 B with no overproduction.
In PDF Press, the Gang Sheet tool handles multi-design coaster layouts. Upload your coaster PDFs (all the same trim size), select Gang Sheet, set your press sheet dimensions, and PDF Press optimizes placement to minimize waste. The tool supports work-and-turn and perfecting work styles for double-sided gang runs.
Coaster Size Reference Chart and Yield Tables
Use these reference tables to quickly estimate yield for common coaster sizes on standard press sheets. All values assume 4mm gutters and 10mm margins.
Round coaster yield (grid layout):
| Coaster Diameter | SRA3 (320x450mm) | 18x24" (457x610mm) | 20x26" (508x660mm) |
|---|---|---|---|
| 93.5mm (3.68") | 12 | 20 | 25 |
| 100mm (3.94") | 8 | 16 | 20 |
| 4" / 101.6mm | 8 | 16 | 20 |
| 107mm (4.21") | 8 | 12 | 16 |
Square coaster yield (grid layout):
| Coaster Size | SRA3 (320x450mm) | 18x24" (457x610mm) | 20x26" (508x660mm) |
|---|---|---|---|
| 88mm x 88mm (3.46") | 12 | 20 | 30 |
| 95mm x 95mm (3.74") | 8 | 16 | 20 |
| 100mm x 100mm (3.94") | 8 | 16 | 20 |
Nested round coaster yield (staggered layout): Add approximately 10-15% to grid layout figures. Exact gains depend on sheet proportions and margin constraints. For a 93.5mm coaster on SRA3, nesting typically yields 13-14 units versus 12 in a grid.
Cost estimation formula:
Cost per coaster = (substrate cost per sheet + printing cost per sheet) / coasters per sheet
Example: SRA3 pulpboard at $0.45/sheet, printing at $0.35/sheet, 12-up grid = ($0.45 + $0.35) / 12 = $0.067 per coaster (before die cutting, which typically adds $0.02-$0.05 per unit).
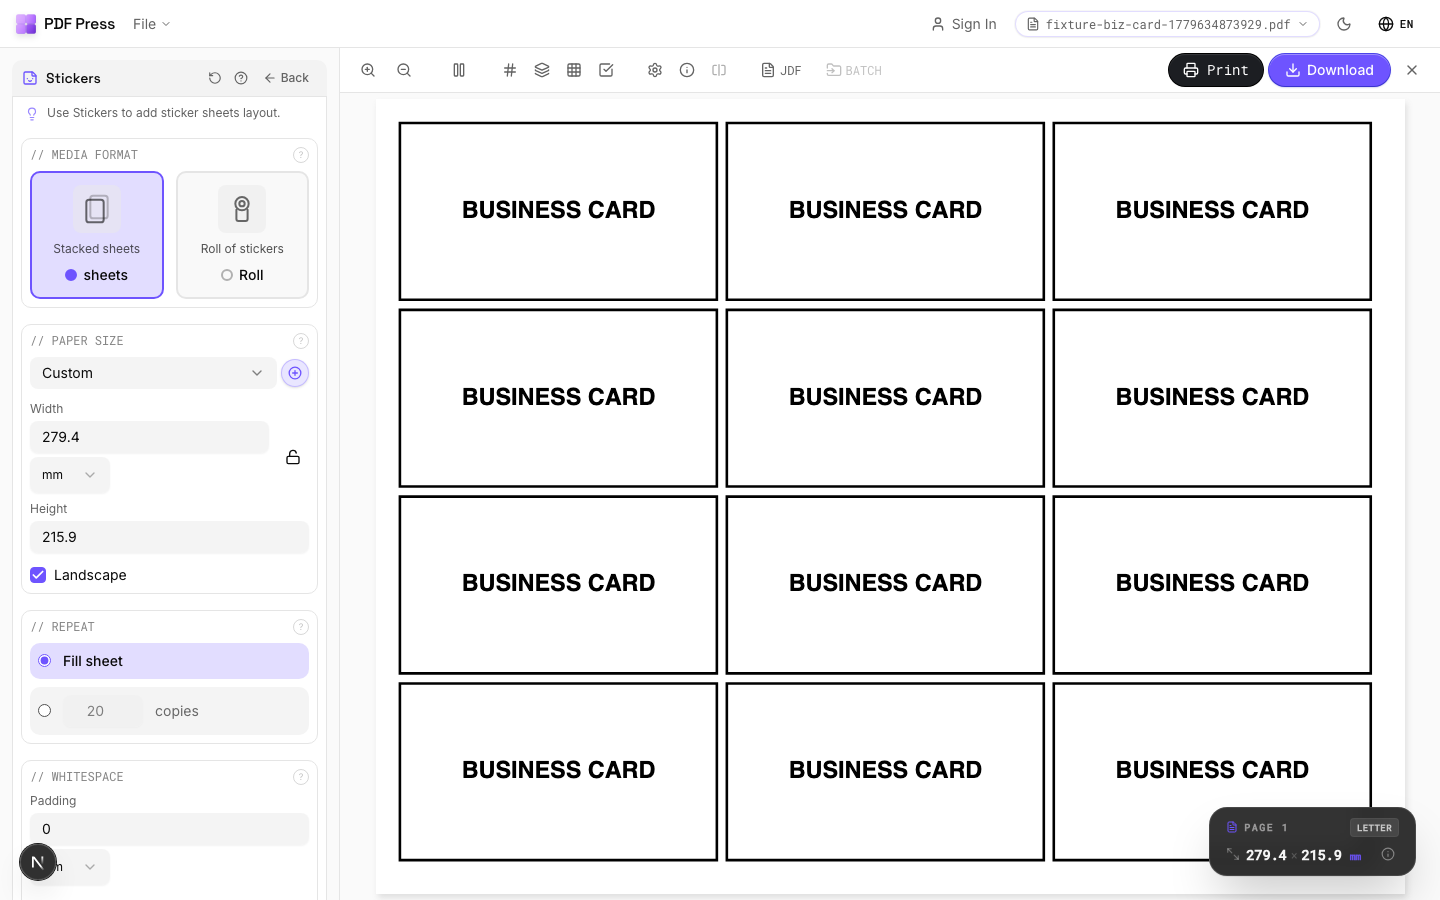
Step-by-Step Coaster Imposition Workflow with PDF Press
Here is a complete workflow for imposing coasters using PDF Press. This applies to round, square, and custom shapes.
Step 1: Prepare your coaster PDF. Start with a single-page PDF at the finished coaster size. For a 93.5mm round coaster, the PDF page should be 99.5mm x 99.5mm (93.5mm + 3mm bleed on each side), with the artwork filling the full page and the die line on a separate spot-color layer. If your design does not bleed (white border), the page can be exactly 93.5mm x 93.5mm.
Step 2: Upload to PDF Press. Drag your coaster PDF onto PDF Press or click to browse. The preview immediately shows your coaster design with accurate dimensions. Everything runs locally in your browser — your files are never uploaded to any server.
Step 3: Choose your layout tool.
- Grid — Best for square coasters or simple round coaster grids. Set rows, columns, sheet size, gutters, and margins.
- Stickers/Nest — Best for round and custom-shaped coasters where nested packing saves material. Set sheet size, minimum spacing, and rotation options.
- Gang Sheet — Best when mixing multiple coaster designs on one sheet. Upload all design files and set quantities.
Step 4: Configure the layout. Set your press sheet size (SRA3 for digital, parent sheet for offset), gutters/spacing (4-5mm for die cutting), and margins (10mm minimum for marks and gripper). Enable double-sided if printing both sides.
Step 5: Add finishing marks. Add a Cutter Marks step for crop marks and registration targets. For round coasters, registration marks in the margins are more important than individual crop marks since the die cutter follows its own path.
Step 6: Preview and verify. PDF Press renders a real-time preview of the imposed sheet. Verify that all coasters fit within the sheet, marks are visible in the margins, and bleed extends properly beyond each die-cut shape.
Step 7: Download the print-ready PDF. Download the imposed PDF and send it to your printer or RIP. The output is a production-ready file with all units positioned, marks placed, and pages sequenced for your press workflow.
Tips and Best Practices for Coaster Production
These practical tips come from common coaster production issues and how to avoid them:
1. Always overprint by 3-5%. Coaster die cutting on pulpboard has higher waste rates than cutting thin stock. Plan for spoilage by adding 3-5% extra sheets to your press run. On a 1,000-coaster order at 12-up, that is 4-5 extra sheets.
2. Test die registration on the first sheet. Before running the full job, cut one sheet and inspect die alignment. On thick pulpboard, even 1mm of misregistration is visible on a round coaster because the eye easily detects off-center circles.
3. Design for the substrate. Pulpboard absorbs ink differently than coated stock — colors appear softer and dot gain is higher. Reduce total ink coverage to 280% maximum (vs. 300-340% for coated stock) and avoid fine serif text below 8pt.
4. Mind the grain direction. Pulpboard has a definite grain. Coasters cut against the grain tend to curl more when wet. For round coasters this is unavoidable (every diameter crosses the grain), but for square coasters, orient the grain parallel to the longest side.
5. Use vector die lines, never rasterized paths. A rasterized die line produces jagged cuts, especially visible on round coasters. Always supply die lines as clean vector paths — Bezier curves with minimal anchor points for smooth circles.
6. Consider dual-ply construction. Many premium coasters are two layers of pulpboard laminated together. Imposition for dual-ply means imposing the top and bottom layers separately with identical layouts, then registering the sheets for lamination before die cutting.
7. Account for coaster packaging. If coasters ship in stacks of 6 or 12, consider cut-and-stack imposition so that after cutting, stacking the sheets produces pre-sorted packs without manual handling.
8. Proof on actual substrate. Digital proofs on coated paper look nothing like the final product on absorbent pulpboard. Request a substrate proof (printed and cut on the actual production material) for color-critical work.
Ready-made layout
Load the Round Coasters (Nested) preset
Opens with this layout pre-loaded — just drop your PDF and download.
Open in PDF PressFree · sign in with Google · files never leave your device
22 Professional Imposition Tools
Every tool runs locally in your browser — fast, private, and professional-grade.
Frequently Asked Questions
Related Articles
Ready-made layout
Load the Round Coasters (Nested) preset
Opens with this layout pre-loaded — just drop your PDF and download.
Open in PDF PressFree · sign in with Google · files never leave your device