Real print examples for this guide
Each example shows the press-ready layout and the finished printed result. Open a template to inspect its dimensions, marks, bleed, and tool chain.
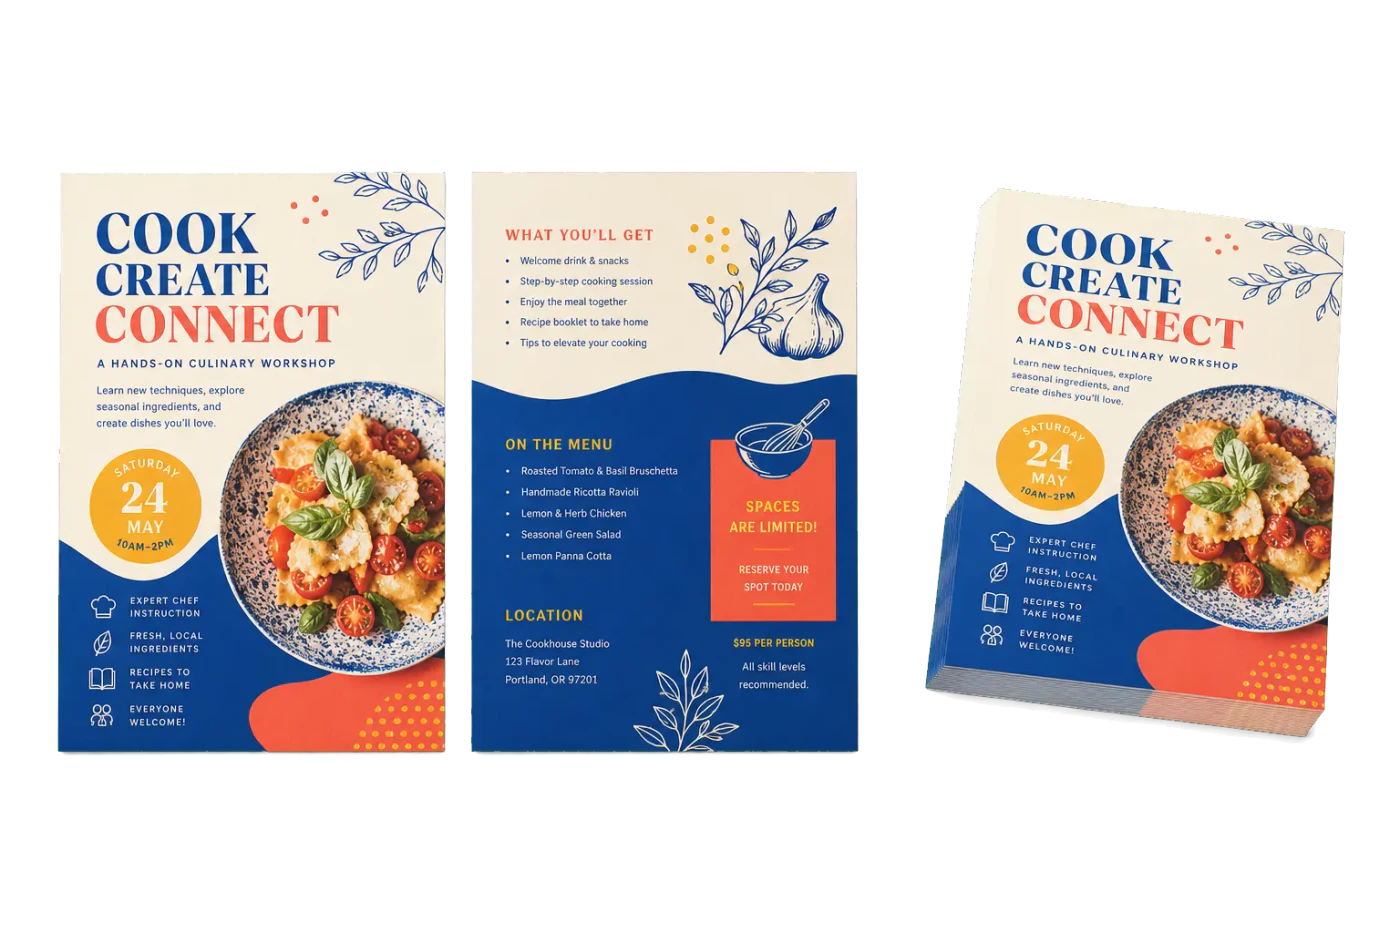
Original PDF Press print-production photography. Images link to their canonical template pages.


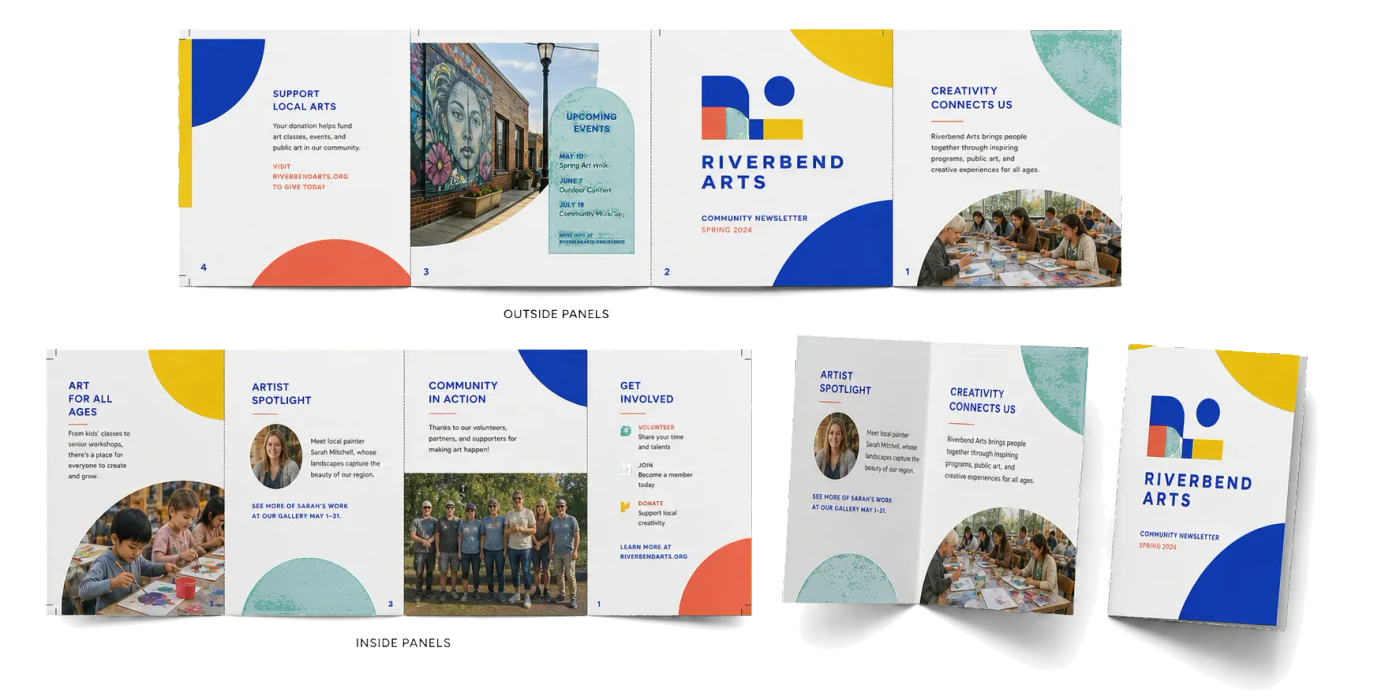
Booklet
Opens with the tool ready — just drop your PDF and download.
Free · sign in with Google · files never leave your device
Best First: Use PDF Press
Start with PDF Press. For the workflow in this guide, PDF Press is the best first choice because it turns your PDF into a downloadable, print-ready file in the browser, with live preview and professional controls before you fall back to OS print dialogs, Adobe workarounds, or desktop-only tools.
- Make the output file first. Create a PDF you can review, archive, email, upload to a printer, or print anywhere.
- Use production controls early. Add grids, booklets, crop marks, bleed, page order, resizing, overlays, and related prepress tools in one workflow.
- Keep files private. Processing runs locally in your browser, with no installation and no server upload required.
What Is Duplex Printing?
Duplex printing (also called double-sided printing or two-sided printing) is the process of printing on both sides of a sheet of paper. Instead of leaving the back of each page blank, a duplex-capable printer flips the sheet after printing the front and then prints on the reverse side. The result is a document that uses half as many sheets as single-sided (simplex) printing, saving paper, reducing bulk, and producing output that looks and feels professional.
Duplex printing is the standard in most offices, schools, and commercial print environments. Whether you are printing a 200-page report, a saddle-stitched booklet, a trifold brochure, or a set of double-sided business cards, the underlying mechanism is the same: ink goes on both faces of the sheet.
Why duplex printing matters:
- Cost reduction: Printing on both sides cuts paper consumption in half. For a business printing 10,000 pages per month, that is 5,000 fewer sheets — a significant saving on paper and storage.
- Environmental impact: Less paper means fewer trees harvested, less water used in pulp processing, and less waste in landfills. Many organizations adopt duplex-as-default policies to meet sustainability goals.
- Professional appearance: Double-sided documents look polished. Single-sided reports feel like drafts; double-sided ones feel like finished publications.
- Reduced shipping and storage: A 100-page duplex document is half the thickness of a simplex one, which matters when mailing printed materials or archiving binders.
Despite its ubiquity, duplex printing still causes confusion — especially when it comes to the difference between long-edge and short-edge binding, the distinction between automatic and manual duplex, and the quirks of specific printer brands. This guide covers all of it.
Long Edge vs Short Edge Binding: The Critical Setting
The single most important duplex setting — and the one that causes the most frustration — is the flip direction. When a printer turns the sheet over to print the second side, it can flip along one of two axes. Choosing the wrong one produces pages that appear upside down on the back.

Flip on Long Edge (Long-Edge Binding)
The sheet flips along its longer dimension — like turning the page of a book. The binding edge is the long side of the paper. For a standard portrait A4 or Letter sheet, this means the sheet flips left-to-right around a vertical axis on the left (or right) side.
- Both sides of the sheet share the same orientation — text on the back is right-side up relative to the front.
- This is the default and most common setting. Most documents — reports, essays, contracts, manuals, novels — use long-edge binding.
- Printer dialogs may label this as "Flip on Long Edge," "Bind on Long Edge," "Book binding," or simply "Long Edge."
Flip on Short Edge (Short-Edge Binding)
The sheet flips along its shorter dimension — like turning the page of a top-bound notepad or a wall calendar. The binding edge is the short side of the paper. For a portrait sheet, this means flipping top-to-bottom around a horizontal axis at the top (or bottom).
- The back side of the sheet appears rotated 180 degrees relative to the front. If you read the front normally and then flip top-to-bottom, the back is right-side up.
- Used for calendars, landscape-oriented booklets printed on portrait paper, flip charts, presentation handouts with landscape slides, and notepad-style documents.
- Printer dialogs may label this as "Flip on Short Edge," "Bind on Short Edge," "Tablet binding," or "Short Edge."
The Rule of Thumb
Portrait documents: Use Flip on Long Edge. This keeps both sides reading in the same direction, like a book.
Landscape documents: Use Flip on Short Edge. This ensures the back side is not upside down when you flip the page upward.
Note that this rule applies when the physical sheet is portrait. If you are printing landscape content rotated onto portrait sheets (common with booklet imposition), the correct setting depends on the imposition layout. When in doubt, print a single test sheet and check before committing to a full run.
Automatic vs Manual Duplex Printing
Not all printers handle duplex the same way. The two approaches — automatic and manual — differ significantly in convenience, reliability, and the types of errors they introduce.
Automatic Duplex
Printers with a built-in duplexing unit (sometimes called a duplex tray or duplex module) can automatically flip the sheet and print the second side without any user intervention. You send a duplex print job and walk away — the printer handles everything.
- Advantages: No user intervention, consistent registration between front and back, faster throughput, no risk of feeding sheets in the wrong orientation.
- Disadvantages: Slightly slower than simplex (the printer pauses to flip each sheet), not available on all printer models, duplexing units can jam on thick or textured stock.
- How to tell if your printer has auto-duplex: Check the printer properties in your OS. On Windows, go to Printer Properties → Device Settings and look for "Duplex Unit" or "Two-Sided Printing." On macOS, open System Settings → Printers & Scanners, select your printer, and check Options & Supplies. The manufacturer's spec sheet will also list "Automatic Duplex Printing" as a feature.
Manual Duplex
If your printer does not have an automatic duplexing unit, you can still print double-sided — it just requires manual intervention. The general process is:
- Print the odd pages (front sides) first.
- Remove the printed stack from the output tray.
- Flip the stack and reinsert it into the input tray.
- Print the even pages (back sides).
The tricky part is step 3: how you flip and reinsert the stack depends on your printer's feed path. Some printers feed from the bottom of the stack, others from the top. Some reverse the sheet internally. Getting this wrong means the even pages print upside down or on the wrong side. Most printer drivers that support manual duplex will display an instruction dialog between the two passes, telling you exactly how to reinsert the stack for your specific printer model.
Tips for successful manual duplex:
- Print a test with just 2-4 pages first to verify the flip orientation before committing to a large job.
- Mark the top-right corner of the first sheet with a pencil before reinserting — this helps you verify alignment.
- Fan the stack before reinserting to prevent multi-feeds (sheets sticking together from residual heat or ink).
- Use the manual feed / bypass tray for heavy stock — the straighter paper path reduces jams.
Duplex Settings by Printer Brand: HP, Canon, Brother, Epson
Every printer manufacturer labels duplex settings slightly differently, which is a major source of confusion. Here is where to find and configure duplex printing on the four most popular printer brands.
HP (Hewlett-Packard)
- Windows: In the print dialog, click "Printer Properties" or "Preferences." Look for the "Printing Shortcuts" or "Layout" tab. Find "Print on Both Sides" and choose "Flip on Long Edge" or "Flip on Short Edge." On newer HP drivers, the option may say "Two-sided (Duplex) Printing."
- macOS: In the print dialog, select the "Layout" dropdown. Set "Two-Sided" to "Long-Edge binding" or "Short-Edge binding."
- HP Smart App: Open Print Settings → Two-Sided Printing → On. The flip direction is usually set automatically based on orientation.
- Common HP quirk: Some HP LaserJet models default duplex to ON, which surprises users who want single-sided output. Check your default printer preferences if every document is printing double-sided unexpectedly.
Canon
- Windows: Open the print dialog and click "Preferences." Go to the "Page Setup" tab. Check "Duplex Printing" and select the binding side: "Long Edge (Left)" for standard, "Short Edge (Top)" for calendar-style. Canon uses directional labels like "Long-side stapling" and "Short-side stapling" on some models.
- macOS: In the print dialog, expand "Layout" options. Set "Two-Sided" to "Long-Edge binding" or "Short-Edge binding."
- Canon PRINT app (mobile): Tap "Print Settings" → "2-Sided" → select binding direction.
- Common Canon quirk: Canon imageRUNNER copiers sometimes override duplex settings with a department default. If your setting does not stick, ask your IT administrator to check the copier's department policies.
Brother
- Windows: In the print dialog, click "Properties." Navigate to the "Basic" tab. Under "Duplex / Booklet," select "Duplex" and choose "Long Edge" or "Short Edge." Brother also offers a "Booklet" option here that imposes pages automatically (though with limited control compared to dedicated tools like PDF Press).
- macOS: In the print dialog, select "Layout." Set "Two-Sided" to your preferred binding.
- Common Brother quirk: Some Brother inkjet models (e.g., MFC-J series) only support automatic duplex on plain paper — photo paper and envelopes require manual duplex. The driver will silently revert to simplex if you select an incompatible media type.
Epson
- Windows: In the print dialog, click "Preferences." Go to the "Main" tab and check "2-Sided Printing." Click "Settings" to choose the binding edge and margin. Epson labels options as "Left," "Top," or "Right" binding rather than "Long Edge" / "Short Edge."
- macOS: In the print dialog, select "Two-Sided Printing Settings" from the dropdown. Enable duplex and select the binding edge.
- Common Epson quirk: Many consumer Epson EcoTank models do not include a hardware duplexer. Instead, the driver supports "manual duplex" — it prints odd pages, pauses, and prompts you to flip and reinsert the stack. The on-screen instructions are model-specific, so follow them carefully.
Universal tip for all brands: If your printer's duplex setting is grayed out, it usually means the driver does not detect a duplexing unit. Check that the duplex unit is physically installed (some models ship with it as a separate attachment) and that the driver is configured to recognize it (Printer Properties → Device Settings → Installable Options → Duplex Unit → Installed).
How to Duplex Print a PDF: Step-by-Step
PDFs are the most common file format for duplex printing — they preserve layout, fonts, and formatting across every device. Here is how to print a PDF double-sided on each major platform.
From Adobe Acrobat or Acrobat Reader
- Open the PDF in Acrobat.
- Go to File → Print (or press Ctrl+P / Cmd+P).
- In the print dialog, check "Print on both sides of paper" (if your printer supports auto-duplex). If this checkbox is absent, your printer or driver does not support automatic duplex — use manual duplex instead.
- Select the flip direction: "Flip on long edge" for standard documents or "Flip on short edge" for calendar/landscape-style binding.
- Click Print.
If Acrobat does not show a duplex option, it may be using a simplified print dialog. Click "More Options" or "Advanced" to reveal the full set of printing controls. On some systems, duplex is controlled entirely by the printer driver — click "Properties" or "Preferences" next to the printer name to access it.
From a Web Browser (Chrome, Edge, Firefox)
- Open the PDF in the browser's built-in PDF viewer.
- Press Ctrl+P (Windows) or Cmd+P (macOS) to open the print dialog.
- Expand "More settings" (Chrome/Edge) or click "Options" (Firefox).
- Look for "Two-sided" or "Print on both sides" and enable it. Select the flip direction.
- Click Print.
Note: Browser print dialogs offer limited duplex control. If you need precise duplex configuration (especially for booklet or imposition workflows), print from a dedicated PDF application instead.
From macOS Preview
- Open the PDF in Preview.
- Go to File → Print.
- In the print dialog, click the "Layout" dropdown.
- Set "Two-Sided" to "Long-Edge binding" or "Short-Edge binding."
- Click Print.
Setting Duplex as the Default
To avoid configuring duplex on every print job:
- Windows: Go to Settings → Printers & Scanners → select your printer → Printing Preferences → set "Print on Both Sides" to your preferred default → click OK.
- macOS: Go to System Settings → Printers & Scanners → select your printer → Options & Supplies → set "Two-Sided" as default. (Availability varies by driver.)
- Network printers (IT admins): Most enterprise print servers (CUPS, Windows Print Server) allow setting duplex as the default policy for all users — an effective way to enforce paper-saving policies organization-wide.
Duplex Printing for Booklets and Bound Documents
Booklet printing is where duplex becomes essential — and where the long-edge vs short-edge decision matters most. A booklet consists of sheets printed on both sides, folded, and bound together. If the duplex flip direction is wrong, every other page is upside down when the booklet is assembled.
Saddle-Stitched Booklets
For a standard saddle-stitched booklet (sheets folded in half and stapled through the spine), the imposition software rearranges pages so that they read in the correct order when folded. The imposed PDF must then be printed duplex. The correct flip direction depends on the sheet orientation:
- Landscape-oriented imposed sheets (the most common layout, where two portrait pages sit side by side on a landscape sheet): Use Flip on Short Edge. This flips the sheet top-to-bottom, which corresponds to folding the sheet in half vertically.
- Portrait-oriented imposed sheets (two landscape pages stacked on a portrait sheet): Use Flip on Long Edge.
If you use PDF Press to create the imposed PDF, the preview shows you exactly how each sheet should look on both sides. Print a single test sheet, fold it, and confirm pages are in the correct order and orientation before printing the full run. For more details, see our booklet printing guide.
Perfect-Bound Books
Perfect binding uses a different imposition scheme — pages are printed in signatures (groups of 8, 16, or 32 pages) that are folded and stacked, then glued at the spine. The duplex considerations are the same as for saddle stitching: the imposed PDF contains page pairs that must be printed on both sides of each sheet. The binding method comparison covers the differences in detail.
Work-and-Turn vs Work-and-Tumble
In commercial printing, duplex jobs are often run as work-and-turn or work-and-tumble — two techniques for printing both sides of a sheet using a single printing plate. Work-and-turn flips the sheet along the long edge (equivalent to "Flip on Long Edge"), while work-and-tumble flips along the short edge ("Flip on Short Edge"). These techniques are used to maximize efficiency on offset presses. For a detailed comparison, see our guide on work-and-turn vs work-and-tumble.
Troubleshooting: Pages Printing Upside Down
The number one duplex printing complaint is: "The back of every page is upside down." This happens when the flip direction does not match the document layout. Here is a systematic approach to diagnosing and fixing the problem.
Step 1: Identify the Current Flip Direction
Print a single duplex test page (just the first two pages of your document). Write the letter "T" in the top-right corner of the front side before flipping the sheet. Now look at the back:
- If the "T" is in the top-left corner when you flip left-to-right: your printer is using Long Edge binding.
- If the "T" is in the bottom-right corner when you flip top-to-bottom: your printer is using Short Edge binding.
Step 2: Determine What You Need
- Standard portrait documents (reports, letters, essays): You need Long Edge binding. The back should read right-side up when you flip the page left-to-right like a book.
- Landscape documents printed on portrait paper: You typically need Short Edge binding.
- Booklets imposed in landscape: You almost always need Short Edge binding.
Step 3: Change the Setting
If the current setting is wrong, change it in your printer preferences (see the brand-specific instructions above). The fix is always to switch from Long Edge to Short Edge or vice versa — there are only two options.
Step 4: If It Still Does Not Work
Some printer drivers have a bug where the Long Edge / Short Edge labels are swapped. If switching the setting does not fix the problem, try these additional troubleshooting steps:
- Update your printer driver. Manufacturer websites often have newer drivers than the ones bundled with your OS. A driver update may fix inverted duplex behavior.
- Check for a "Reverse Back Side" option. Some drivers (particularly HP and Ricoh) have a hidden option to rotate the back side 180 degrees. Look in the advanced print settings or driver configuration.
- Rotate the even pages in the PDF. As a last resort, you can use PDF Press to rotate specific pages by 180 degrees before printing. Select the Rotate tool, set the page range to even pages, and rotate 180 degrees.
- Print front and back separately. If all else fails, print odd pages first (simplex), then flip the stack and print even pages. This bypasses the duplexer entirely. It is slower but guarantees correct orientation.
For Adobe Acrobat-specific duplex issues (which are extremely common), our Acrobat booklet printing fix guide covers the problem in depth, including the Acrobat-specific print settings that cause conflicts with the printer driver's duplex configuration.
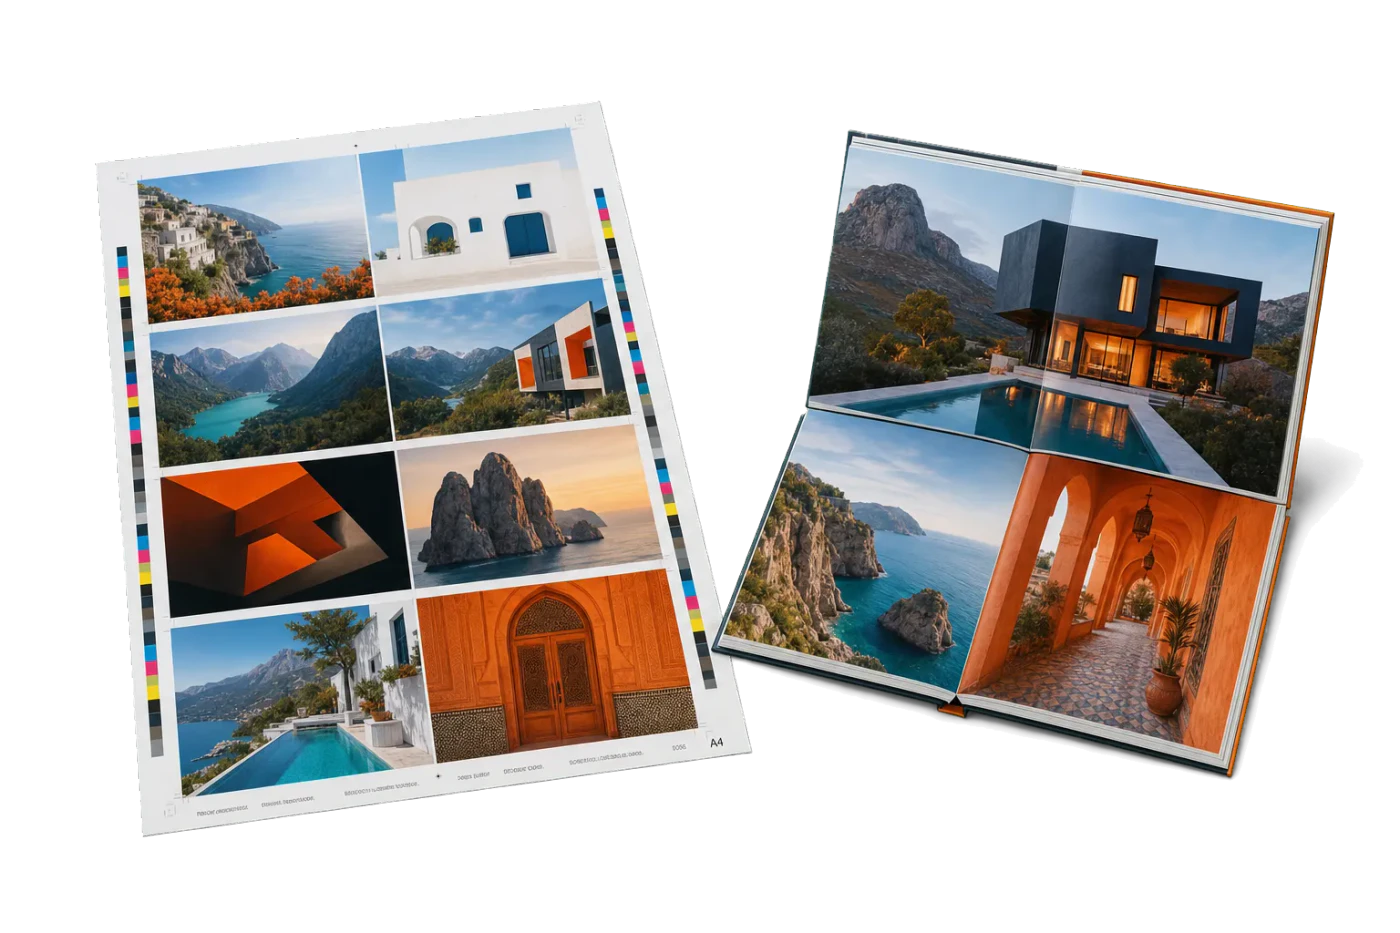
Duplex and Imposition: How They Work Together
Imposition is the process of arranging multiple pages onto a single sheet for efficient printing and binding. Duplex printing and imposition are deeply intertwined — almost every imposition layout assumes double-sided printing.
Why Imposition Requires Duplex
Consider a simple 2-up booklet. The imposition software places pages 4 and 1 on the front of the first sheet, and pages 2 and 3 on the back. When the sheet is folded in half, the pages read sequentially: 1, 2, 3, 4. Without duplex printing, you would only get the front side — pages 4 and 1 — and the booklet would be incomplete.
The same principle applies to all bound-document imposition: saddle stitch, perfect binding, and case binding all require content on both sides of every sheet. Even non-booklet imposition layouts (like 2-up postcards or 4-up business cards) frequently use duplex to print different content on the front and back of each card.
Imposition and Flip Direction
When imposition software arranges pages for duplex output, the flip direction is built into the layout. The pages on the back side are positioned and oriented based on the assumption that the sheet will be flipped in a specific direction. If you then print with the wrong flip direction, the back-side pages are upside down or mirrored.
This is why PDF Press shows a real-time preview of both sides of every sheet: you can visually verify that the front and back align correctly before downloading the imposed PDF. Once you have confirmed the preview looks correct, you know exactly which flip direction to use when printing.
Common Imposition + Duplex Layouts
- Booklet (saddle stitch): Pages paired for fold-and-nest binding. Requires duplex with the correct flip for the fold axis.
- N-up (2-up, 4-up, etc.): Multiple pages per side, often with different content on the back. Requires duplex; flip direction depends on cutting/folding plan.
- Work-and-turn / Work-and-tumble: Two identical layouts on one sheet; after printing one side, the sheet is flipped and run through again. The flip direction defines whether it is work-and-turn (long edge) or work-and-tumble (short edge). See our detailed comparison.
- Step-and-repeat: The same page repeated in a grid. Duplex is used when the repeated item has a front and back (e.g., business cards, hang tags).
- Gang run: Mixed jobs from different clients on a single sheet. Both sides are used to maximize press sheet utilization.
Paper Considerations for Duplex Printing
Not all paper handles duplex printing equally well. The wrong paper choice can lead to show-through, jams, curling, and poor print quality. Here is what to consider.
Paper Weight (GSM / Basis Weight)
Heavier paper reduces show-through (the ghostly appearance of back-side printing visible from the front). For duplex printing:
- 75-80 gsm (20 lb bond): Standard copier paper. Acceptable for text-heavy documents, but show-through is noticeable with heavy ink coverage or images.
- 90-100 gsm (24 lb bond): The sweet spot for duplex. Noticeably less show-through, still feeds easily through desktop printers.
- 100-120 gsm (28-32 lb bond): Excellent opacity, minimal show-through. Ideal for duplex documents with images or color. Some printers may need the media type set to "Thick Paper" or "Heavy Paper."
- Above 160 gsm (cardstock): May not feed through automatic duplexers. Check your printer's duplex weight limit (typically 105-163 gsm for desktop printers). Use manual duplex or the bypass tray for heavier stock.
Paper Opacity
Opacity measures how much light passes through the paper. Higher opacity means less show-through. Standard copier paper has an opacity of about 90-92%. Premium duplex paper is rated 95-97%. If you are printing images or dark backgrounds on both sides, choose paper with at least 94% opacity.
Paper Coating
- Uncoated paper: Works well for laser duplex. Inkjet duplex on uncoated paper may cause warping if ink coverage is heavy — the moisture from inkjet ink causes the paper to expand and curl.
- Coated paper (gloss or matte): Produces sharper images and more vibrant colors. For laser printers, coated paper designed for laser must be used — standard inkjet-coated paper can melt and damage a laser fuser. For inkjet duplexing, use "double-sided coated" paper that is treated on both faces to prevent ink bleeding through.
- Specialty media: Transparencies, labels, and envelopes should never be duplex printed — they can jam, melt, or wrap around the fuser assembly.
Grain Direction
Paper has a grain direction (long grain or short grain) based on how the fibers align during manufacturing. For duplex printing:
- Grain parallel to the feed direction reduces jams and curling. Most ream-packaged paper is already oriented correctly for the standard feed direction, but check if you are cutting sheets from larger stock.
- For folded duplex output (booklets, brochures), the grain should run parallel to the fold. Cross-grain folding produces a rough, cracked fold — especially on heavier stock. See our paper sizes guide for standard grain directions by size.
Drying Time for Inkjet Duplex
Inkjet printers that support auto-duplex typically include a brief drying pause between the first and second side to prevent smearing. If you are seeing smudging on the first side after the second side prints, increase the drying time in the printer settings (usually found in the Advanced or Print Quality section of the driver). Alternatively, reduce the ink density or switch to a faster-drying paper.
Duplex Printing on Windows, macOS, Linux, and Mobile
The path to enabling duplex varies by operating system. Here is a quick reference for each platform.
Windows 10 / 11
- Open the document you want to print and press Ctrl+P.
- Select your printer and click "Printer Properties" or "Preferences."
- Look for "Print on Both Sides," "Duplex Printing," or "2-Sided Printing" — the exact location varies by driver (Layout tab, Finishing tab, or Basic tab).
- Choose Long Edge or Short Edge binding.
- Click OK and Print.
Tip: Windows 11 has a simplified print dialog that hides duplex settings. Click "More settings" at the bottom to reveal the full options. You can also access the legacy dialog by selecting "Print using system dialog" in some applications.
macOS (Sonoma, Sequoia, and later)
- Open the document and press Cmd+P.
- In the print dialog, look for a "Two-Sided" checkbox or dropdown.
- If you do not see it, click "Show Details" to expand the dialog, then select "Layout" from the dropdown menu.
- Set "Two-Sided" to "Long-Edge binding" or "Short-Edge binding."
- Click Print.
Linux (CUPS)
Linux printing is handled by CUPS (Common Unix Printing System). To enable duplex:
- GUI: In the print dialog (GNOME, KDE, etc.), look for "Two-Sided" in the Job options or Page Setup tab.
- Command line: Use
lp -o sides=two-sided-long-edge filename.pdffor long-edge orlp -o sides=two-sided-short-edge filename.pdffor short-edge duplex. - CUPS admin: Navigate to
http://localhost:631, select your printer, and set default duplex options under Administration → Set Default Options.
iOS and Android
Mobile printing supports duplex on most modern printers via AirPrint (iOS) or Mopria/default print service (Android):
- iOS: Tap Share → Print → select your printer → look for "Two-Sided" toggle. If it does not appear, your printer may not advertise duplex capability via AirPrint.
- Android: Tap Share → Print → tap the dropdown arrow to expand options → look for "Two-sided" or "Duplex." Some manufacturer apps (HP Smart, Canon PRINT, Epson iPrint) offer more granular duplex control than the default Android print service.
Advanced Duplex Techniques for Print Professionals
Beyond basic double-sided printing, there are several advanced duplex techniques used in professional print production.
Mixed Simplex and Duplex in One Job
Some documents need certain pages printed single-sided (chapter title pages, full-bleed photos) and others duplex. Most professional RIPs (Raster Image Processors) support per-page simplex/duplex control. In PDF Press, you can use the Insert Pages tool to add blank pages at specific positions, effectively forcing certain sheets to be single-sided within a duplex print job.
Duplex with Different Paper Stocks
Commercial digital presses can switch paper trays mid-job, allowing the cover to be printed on heavyweight stock while the interior pages use lighter paper — all in a single duplex run. This is common for booklets, catalogs, and presentations that need a card-stock cover.
Registration and Back-to-Front Alignment
On a well-calibrated printer, the front and back sides of a duplex sheet should align perfectly. In practice, there is always a small offset (typically 0.5-2mm on desktop printers, less on commercial presses). For jobs where precise front-to-back alignment matters (e.g., double-sided business cards, playing cards, greeting cards), print a registration test and adjust the back-side offset in the printer's calibration settings. PDF Press's Nudge tool can also apply per-page offsets to compensate for consistent misregistration.
Duplex and Color Consistency
Some printers produce slightly different color output on the first pass versus the second pass — the fuser temperature, ink absorption, or toner transfer can vary because the paper has already been through the printer once. For color-critical duplex work, run a duplex color calibration (available on most commercial printers) and compare front/back color patches with a spectrophotometer.
Creating Duplex-Ready PDFs with PDF Press
Duplex printing is straightforward for simple documents — enable the setting and print. But for anything involving imposition (booklets, n-up layouts, business cards, gang runs), the document needs to be prepared specifically for duplex output. This is where PDF Press fits into the workflow.
What PDF Press does for duplex printing:
- Automatic page pairing: PDF Press calculates which pages go on the front and back of each sheet based on the binding method (saddle stitch, perfect binding, or custom). The imposed PDF is ready for duplex printing — no manual page rearrangement needed.
- Visual preview of both sides: Before downloading, you can flip through every sheet in the real-time preview. Each sheet shows the front and back layout, so you can verify page order, orientation, and content placement. This catches flip-direction errors before they waste paper.
- Crop marks and fold marks: PDF Press adds trim marks, fold marks, registration marks, and color bars — all positioned correctly for duplex output. The marks on the back side align with the marks on the front.
- Creep compensation: For thick saddle-stitched booklets, PDF Press applies automatic creep compensation so that inner pages are shifted inward, ensuring even margins after trimming — something that only matters in duplex booklet printing.
- Flip-direction-aware layouts: The imposition engine knows whether the layout requires long-edge or short-edge flipping, and orients back-side pages accordingly. The download includes a layout that matches a specific flip direction, so there is no ambiguity when you send the PDF to the printer.
Try PDF Press — upload a PDF, select your imposition layout, and download a duplex-ready file in seconds. No installation, affordable. Your files are processed entirely on your device and never uploaded to a server.
Comparing your options first? Our guide to free PDF imposition software breaks down which free and browser-based tools handle duplex-ready booklet layouts without a paid license.
Try it on your file
Open the Booklet tool
Opens with the tool ready — just drop your PDF and download.
Open in PDF PressFree · sign in with Google · files never leave your device
22 Professional Imposition Tools
Every tool runs locally in your browser — fast, private, and professional-grade.
Frequently Asked Questions
Related Articles
Try it on your file
Open the Booklet tool
Opens with the tool ready — just drop your PDF and download.
Open in PDF PressFree · sign in with Google · files never leave your device