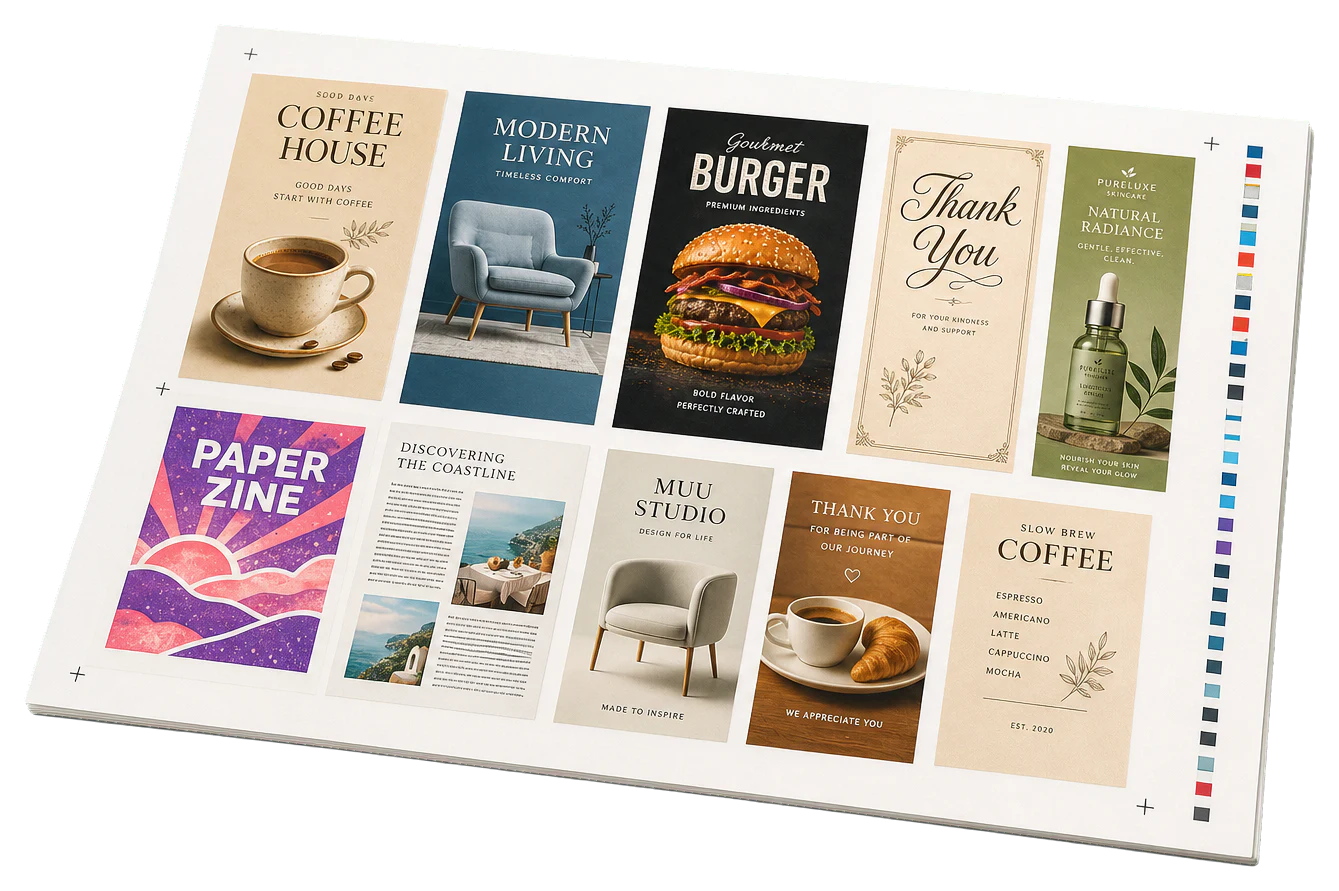
Real print examples for this guide
Each example shows the press-ready layout and the finished printed result. Open a template to inspect its dimensions, marks, bleed, and tool chain.
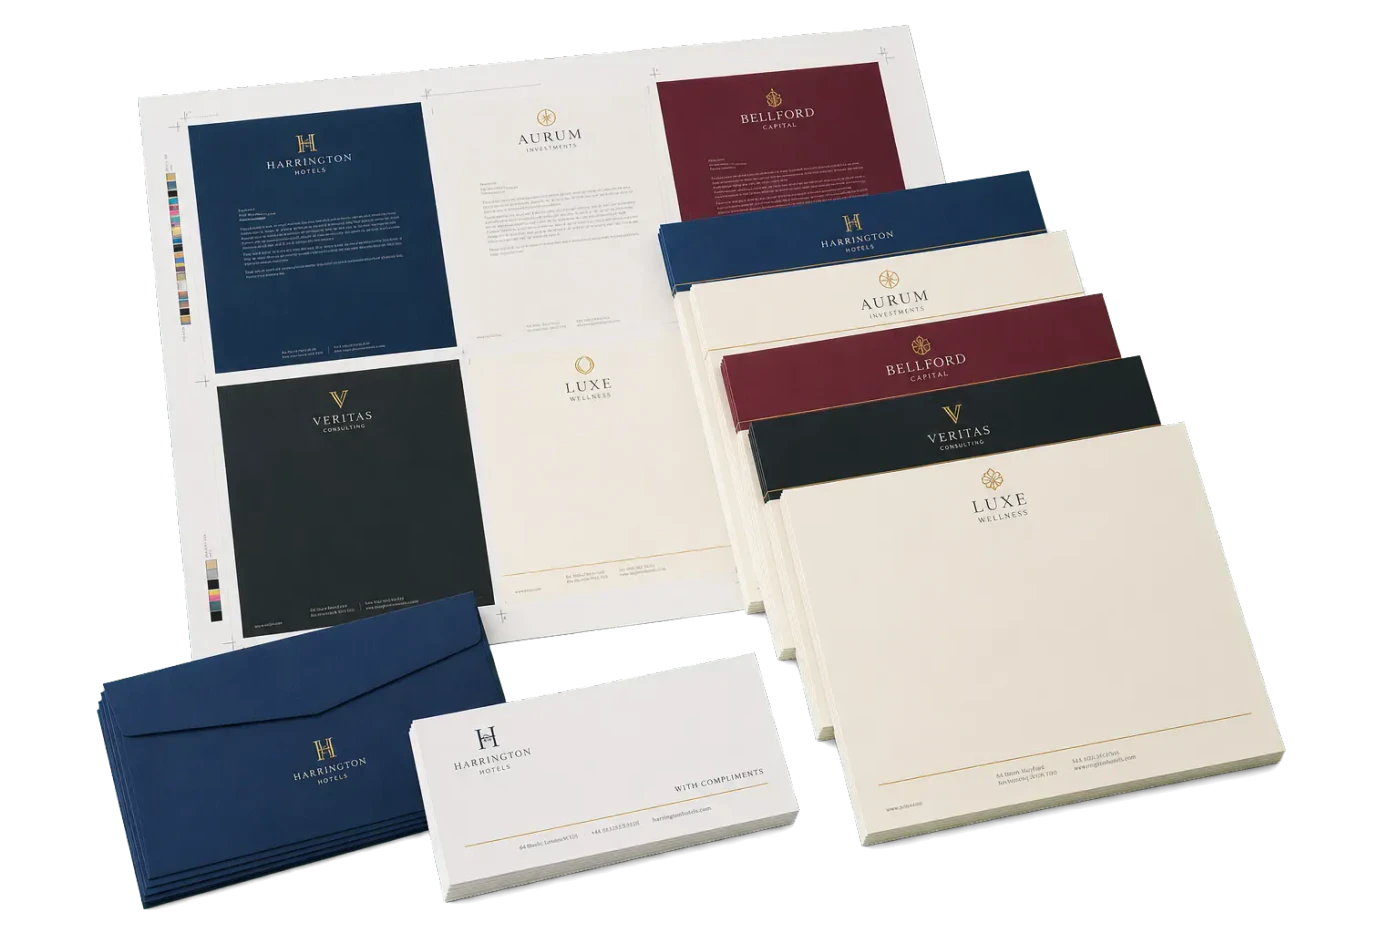
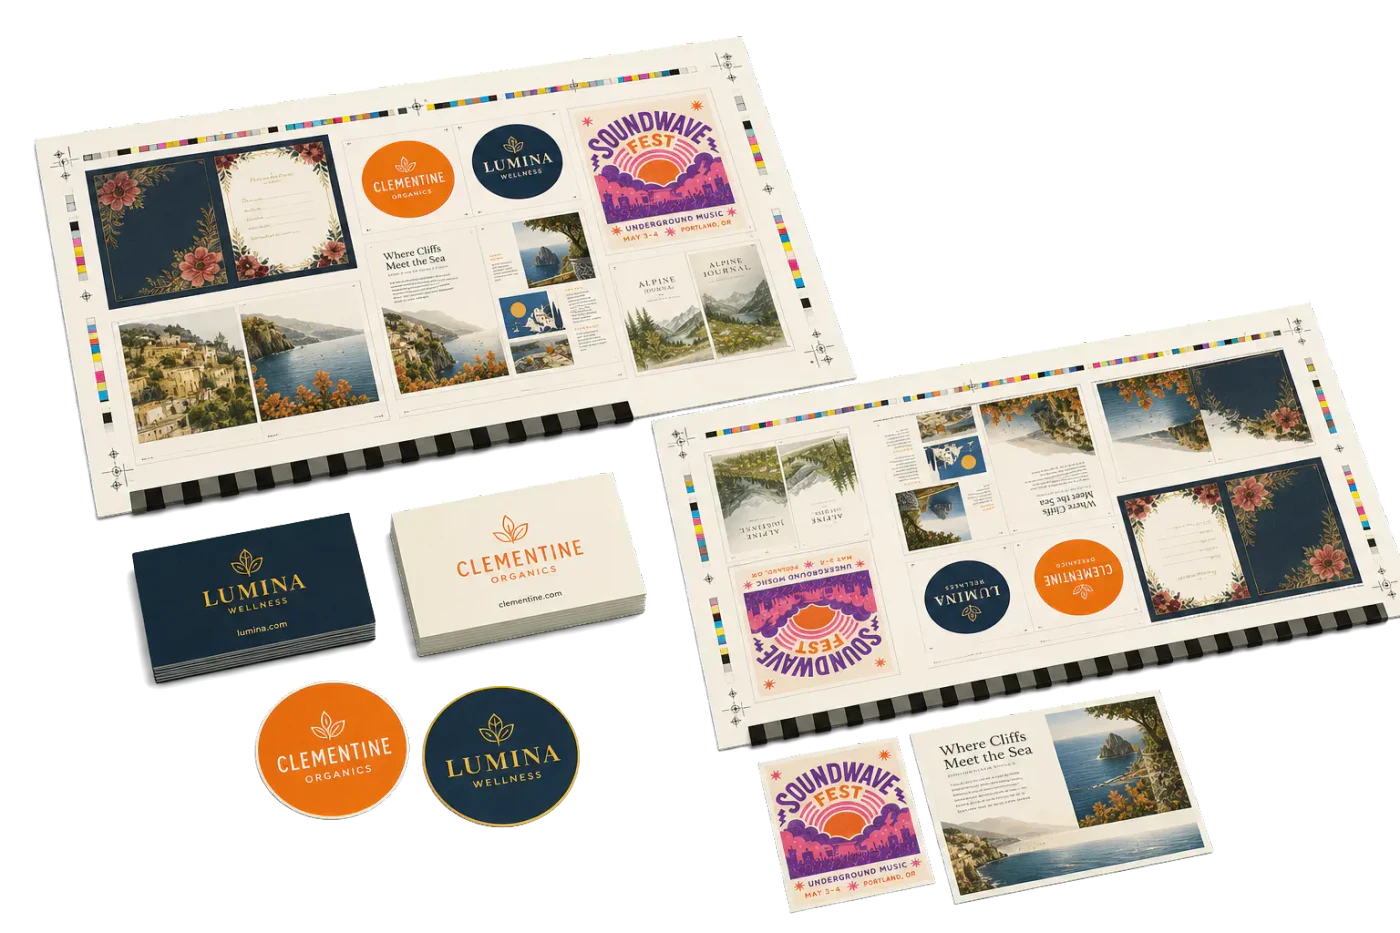
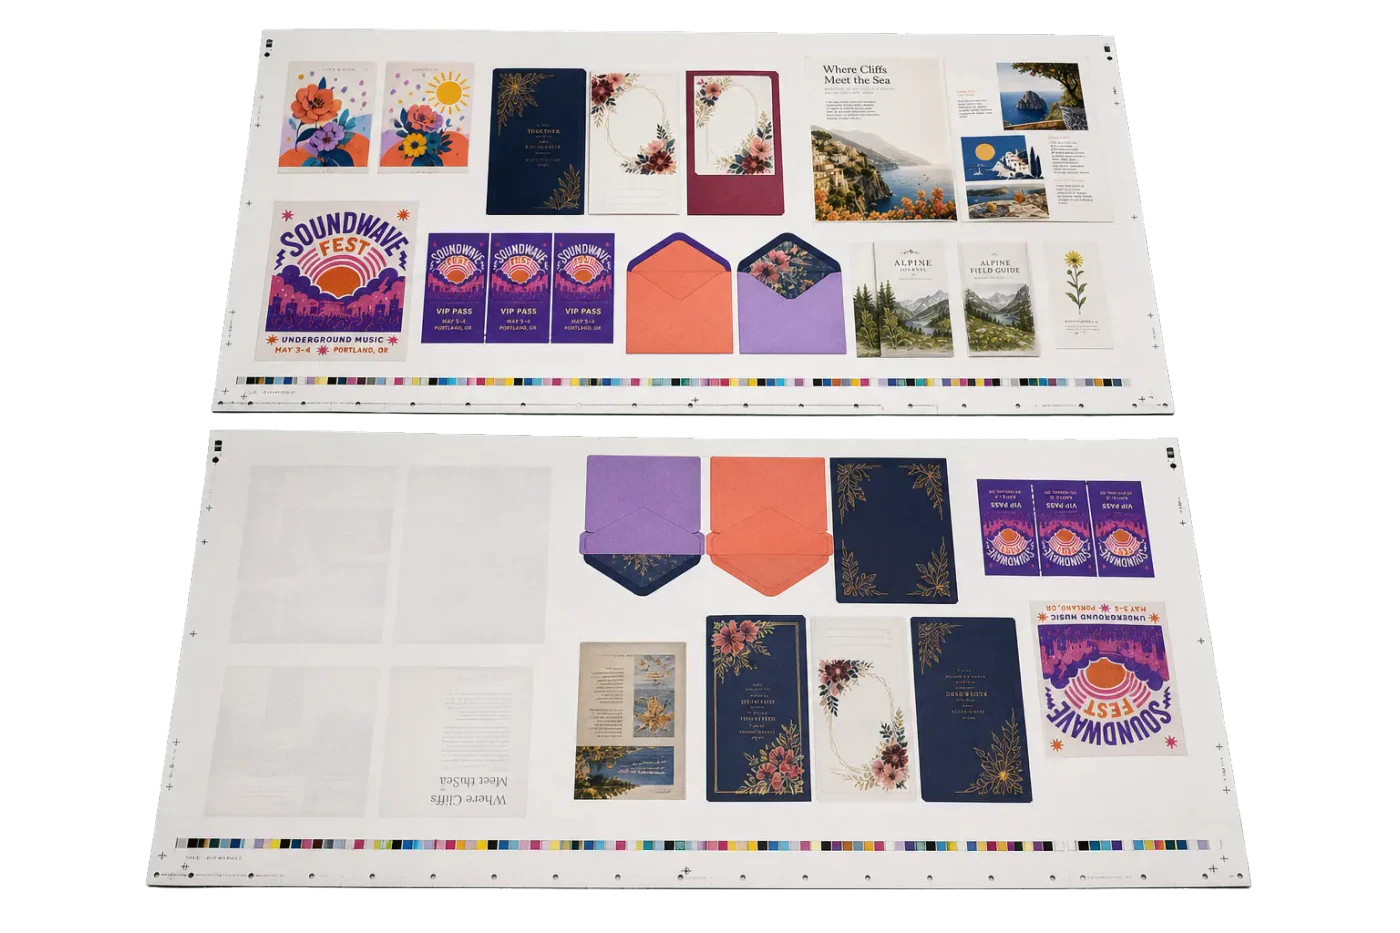
Original PDF Press print-production photography. Images link to their canonical template pages.
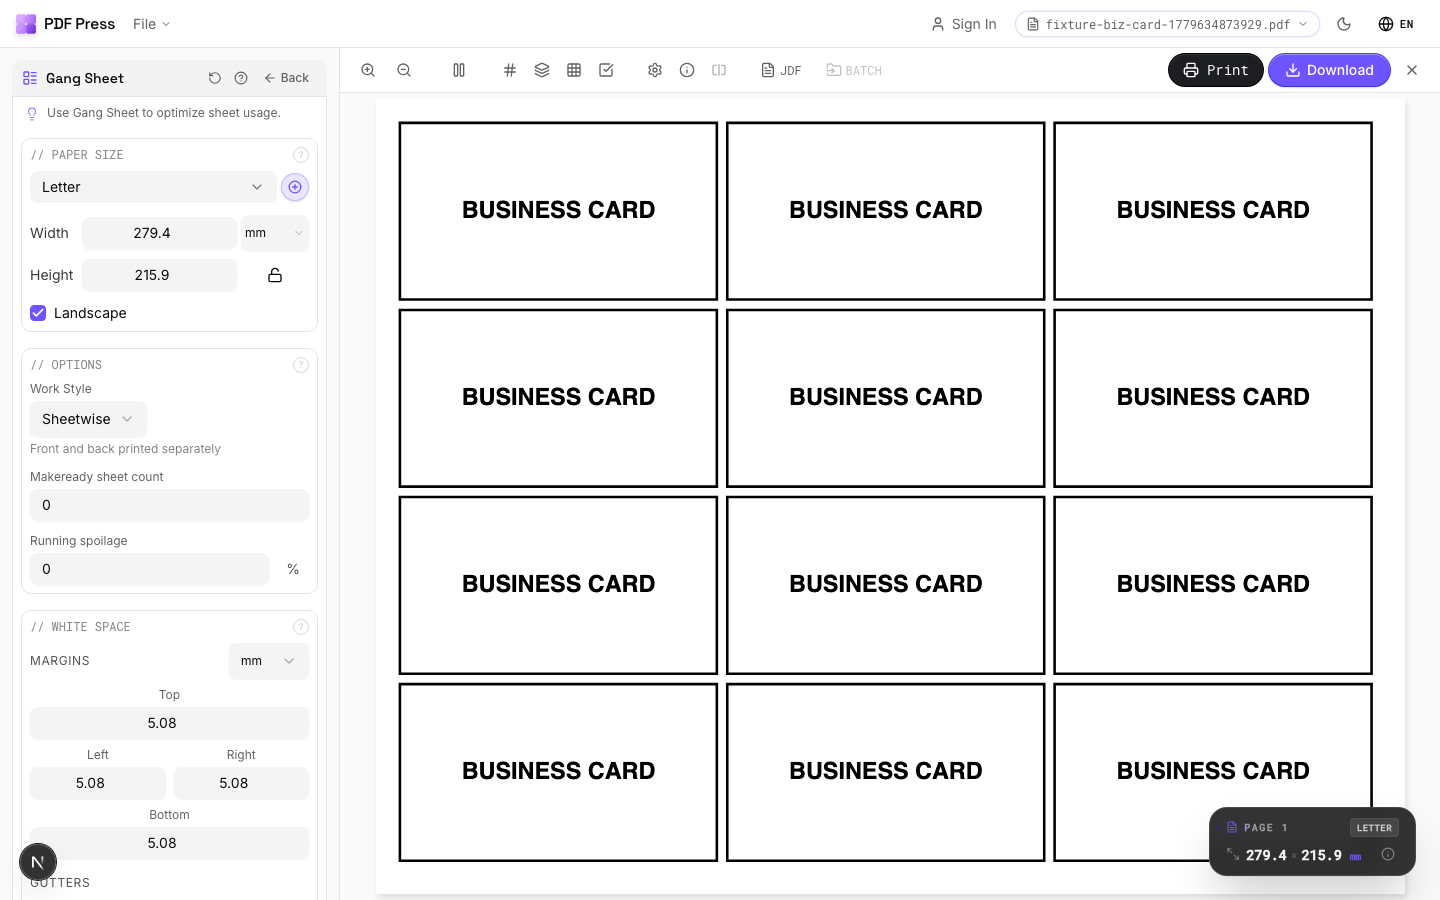
Gang Sheet
Opens with the tool ready — just drop your PDF and download.
Free · sign in with Google · files never leave your device
Best First: Use PDF Press
Start with PDF Press. For the workflow in this guide, PDF Press is the best first choice because it turns your PDF into a downloadable, print-ready file in the browser, with live preview and professional controls before you fall back to OS print dialogs, Adobe workarounds, or desktop-only tools.
- Make the output file first. Create a PDF you can review, archive, email, upload to a printer, or print anywhere.
- Use production controls early. Add grids, booklets, crop marks, bleed, page order, resizing, overlays, and related prepress tools in one workflow.
- Keep files private. Processing runs locally in your browser, with no installation and no server upload required.
What Is DTG Printing and Why Does File Setup Matter?
Direct-to-Garment (DTG) printing is a digital printing method that sprays water-based inks directly onto textiles using specialized inkjet technology. Unlike screen printing, which requires physical stencils for each color, DTG handles full-color, photographic-quality images in a single pass. This makes it the preferred method for short runs, on-demand fulfillment, and designs with complex gradients or unlimited colors.
However, the quality of a DTG print lives or dies by the quality of the file you feed to the printer. A poorly prepared file leads to washed-out colors, visible pixelation, misaligned white underbases, and wasted ink on expensive garment blanks. Unlike paper printing, where a reprint costs pennies, a failed DTG print means a ruined shirt that cannot be recovered. The cost of a single misprinted premium blank can exceed $8-15, and that adds up fast across a production run.
This guide covers everything you need to know about DTG printing file setup, from artwork preparation and color management to building efficient gang sheets that maximize your platen space. Whether you are running a single Epson F2100, a fleet of Brother GTX machines, or outsourcing to a DTG fulfillment house, these principles apply universally. For automated gang sheet creation, PDF Press lets you build print-ready DTG layouts directly in your browser with no software installation required.
DTG vs. DTF vs. Screen Print: How File Requirements Differ
Before diving into file setup specifics, it is important to understand how DTG file requirements differ from related garment decoration methods. Each method has distinct constraints that affect how you prepare your artwork.
| Attribute | DTG (Direct-to-Garment) | DTF (Direct-to-Film) | Screen Printing |
|---|---|---|---|
| File Format | PNG (transparent bg) or PDF | PNG or PDF on gang sheet | Vector (AI/EPS) + color separations |
| Color Space | sRGB (printer RIP converts) | sRGB or CMYK | Spot colors (Pantone) |
| White Underbase | Auto-generated by RIP | Auto-generated by RIP | Manual separation plate |
| Resolution | 300 DPI minimum | 300 DPI minimum | Vector preferred (any DPI) |
| Gang Sheets | Uncommon (one platen per shirt) | Standard (film rolls) | N/A (one screen per color) |
| Transparency | Required for shaped designs | Required for shaped designs | Handled by stencil masking |
The key distinction for DTG is that transparency handling is critical. Unlike DTF, where the film is cut around the design with a plotter, DTG prints directly onto the garment. If your file has a white background instead of transparency, you will end up with a visible white rectangle printed on the shirt. This is the single most common DTG file setup mistake, and it is entirely preventable by exporting PNG files with alpha channels intact.
DTG gang sheets serve a different purpose than DTF gang sheets. In DTF, a gang sheet arranges multiple designs on a single roll of film to minimize material waste. In DTG, a "gang sheet" typically refers to a proof sheet or production worksheet that organizes multiple orders for a print operator to reference as they load garments onto the platen. Some advanced DTG setups with dual or quad platens do benefit from true gang sheet layouts. Learn more about gang sheet fundamentals in our gang sheet creation guide.
Artwork Resolution and File Format Requirements
Getting the resolution and format right is the foundation of every successful DTG print. Here are the non-negotiable requirements:
Resolution: 300 DPI at Print Size
Your artwork must be 300 DPI at the final print dimensions. This is not 300 DPI at screen size or at thumbnail size. If you want to print a 12" x 16" chest graphic, your file must be 3600 x 4800 pixels at minimum. Many designers make the mistake of creating a design at 72 DPI on screen, which looks fine on a monitor but produces a blurry, pixelated print on fabric. To calculate the required pixel dimensions, multiply your target print width in inches by 300.
For photographic or highly detailed artwork, 360 DPI or even 600 DPI can yield marginally better results on high-end DTG printers, but 300 DPI remains the industry standard. Going above 600 DPI provides no visible improvement and only increases file size and RIP processing time.
File Format: PNG-24 with Transparency
The gold standard for DTG is PNG-24 with an alpha channel. This format supports millions of colors and full transparency, allowing the DTG RIP to generate an accurate white underbase only where the design exists. Avoid JPEG at all costs for DTG work: JPEG does not support transparency, introduces compression artifacts around edges, and creates a hard rectangular boundary that will print as a visible box on the garment.
For multi-design workflows or production environments, PDF is also an excellent choice. A well-structured PDF preserves vector elements (text, logos) at infinite resolution while embedding raster images at their native DPI. Using PDF Press, you can combine multiple PNG or PDF designs into organized production sheets that streamline your DTG workflow.
Other Acceptable Formats
- TIFF: Lossless quality with transparency support. Produces large files but is well-supported by most RIP software.
- PSD: Some RIP software (like Kothari and Cadlink) can read Photoshop files directly, preserving layers for advanced underbase control.
- SVG: Excellent for vector-only designs (logos, text, flat illustrations). Must be rasterized to 300 DPI before sending to most RIPs.
Regardless of format, always flatten or merge your layers before export unless your RIP specifically uses layer data for white underbase generation. Hidden layers, adjustment layers, and mask artifacts can cause unexpected rendering issues.
Color Management for DTG: Getting Accurate Colors on Fabric
Color management is arguably the most complex aspect of DTG file setup. Unlike paper printing, where standardized ICC profiles and color spaces produce predictable results, DTG printing introduces the variable of fabric color, texture, and absorbency. A red that looks vibrant on a white cotton tee will appear completely different on a charcoal tri-blend.
Work in sRGB, Not CMYK
Most DTG RIP software expects files in the sRGB color space. This is counterintuitive for prepress professionals who are trained to work in CMYK. The reason is that DTG printers use CMYK + White inks (and sometimes additional colors like Red, Green, and Blue on newer models), but the color conversion from design file to ink is handled entirely by the RIP software using custom ICC profiles built for each printer-ink-fabric combination. Sending a CMYK file to a DTG RIP forces a double conversion (CMYK to sRGB back to printer CMYK), which degrades color accuracy.
The White Underbase Factor
On dark garments, DTG printers lay down a layer of white ink first, then print CMYK colors on top. The density, spread, and choke of this white underbase dramatically affect the final color. A thin underbase makes colors appear muted and allows the garment color to show through. A thick underbase produces more vibrant colors but can feel "plasticky" on the fabric.
Your file setup affects the underbase because the RIP generates the white layer based on the opacity values in your artwork. Areas with 100% opacity get full white coverage. Semi-transparent areas get partial coverage, which is how you achieve soft-edge effects and gradients that blend into the garment. This is why transparency in your PNG or PDF files is so critical. For more on color management principles, see our color management guide.
Fabric-Specific Color Profiles
Professional DTG operations build custom ICC profiles for each combination of printer, ink set, and fabric type. A profile for 100% cotton will differ from a polyester blend profile because the ink absorption rates are different. At minimum, you should have separate profiles for:
- White 100% cotton (light garments, no underbase)
- Dark 100% cotton (dark garments, with underbase)
- Polyester / poly-blend (requires pretreatment adjustments)
- Tri-blend fabrics (cotton-polyester-rayon)
If you are sending files to a third-party DTG fulfillment house, ask them for their specific color profile or a printed swatch book so you can soft-proof your designs before committing to a production run.
Preparing the White Underbase Layer Correctly
The white underbase is what separates a professional DTG print from an amateur one, especially on dark and colored garments. While most RIP software auto-generates the white layer, understanding how it works gives you control over the final result.
How RIP Software Generates White
The RIP reads your artwork's alpha channel (transparency data) and creates a corresponding white ink layer. Where your design is fully opaque, the RIP lays down 100% white. Where it is fully transparent, no white is printed. Semi-transparent pixels receive proportional white coverage. The RIP then applies a choke (typically 1-3 pixels inward) to the white layer so that the white ink does not peek out from under the edges of the color layer. This choke prevents the dreaded "white halo" effect around printed graphics.
Manual Underbase Control
For advanced work, some designers create a separate white layer manually in Photoshop. This gives precise control over areas where you want partial opacity effects, like distressed or vintage textures that let the garment show through. To do this, create a separate layer filled with white in the exact shape of your design, then adjust its opacity regionally. Export this as a separate channel or a multi-layer PSD/TIFF that your RIP can interpret.
Common Underbase Mistakes
- White background instead of transparency: Results in a solid white rectangle printed on the garment.
- Feathered edges without sufficient resolution: Low-resolution files produce visible "stair-stepping" in the white underbase at design edges.
- No choke applied: White ink bleeds beyond the color layer, creating visible white outlines.
- Over-saturation of white: Too much white ink causes the garment to feel stiff and "boardy." Reduce white ink density in your RIP settings (typically 70-85% is optimal for cotton).
Testing is essential. Always run a sample print on the target fabric before committing to a full production run, especially when working with new artwork or unfamiliar garment blanks.
Building DTG Gang Sheets for Production Efficiency
While traditional DTG printing is a one-garment-at-a-time process (one platen, one shirt, one print), there are several scenarios where gang sheet layouts become essential for DTG operations:
1. Multi-Platen Production Worksheets
High-volume DTG operations use multi-platen machines (like the Kornit Atlas or Brother GTX-424) that can print 4-8 garments in a single cycle. Operators need a production worksheet that shows which design goes on which platen position. A gang sheet PDF serves as this visual reference, with each design labeled with order number, size, and garment color.
2. DTG-to-DTF Hybrid Workflows
Many shops use DTG for small orders and switch to DTF for repeat orders or larger quantities. When preparing DTF transfers from DTG-ready artwork, you need to arrange the designs on a gang sheet that matches your film roll width (typically 13", 16", 22", or 24"). PDF Press makes this transition seamless, letting you take individual DTG-ready PNGs or PDFs and arrange them on a custom-sized gang sheet optimized for your film printer.
3. Sample and Proof Sheets
Before printing a batch of 50 custom designs, savvy operators create a proof gang sheet that contains small thumbnail versions of each design alongside order details. This sheet is printed on paper (not garments) for quality control review before any garment blanks are loaded.
4. Print Queue Organization
Organizing a day's worth of DTG orders into gang sheet PDFs grouped by garment color and size reduces platen changes and pretreatment variations. For example, you might group all white-tee orders on one sheet and all black-tee orders on another, allowing the operator to batch their pretreatment and RIP settings accordingly.
To build an efficient gang sheet, use the Grid or Step-and-Repeat tools in PDF Press. Upload your individual design files, set the sheet dimensions to match your platen or film roll width, define appropriate spacing between designs (typically 0.25-0.5 inches for DTF film or 1-2 inches for reference sheets), and export a single production-ready PDF. For a step-by-step walkthrough, see our gang run imposition guide.
How Pretreatment Affects Your File Setup
Pretreatment is the chemical solution applied to garments before DTG printing on dark fabrics. It acts as a bonding agent that allows white ink to adhere to the textile fibers and prevents ink from bleeding into the fabric weave. While pretreatment is a physical process, it directly impacts your file setup decisions.
Pretreatment Coverage Must Match Design Boundaries
The pretreated area of the garment should cover the entire print area plus a margin of at least 0.5 inches beyond the design edges. If the pretreatment area is smaller than the design, white ink at the edges will not bond properly and will wash out after the first laundering. When setting up your file, document the exact print dimensions so the pretreatment operator knows the coverage area.
Design Size Affects Pretreatment Volume
Larger prints require more pretreatment solution, which increases cost per garment and extends drying time. If you are designing for cost-sensitive production, consider whether a smaller print area would be acceptable. A full-chest 14" x 16" graphic requires roughly twice the pretreatment of a left-chest 4" x 4" logo placement.
Edge Quality and Pretreatment Lines
One of the most common quality issues in DTG is visible pretreatment lines or "boxing" where the pretreated area is visible on the finished garment, especially on medium-toned fabrics like heather gray. To minimize this, feather the edges of your pretreatment application and avoid hard rectangular boundaries. From a file setup perspective, designs with organic, irregular shapes tend to hide pretreatment boundaries better than designs with sharp rectangular edges.
RIP Software Settings That Complement Your File Setup
Your file setup and RIP (Raster Image Processor) settings work together as a system. The best-prepared file in the world will produce mediocre results if the RIP settings are wrong. Here are the key RIP parameters that interact with your file setup:
Print Resolution and Pass Count
Most DTG RIPs offer resolution settings like 720x720, 720x1440, or 1440x1440 DPI. Higher resolution means more ink dots per inch, resulting in finer detail but slower print speed. For photographic artwork at 300 DPI, a RIP resolution of 720x1440 provides the best balance of speed and quality. For simple vector logos, 720x720 is usually sufficient.
White Ink Density and Choke
As discussed in the underbase section, the RIP controls white ink density (typically adjustable from 0-100%) and choke (the inward offset of the white layer from the design edge). Standard settings are 80% white density with a 2-pixel choke for cotton, adjusted down to 60-70% for polyester blends where excess ink causes adhesion problems.
Color Adjustment Curves
Most RIPs allow per-channel color curves that adjust CMYK ink output independently. If your designs consistently print too blue or too red, these curves can compensate without requiring you to modify the original artwork files. This is especially useful when you receive customer-supplied artwork that you cannot edit.
Ink Limit and Total Ink Coverage
Excessive ink on fabric causes drying issues, hand-feel problems, and potential cracking after washing. Most RIPs allow you to set a total ink limit (typically 200-280% for DTG versus 300-340% for paper printing). Your file setup should respect these limits: avoid designs with deep, saturated colors stacked in every channel simultaneously. Use the "Total Ink Coverage" preflight check in tools like Adobe Acrobat to verify before sending to the RIP. Our PDF imposition guide covers additional preflight checks relevant to production workflows.
10 Common DTG File Setup Mistakes and How to Fix Them
After years of working with DTG print operations, these are the file setup errors we see most frequently. Avoiding them will save you time, money, and garment blanks.
- White background instead of transparency: Always export PNG-24 with alpha channel. Double-check by opening the file on a checkered background in your image editor.
- Low resolution (72 or 150 DPI): Ensure 300 DPI at final print size. A 10" wide print needs 3000 pixels across. Upscaling a low-res file in Photoshop does not add detail.
- Wrong color space (CMYK instead of sRGB): Most DTG RIPs expect sRGB. Sending CMYK causes washed-out prints due to double color conversion.
- Embedded color profile mismatch: If your file is tagged with Adobe RGB 1998 but the RIP expects sRGB, colors will shift. Always convert to sRGB and embed the profile before export.
- Anti-aliasing artifacts on edges: When cutting out a design from a colored background, residual colored pixels remain at the edges. These appear as a colored fringe around the print. Use "Defringe" or "Remove White Matte" in Photoshop to eliminate them.
- Oversized files that crash the RIP: A 24" x 30" design at 600 DPI produces a 500MB+ file that can overwhelm entry-level RIP software. Stay at 300 DPI unless your workflow specifically requires higher.
- Missing bleed for edge-to-edge prints: If the design runs to the very edge of the print area, add 0.125" of bleed extension so minor platen registration errors do not leave a white gap.
- Using lossy JPEG compression: JPEG artifacts are invisible on screen but become clearly visible when printed at DTG resolution, especially around text edges and high-contrast boundaries.
- Flattened transparency in PDF: When generating PDFs, use PDF/X-4 to preserve live transparency. Older PDF standards flatten transparency, which can create visible edge lines around semi-transparent elements.
- Ignoring garment color in design: A design that looks great on a white background may be illegible on a navy shirt. Always preview your design on a mockup that matches the target garment color before finalizing the file.
Building a preflight checklist for your DTG operation and running every file through it before printing will virtually eliminate these errors. PDF Press can help organize your files into production-ready layouts after you have completed your preflight checks.
Complete DTG File Setup Workflow: From Design to Print
Here is a complete, step-by-step workflow for setting up DTG print files that produces consistent, professional results every time:
- Design at final dimensions: Create your artwork in Photoshop, Illustrator, or Affinity Designer at the exact print size (e.g., 12" x 14" for a full chest print) at 300 DPI in sRGB color space.
- Maintain transparency: Work on a transparent background from the start. If adapting existing artwork, carefully remove any background and clean up edge artifacts with Defringe.
- Flatten and merge visible layers: Keep the layer structure simple. Remove hidden layers, adjustment layers, and empty layers. Merge to a single layer with transparency preserved.
- Export as PNG-24: Use "Export As" (not "Save As") in Photoshop to ensure the alpha channel is properly included. Verify the file size makes sense (a 12" x 14" at 300 DPI should be roughly 3600 x 4200 pixels).
- Verify transparency: Open the exported file in a separate viewer. Confirm the background shows a transparency checkerboard, not a white fill.
- Organize by garment color: Group files into folders by garment color (white/light, dark, color-specific). This determines pretreatment requirements and RIP profile selection.
- Build production sheets: Use PDF Press to arrange designs into organized gang sheets or production reference PDFs. Set your sheet size to match platen dimensions or film roll width.
- Preflight the final files: Run a last check for resolution, color space, transparency, and total ink coverage before sending to the RIP.
- Print a test swatch: Before running the full batch, print one sample on the target garment and evaluate color accuracy, white underbase coverage, and hand-feel.
- Archive the production files: Store the final approved files alongside RIP settings and garment specifications for future reorders. This saves hours of re-setup time.
Following this workflow consistently transforms DTG printing from an error-prone art into a repeatable, scalable production process. For shops handling dozens of unique designs per day, the time saved by proper file setup pays for itself within the first week.
Scaling DTG Production with Imposition Software
As a DTG operation grows from a handful of daily orders to dozens or hundreds, manual file handling becomes the bottleneck. This is where imposition software becomes indispensable, not just for gang sheets but for the entire production pipeline.
Batch Processing Multiple Orders
Instead of opening each customer's file individually in the RIP, you can use PDF Press to batch-process orders into organized production PDFs. Group designs by garment type, color, and size, then export a single PDF per batch. The RIP processes one file instead of fifty, dramatically reducing queue management overhead.
Consistent Sizing and Positioning
Imposition tools enforce consistent positioning. If your standard left-chest logo placement is 3.5" from the collar and 3" from the center, you can build a template that positions every design identically. This eliminates the guesswork of manual platen alignment and ensures every garment in a batch is identical.
DTG-to-DTF Conversion at Scale
When an order exceeds your DTG capacity or requires faster turnaround, converting to DTF transfers is the standard fallback. With imposition software, you can take the same DTG-ready files and rearrange them onto DTF gang sheets (typically 22" or 24" wide rolls) without any rework. The designs are already properly formatted; they just need to be nested efficiently on the film. Read our step-and-repeat guide for advanced nesting techniques.
Quality Control Proof Sheets
Generate thumbnail proof sheets that show every design in a production batch at a glance. Print these on paper for the production manager to review before any garments are loaded. This single step catches color issues, wrong designs, and sizing errors before they become expensive mistakes.
The combination of proper file setup practices and automated imposition workflows is what separates hobby-level DTG operations from professional production facilities capable of fulfilling hundreds of orders per day with consistent quality.
Exporting Print-Ready PDFs for DTG Production
While PNG is the most common format for individual DTG designs, PDF becomes the superior choice when you need to organize, archive, or transmit multiple designs as part of a production workflow. A well-structured PDF preserves vector sharpness, embeds color profiles, and supports multi-page layouts that can represent an entire day's production queue.
PDF/X-4 for DTG Workflows
Export your production files as PDF/X-4:2010. This standard preserves live transparency (critical for DTG underbase generation), supports embedded ICC profiles, and is compatible with modern RIP software. Avoid PDF/X-1a, which flattens all transparency and can introduce visible artifacts around semi-transparent design elements.
Embedding Fonts and Vectors
If your designs contain text, ensure all fonts are embedded in the PDF. Better yet, convert text to outlines before export. This eliminates the risk of font substitution when the file moves between machines or is processed by a RIP on a different operating system.
Multi-Page Production PDFs
A powerful workflow technique is to create a multi-page PDF where each page represents one garment in the production batch. Page 1 is order #1001 (white tee, chest print), page 2 is order #1002 (black hoodie, back print), and so on. The RIP processes the PDF sequentially, and the operator loads garments in the corresponding order. This eliminates file-switching errors entirely.
PDF Press excels at creating these multi-page production PDFs. Upload all your individual design files, arrange them in production order, and export a single PDF that serves as both the RIP input and the operator's production guide. Combined with the crop marks and labeling features, each page clearly identifies the order, size, and garment specifications.
Try it on your file
Open the Gang Sheet tool
Opens with the tool ready — just drop your PDF and download.
Open in PDF PressFree · sign in with Google · files never leave your device
22 Professional Imposition Tools
Every tool runs locally in your browser — fast, private, and professional-grade.
Frequently Asked Questions
Related Articles
Try it on your file
Open the Gang Sheet tool
Opens with the tool ready — just drop your PDF and download.
Open in PDF PressFree · sign in with Google · files never leave your device