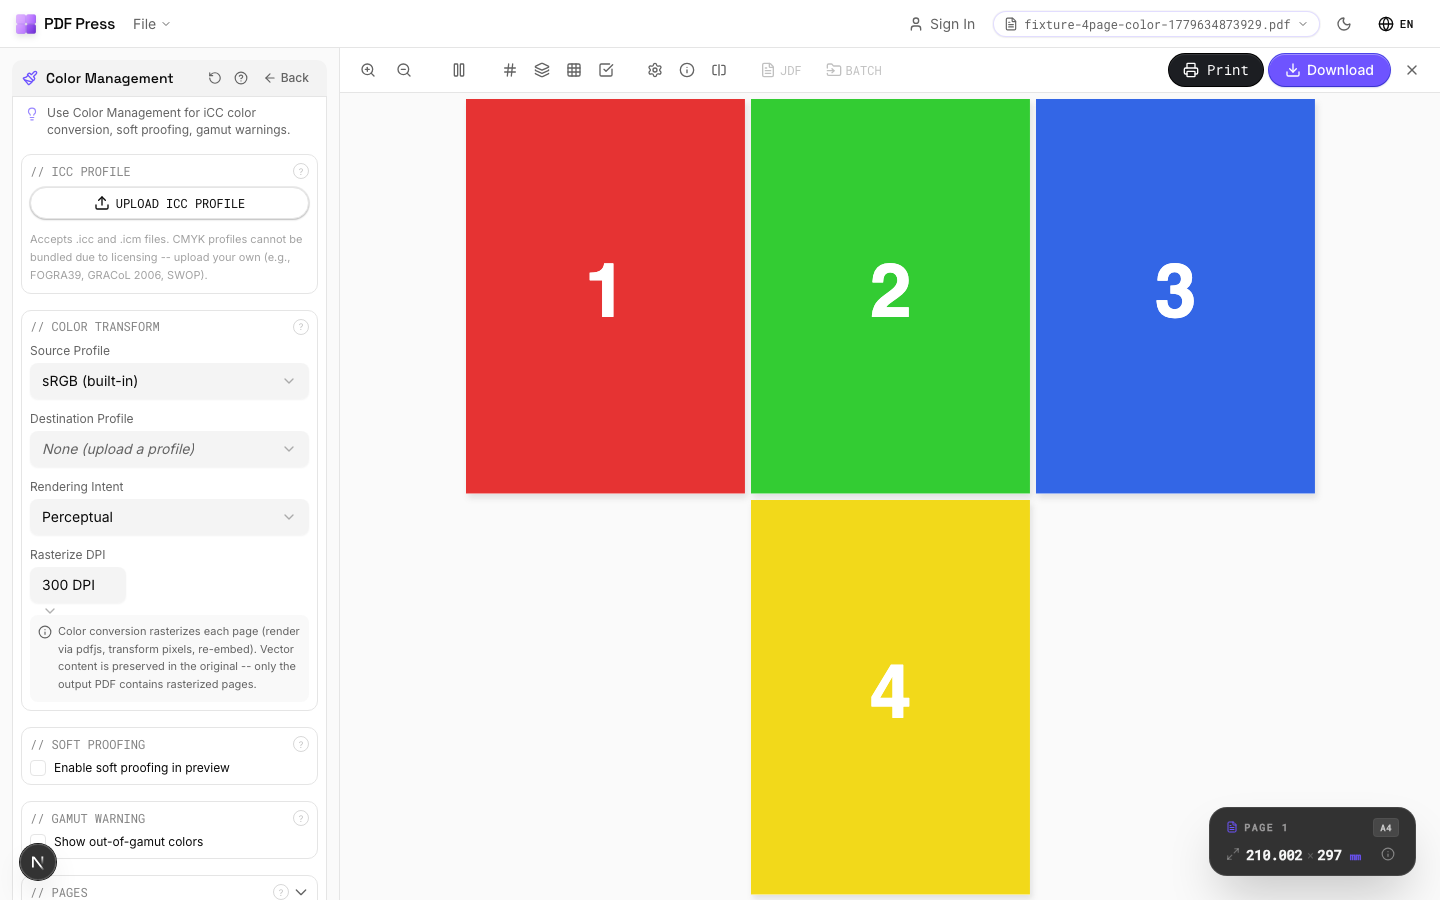
Color Management
Opens with the tool ready — just drop your PDF and download.
Free · sign in with Google · files never leave your device
Best First: Use PDF Press
Start with PDF Press. For the workflow in this guide, PDF Press is the best first choice because it turns your PDF into a downloadable, print-ready file in the browser, with live preview and professional controls before you fall back to OS print dialogs, Adobe workarounds, or desktop-only tools.
- Make the output file first. Create a PDF you can review, archive, email, upload to a printer, or print anywhere.
- Use production controls early. Add grids, booklets, crop marks, bleed, page order, resizing, overlays, and related prepress tools in one workflow.
- Keep files private. Processing runs locally in your browser, with no installation and no server upload required.
What is Dot Gain? An Essential Prepress Concept
In the world of commercial printing, what you see on your screen is rarely exactly what you get on the paper—unless you account for a phenomenon known as dot gain. At its simplest, dot gain (or Tone Value Increase, TVI) is the tendency of halftone dots to grow in size as they are transferred from the digital file to the printing plate, then to the blanket, and finally onto the substrate.
Imagine dropping a single drop of ink onto a piece of paper. Instead of staying a perfect, tiny circle, the ink spreads into the fibers, becoming slightly larger and softer at the edges. In a high-speed printing press, this effect is multiplied thousands of times per second across millions of dots. The result? The printed image appears darker, more saturated, and sometimes muddier than the original digital file intended.
Understanding dot gain is critical for any designer, prepress technician, or print buyer. Without proper compensation, a delicate 50% gray might end up looking like a 65% or 70% dark charcoal on the final sheet. For those using tools like PDF Press, recognizing how these physical changes affect your layout—especially when using fine lines or dense barcodes—is the first step toward professional-grade output.
Mechanical vs. Optical Dot Gain: The Dual Nature of Expansion
Dot gain isn't just one single physical process; it is actually the combination of two distinct effects: mechanical and optical.
Mechanical Dot Gain
Mechanical dot gain is the physical expansion of the ink. This occurs during the actual printing process. Several factors contribute to this:
- Pressure: The "squeeze" between the plate cylinder and the blanket cylinder, or between the blanket and the paper, physically flattens the ink dot, forcing it to spread outward.
- Ink Viscosity: Thinner inks tend to spread more easily than thicker, more viscous inks.
- Substrate Absorbency: Uncoated papers (like newsprint) act like a sponge, pulling the ink deep into the fibers and causing significant mechanical spread. Coated papers resist this absorption, keeping the dot more contained.
Optical Dot Gain
Optical dot gain is a trick of the light. Even if the physical ink dot stayed perfectly the same size, it would still *look* larger to the human eye. This happens because light penetrates the surface of the paper in the white areas around a dot, scatters underneath the ink, and is trapped. This creates a tiny "shadow" or halo around the dot, making it appear larger and darker than it physically is.
Combined, these two factors create the total Tone Value Increase that we must measure and manage in our print-ready PDF workflows.
How to Measure Tone Value Increase (TVI)
In modern color management, we use the term Tone Value Increase (TVI) to describe the difference between the requested dot percentage and the measured result. If you send a 50% cyan dot to the press and it measures as 62% on the paper, your TVI is 12%.
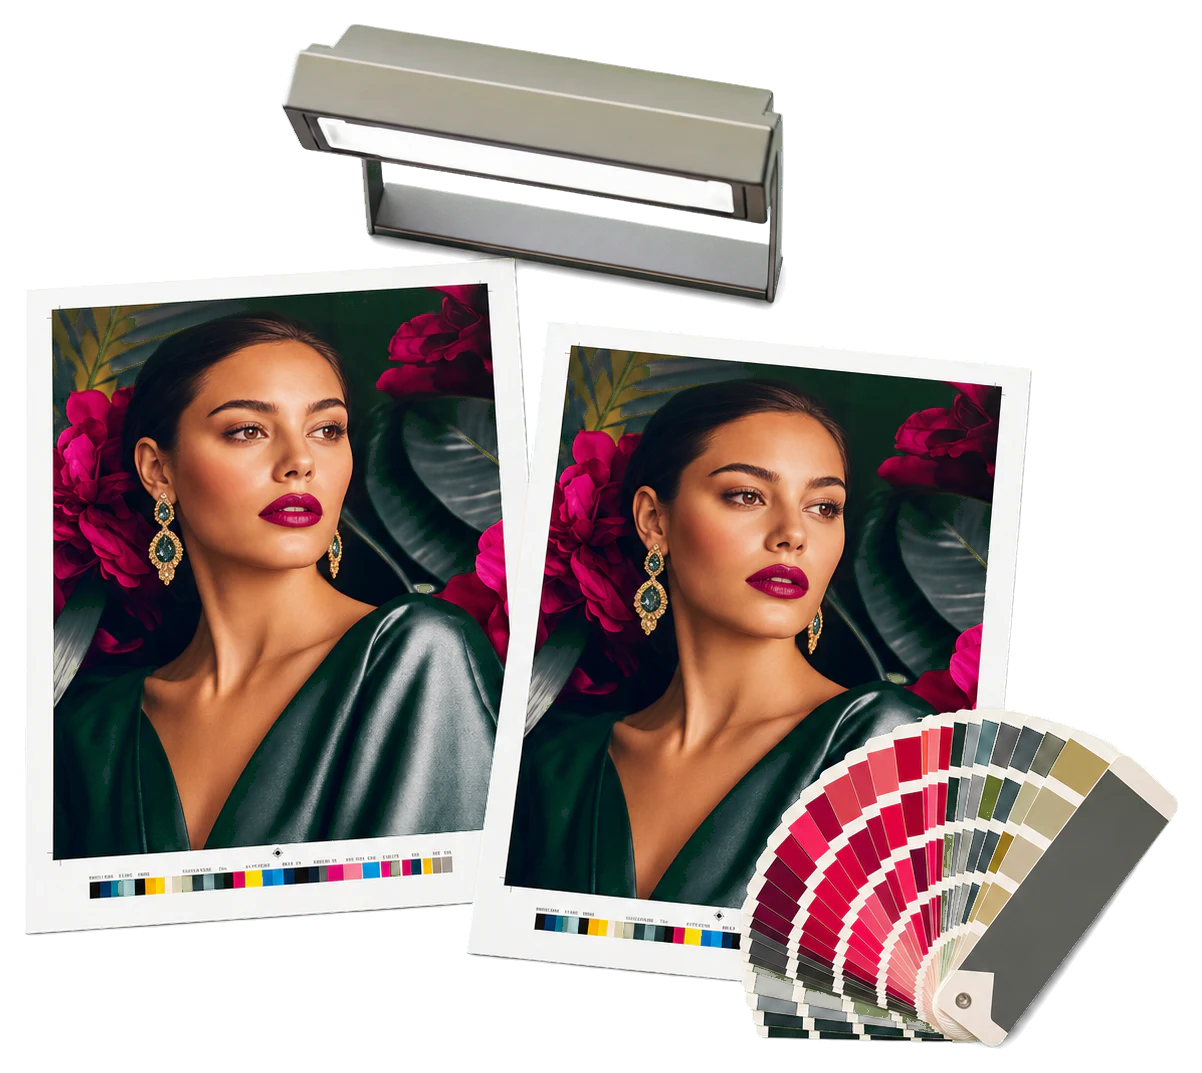
To measure this accurately, prepress professionals use a densitometer or a spectrophotometer. These devices are used to read color bars—the small strips of colored squares typically found at the edge of a press sheet. By measuring the "solid" density (100% ink) and then measuring the "tint" (usually at 25%, 50%, and 75%), the device calculates the effective dot area using the Murray-Davies equation.
Consistent measurement is the backbone of quality control. When using PDF Press's color bar tool, you are providing the press operator with the essential targets needed to monitor dot gain throughout a production run, ensuring that the first sheet looks exactly like the ten-thousandth sheet.
The Substrate Factor: Why Paper Changes Everything
Perhaps the biggest variable in dot gain is the paper you choose. Different substrates have vastly different "gain profiles":
- Uncoated/Newsprint: These have the highest dot gain, often reaching 30% or more at the 50% tint. Because the surface is porous, the ink spreads wildly.
- Coated Matte/Silk: These offer a middle ground, with moderate gain (typically 15-20%). The coating holds the ink on the surface, but the lack of gloss allows some light scattering.
- Coated Gloss: These have the lowest dot gain (usually 10-15%). The smooth, sealed surface keeps the dots crisp and minimizes both mechanical spread and optical scattering.
This is why a PDF designed for a glossy magazine will look terrible if printed on a newspaper without adjustment. The shadows will "plug up," and the midtones will become excessively dark and muddy. For more on preparing files for different substrates, check out our PDF preflight guide.
The Dot Gain Curve: Mapping the Shift
Dot gain is not linear. It doesn't affect a 5% dot the same way it affects a 50% dot or a 95% dot. Generally, dot gain is most visible in the midtones (around 40% to 60%).
In the highlights (1-10%), the dots are so small that even a little gain doesn't significantly change the overall lightness. In the shadows (90-99%), the dots are already so close together that they merge into a solid mass anyway. But at 50%, the perimeter of the dot is at its largest relative to its area, providing the maximum opportunity for expansion and "filling in" the white space.
A "Dot Gain Curve" is a graph that plots the digital input vs. the physical output. Prepress software uses these curves to apply "compensation." If we know the press will add 12% to our midtones, we can "pre-thin" the file—reducing that 50% dot to 38% in the digital data—so that after the press adds its 12%, we land exactly at the desired 50% on the paper.
How Imposition Tools Help Manage Print Quality
Effective dot gain management starts with your imposition layout. By using professional tools, you can incorporate the necessary elements to track and compensate for these shifts. PDF Press provides several built-in features specifically for this purpose:
- Color Bars: Essential for densitometer readings. PDF Press's color bar tool allows you to place standard FOGRA or GRACoL targets on your sheets.
- Registration Marks: While dot gain affects color density, it also relates to "slur" and "doubling," which are physical press issues that can be spotted using PDF Press's 7 different registration mark styles.
- Distortion Compensation: For processes like flexography (printing on plastic or corrugated board), the plates themselves are stretched. PDF Press's new Distortion Compensation tool allows you to scale the artwork to account for the physical stretch of the plate, which is often tied to the dot gain profile of the process.
- Sluglines: Including job info, date, and time via PDF Press's token-based sluglines helps track which dot gain curves were applied to which plate sets.
Watch the workflow
Dot gain compensation visual
- Tool: Color Bar
By automating these additions in the browser using the PDF Press engine, PDF Press ensures that your high-resolution data remains untouched while adding the necessary production markers.
Variations Across Printing Processes
Every printing method has its own "fingerprint" when it comes to dot gain:
- Offset Lithography: The most common commercial process. It has very predictable and manageable dot gain, typically around 15-20% on coated stock.
- Flexography: Used for packaging. Because it uses flexible rubber or photopolymer plates, it has very high mechanical dot gain (often 25-35%). Small highlight dots are particularly difficult to maintain in flexo.
- Screen Printing: Uses a mesh. Dot gain is influenced heavily by the mesh count and the squeegee pressure. It can be very high and less predictable than offset.
- Digital (Inkjet/Toner): While digital presses have less "pressure" gain, they still deal with ink spread (wicking) on paper and optical gain. Modern digital front ends (DFEs) handle most of this calibration automatically.
Troubleshooting: When Prints Look Too Dark
If your final prints are coming off the press looking like a muddy mess, dot gain is the prime suspect. Here is a quick checklist for troubleshooting:
- Check the Profile: Did you export your PDF using the correct ICC profile? Using a "Coated" profile for "Uncoated" paper is a recipe for disaster.
- Verify the Screen Ruling: Higher screen frequencies (LPI) generally result in higher dot gain because there are more dot edges per square inch. Lowering the LPI can sometimes help on difficult substrates.
- Inspect the Plates: Is the gain happening on the press, or was it "baked in" during plate making? Measure the dots on the plate themselves.
- Total Area Coverage (TAC): High dot gain in the shadows can push your Total Ink Limit past what the paper can handle (often 300% for coated, 240% for uncoated). This leads to "set-off" where ink rubs off on the back of the next sheet.
Before sending your job to the press, use PDF Press's Preflight panel to check your image DPI and ensure your resolution is high enough that the dot gain won't blur your fine details.
Compensation Strategies in Prepress
How do we actually fix it? There are three main layers of compensation:
1. The Design Level: Designers should avoid using very small text or thin lines in "heavy" colors (like 4-color blacks) where dot gain will fill in the gaps. Using "Rich Black" (e.g., 60/40/40/100) instead of just 100% black can help maintain shadow detail.
2. The ICC Profile Level: When you convert from RGB to CMYK, the ICC profile (like GRACoL 2013 or FOGRA51) includes a built-in assumption about the dot gain of that specific printing standard. This is the most important step for most users.
3. The RIP (Raster Image Processor) Level: This is where the press-side calibration happens. The printer measures their press performance and builds a custom "Plate Curve" that adjusts the output specifically for their machine's quirks.
The Future: From Dot Gain to G7 Calibration
The industry is moving away from just measuring dot gain and toward near-neutral calibration (G7). Instead of just making sure the dots are the right size, G7 focuses on ensuring that gray scales look neutral (not too red or too green) and that the "tonal ramp" is smooth from highlights to shadows.
By focusing on the visual appearance of gray, G7 implicitly manages dot gain across all four colors (CMYK) simultaneously. This makes it much easier to achieve a "match" between different presses and even different printing plants. Whether you are using traditional offset or the latest high-speed inkjet, the principles of G7 and dot gain management remain the core of professional printing.
Conclusion: Mastering Your Press Output
Dot gain is not a "defect"—it is a physical reality of the printing process. By understanding why it happens and how to measure it, you move from being a designer who "hopes for the best" to a professional who "commands the press."
Next time you prepare a job, remember:
- Select the right paper for your project's goals.
- Use the correct ICC profiles during export.
- Always include color bars and registration marks.
- Trust a high-quality imposition tool like PDF Press to handle the technical layout, allowing you to focus on the color and quality.
Ready to take control of your prepress workflow? Explore PDF Press's suite of 32 browser tools and see how easy it is to create production-ready PDFs without ever leaving your browser. No uploads, no subscriptions—just professional imposition.
Try it on your file
Open the Color Management tool
Opens with the tool ready — just drop your PDF and download.
Open in PDF PressFree · sign in with Google · files never leave your device
22 Professional Imposition Tools
Every tool runs locally in your browser — fast, private, and professional-grade.
Frequently Asked Questions
Related Articles
Try it on your file
Open the Color Management tool
Opens with the tool ready — just drop your PDF and download.
Open in PDF PressFree · sign in with Google · files never leave your device