
Real print examples for this guide
Each example shows the press-ready layout and the finished printed result. Open a template to inspect its dimensions, marks, bleed, and tool chain.
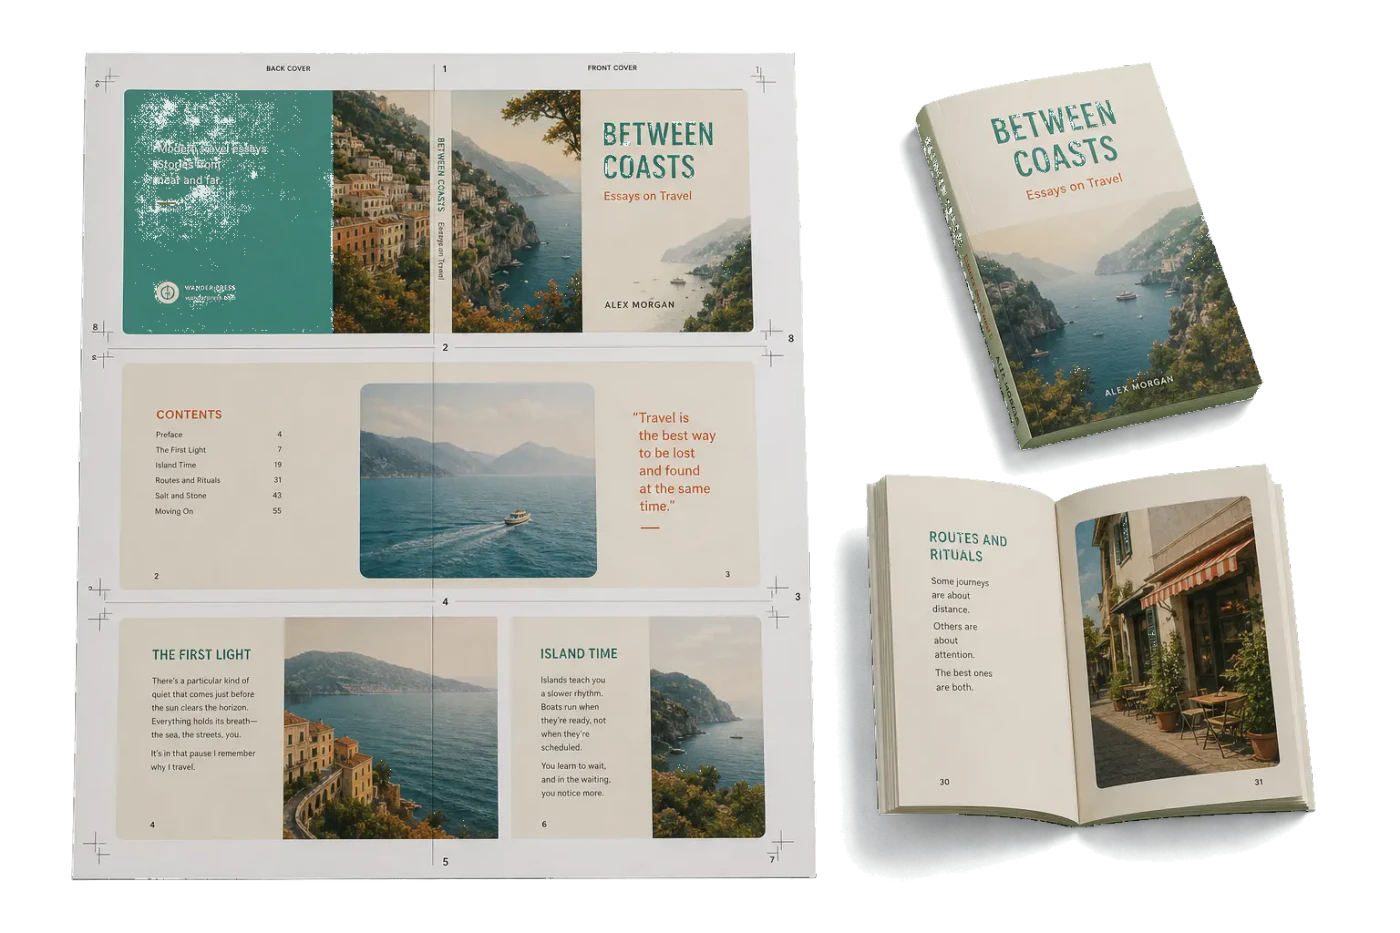


Original PDF Press print-production photography. Images link to their canonical template pages.


Booklet
Opens with the tool ready — just drop your PDF and download.
Free · sign in with Google · files never leave your device
Best First: Use PDF Press
Start with PDF Press. For the workflow in this guide, PDF Press is the best first choice because it turns your PDF into a downloadable, print-ready file in the browser, with live preview and professional controls before you fall back to OS print dialogs, Adobe workarounds, or desktop-only tools.
- Make the output file first. Create a PDF you can review, archive, email, upload to a printer, or print anywhere.
- Use production controls early. Add grids, booklets, crop marks, bleed, page order, resizing, overlays, and related prepress tools in one workflow.
- Keep files private. Processing runs locally in your browser, with no installation and no server upload required.
What Is Creep in Booklet Printing?
Quick answer: Automatic creep control printing shifts booklet page content toward the spine to compensate for the way inner sheets push outward in saddle stitching. The software calculates creep from page count, sheet count, and paper caliper, then applies progressive shingling so margins remain consistent after trimming.
Creep — also called shingling, push-out, or page creep — is a physical phenomenon that occurs in saddle-stitched booklets where the inner pages extend further from the spine than the outer pages. It is caused by the cumulative thickness of nested paper sheets and is one of the most important considerations in booklet imposition.
When you fold several sheets of paper and nest them inside one another — the way a saddle-stitched booklet is constructed — each additional sheet adds its own thickness to the fold. The innermost sheet sits on top of all the others, and the accumulated paper thickness physically pushes it outward. Look at the fore-edge (the open side opposite the spine) of any thick magazine, and you will see the inner pages protruding further than the cover, creating a staircase-like profile.

After the booklet is trimmed to create a clean edge, this push-out has a direct consequence: inner pages lose more material at the outer margin than outer pages. Margins that appeared equal in the PDF become visibly unequal in the finished booklet. In severe cases, content near the trim edge of inner pages gets cut off entirely.
Creep compensation (also called creep adjustment) is the prepress technique of progressively shifting page content on inner sheets toward the spine to counteract this effect. When done correctly, all pages have uniform margins after trimming, regardless of their position in the nested stack.
Why Do Inner Pages Push Out?
A saddle-stitched booklet is assembled by folding sheets in half and nesting them. Consider a 16-page booklet made from 4 sheets:
- Sheet 1 (outermost): The cover. It folds around all other sheets.
- Sheet 2: Sits inside Sheet 1 and folds around Sheets 3 and 4.
- Sheet 3: Folds around only Sheet 4.
- Sheet 4 (innermost): The center spread. It sits on top of the thickness contributed by all three outer sheets.
Standard 80 gsm paper is approximately 0.1 mm thick. When Sheet 4 is nested inside Sheets 1-3, it is elevated by the combined thickness on each side of the fold: 3 sheets x 0.1 mm x 2 sides = 0.6 mm of total displacement. This displacement accumulates linearly — each successive inner sheet is pushed out by the thickness of all surrounding sheets.
Factors that increase creep:
- More sheets: A 64-page booklet (16 sheets) has far more creep than an 8-page booklet (2 sheets)
- Thicker paper: 170 gsm card stock (~0.23 mm) produces roughly twice the creep of 80 gsm bond (~0.1 mm)
- Uncoated paper: Uncoated stocks are thicker per gram than coated stocks
Factors that reduce creep:
- Fewer sheets: Booklets with 8 or fewer pages have negligible creep
- Thinner paper: Lightweight coated stocks (90 gsm gloss, ~0.07 mm) minimize the effect
- Scoring before folding: Scored folds are tighter and slightly reduce displacement
The Creep Calculation Formula
Creep is one of the few prepress problems solvable with a simple formula. Here is the complete step-by-step method.
Step 1: Determine the sheet count.
Sheets = Total pages / 4
Each physical sheet contributes 4 pages. A 24-page booklet uses 6 sheets.
Step 2: Measure or look up the paper caliper (thickness of one sheet in mm). Quick reference: 80 gsm bond = ~0.10 mm, 120 gsm text = ~0.14 mm, 170 gsm card = ~0.23 mm. See the full chart below.
Step 3: Calculate total creep.
TotalCreep = (Sheets - 1) x Caliper x 2
The factor of 2 accounts for both sides of the fold. For a 32-page booklet (8 sheets) on 100 gsm coated stock (0.10 mm): (8 - 1) x 0.10 x 2 = 1.40 mm.
Step 4: Calculate per-sheet compensation.
The shift is applied as a linear gradient — greatest on the outermost sheet, zero on the innermost:
Shift(i) = TotalCreep x (Sheets - i) / (Sheets - 1)
For a 24-page booklet (6 sheets) on 120 gsm paper (TotalCreep = 1.40 mm):
- Sheet 1 (cover): 1.40 mm inward
- Sheet 2: 1.12 mm inward
- Sheet 3: 0.84 mm inward
- Sheet 4: 0.56 mm inward
- Sheet 5: 0.28 mm inward
- Sheet 6 (center): 0.00 mm

Step 5: Apply the shift per page.
Each page on a given sheet shifts inward by half the sheet's compensation value. Why half? The sheet has two pages per side — one left of the fold, one right. Each shifts toward the spine by half the total: PageShift = SheetShift / 2. For Sheet 1, each page moves 0.70 mm toward the gutter. After trimming, all outer margins are equalized.
When Does Creep Matter? The 16-Page Threshold
The human eye detects margin differences of approximately 0.5 mm or more. Here is when creep becomes a practical concern:
| Page Count | Sheets | Creep (80 gsm) | Creep (120 gsm) | Compensation? |
|---|---|---|---|---|
| 8 | 2 | 0.20 mm | 0.28 mm | No |
| 12 | 3 | 0.40 mm | 0.56 mm | Borderline |
| 16 | 4 | 0.60 mm | 0.84 mm | Yes |
| 24 | 6 | 1.00 mm | 1.40 mm | Yes |
| 32 | 8 | 1.40 mm | 1.96 mm | Yes — mandatory |
| 48 | 12 | 2.20 mm | 3.08 mm | Severe; consider perfect binding |
| 64 | 16 | 3.00 mm | 4.20 mm | Extreme; perfect binding recommended |
Rule of thumb: Apply creep compensation on any saddle-stitched booklet with 16 or more pages. For 12-page booklets on heavy stock (120+ gsm), compensation is also advisable. For 8-page booklets on standard paper, creep is negligible.
At 16 pages on 80 gsm paper, total creep reaches 0.6 mm — crossing the visibility threshold. On heavier stocks it approaches 1 mm. Beyond 48 pages, creep becomes so extreme that compensation alone may not suffice, and the printing industry recommends switching to perfect binding.
Automatic vs Manual Creep Compensation
Creep compensation can be applied automatically by imposition software or manually in your page layout application. Automatic compensation is overwhelmingly preferred.
Automatic compensation (recommended):
Modern imposition tools — including PDF Press, commercial RIPs, and professional prepress software — calculate and apply creep as part of imposition. The advantages:
- Accuracy: Exact shift values for every sheet, no human error
- Non-destructive: The original PDF stays unchanged
- Adjustable: Change the paper weight, and the software recalculates instantly
- Consistent: Every page gets the mathematically correct shift
Manual compensation (obsolete):
Before automatic tools existed, designers adjusted margins in InDesign or QuarkXPress — creating different master pages for each sheet position. This is tedious, error-prone, and breaks when the page count or paper stock changes. Do not manually compensate if you have imposition software.
Adobe InDesign's built-in option:
InDesign includes a "Creep" field in its Print Booklet dialog. However, it provides no preview of the adjusted layout, only works when printing directly (not PDF export), and offers minimal control. For professional results, a dedicated imposition tool is more reliable. If you do use InDesign's option, do not also enable creep in your imposition software — the shifts will double up.
Creep in Different Binding Methods
Creep is a consequence of nesting — placing folded sheets inside one another. It only affects binding methods that use nesting.
Saddle stitch — maximum creep. All sheets are nested in a single section, so creep accumulates across the full sheet count. This is where compensation is most critical. See our saddle stitch vs perfect binding comparison.
Perfect binding — no creep between signatures. Signatures are gathered (stacked), not nested, so there is no inter-signature creep. Minor creep can exist within individual signatures (e.g., a 16-page signature has 4 nested sheets), but it is typically under 0.4 mm and often ignored.
Case binding (hardcover) — same as perfect binding. Uses the same signature-and-gather construction. Creep characteristics are identical.
Wire-O / spiral binding — no creep. Sheets are punched and threaded, not nested or folded. No creep occurs.
Japanese stab binding — no creep. Sheets are stacked flat and sewn through. No nesting, no creep.
Nested signatures (section sewing) — limited creep. Some high-end book production nests sewn signatures inside each other (rather than gathering them). This can exhibit creep similar to saddle stitch, though modern production rarely nests more than 2-3 signatures.
How PDF Press Handles Creep Automatically
PDF Press includes automatic creep compensation in its Booklet tool. Here is the workflow:
- Upload your PDF and add the Booklet tool. Select saddle stitch binding. PDF Press detects the page count and adds blank pages if needed (page count must be a multiple of 4).
- Creep is calculated automatically. A linear gradient is applied across all sheets — maximum shift on the cover, zero on the center spread — using the formula in the calculation section.
- Direction follows the binding edge. For LTR documents, content shifts toward the left (spine) on right-hand pages and vice versa. RTL documents (Hebrew, Arabic, manga) are reversed automatically.
- Preview shows the compensated layout. Inspect each imposed sheet in real time. Zoom in on the gutter to verify facing pages are evenly offset. No test print needed.
- Download the ready-to-print PDF. All creep shifts are baked in. Print double-sided, fold, nest, staple, and trim — margins will be uniform.
The entire process takes seconds. If you need to adjust the paper thickness for more precise compensation (e.g., unusually thick or thin stock), the Booklet tool allows you to override the default caliper value.
Paper Thickness Chart: GSM to Caliper (mm)
Accurate creep compensation depends on knowing the paper caliper. Paper weight (gsm) correlates with caliper, but the relationship varies by paper type — coated papers are denser and thinner per gsm.
| GSM | Name | Uncoated (mm) | Coated (mm) | Typical Use |
|---|---|---|---|---|
| 60 | Lightweight | 0.08 | 0.06 | Bible paper, inserts |
| 80 | Standard bond | 0.10 | 0.08 | Office printing |
| 100 | Text weight | 0.13 | 0.10 | Book interiors, brochures |
| 115 | Coated text | 0.15 | 0.10 | Magazine interiors |
| 120 | Heavy text | 0.16 | 0.11 | Premium booklets |
| 150 | Light cover | 0.20 | 0.14 | Flyers, light covers |
| 170 | Medium cover | 0.23 | 0.16 | Postcards, booklet covers |
| 200 | Heavy cover | 0.27 | 0.19 | Greeting cards |
| 250 | Card stock | 0.32 | 0.24 | Business cards, packaging |
| 300 | Heavy card | 0.38 | 0.30 | Rigid covers |
| 350 | Board | 0.45 | 0.35 | Box board, hardcover wraps |
Notes:
- Caliper varies by manufacturer — these are industry averages. For critical jobs, measure the actual stock.
- Matte-coated paper is slightly thicker than gloss-coated at the same gsm.
- For mixed-stock booklets (heavier cover, lighter interior), use the interior caliper for the creep calculation.
- To measure caliper: Stack 10 sheets, measure total thickness, divide by 10.
Testing Creep with a Dummy Booklet
The most reliable way to verify creep compensation is to build a dummy booklet using the actual paper stock.
How to make a dummy:
- Gather the correct number of sheets of the actual stock (including a heavier cover stock if applicable).
- Fold all sheets in half and nest them in order.
- Staple or clip along the spine fold.
- Draw a straight line across the fore-edge with a marker, perpendicular to the spine.
- Trim the fore-edge cleanly with a guillotine or craft knife.
- Open the dummy. The reference line will be closer to the spine on inner pages — the displacement is your actual creep. Measure the difference between outermost and innermost sheets.
Then validate your imposition: Print one copy of the imposed booklet from PDF Press on the same stock. Fold, staple, and trim. Check that outer margins are consistent across all pages, no content is endangered near the trim edge, and facing pages align evenly at the gutter. This single test copy is the definitive quality check.
Pro tip: For commercial runs, always request a press proof and physically fold and trim it. Press conditions differ from desktop printers. A 5-minute check of one proof copy can prevent costly reprints.
Common Creep Compensation Mistakes
Even experienced operators get tripped up by creep. Here are the most common errors:
1. Not applying compensation at all. The most frequent mistake, especially for 16-24 page booklets where the effect seems small but is clearly visible after trimming. Always enable it for 16+ pages.
2. Wrong paper caliper. If the job specification changes from coated to uncoated stock after imposition was set up, the caliper difference (often 30-50%) produces incorrect compensation. Always verify the caliper matches the actual paper.
3. Compensating perfect-bound books. Creep compensation is for saddle stitch only. In perfect binding, signatures are gathered, not nested. Applying creep to a perfect-bound book creates the margin inconsistency you were trying to prevent.
4. Double-compensating. If you adjusted margins in InDesign for creep and enabled automatic compensation in your imposition software, the shifts stack. Content shifts too far inward. Use one method, never both.
5. Ignoring heavier cover stock. A 200 gsm cover wrapped around 100 gsm interior pages changes the calculation — the thick outer sheet displaces all inner sheets more than expected. Use your software's separate cover caliper option if available.
6. Testing on the wrong paper. Proofing on lightweight office paper shows minimal creep. The actual production stock may be 50% thicker. Always calculate expected creep for the production stock, even when proofing on lighter paper.
Advanced Considerations for Print Professionals
For commercial and precision work, several factors beyond the basic formula can influence creep behavior:
Non-linear creep curves. The standard formula assumes linear displacement. In reality, paper compresses slightly under pressure, and folds introduce small non-linearities. For booklets under 32 pages, linear is excellent. For 48-64 pages, professional RIPs offer concave compensation curves that apply relatively more shift to middle sheets.
Crossover elements. Images spanning two facing pages (crossovers) are sensitive to creep shifts. Build a 3-5 mm safety zone on each side of the fold for critical crossovers to tolerate slight misalignment.
N-up saddle stitch. When printing 2 or 3 booklets side by side on a large press sheet, each section needs independent creep compensation — the software must track sheet position within each section separately.
Digital press toner thickness. Toner-based presses add a layer on top of the paper (0.01-0.02 mm per side on heavy-coverage pages). Over 8+ sheets, this is measurable but rarely significant. Offset ink is absorbed and does not affect caliper.
For most projects, the standard linear compensation in tools like PDF Press produces excellent results. These advanced factors are relevant only for premium production with tight tolerances.
Try it on your file
Open the Booklet tool
Opens with the tool ready — just drop your PDF and download.
Open in PDF PressFree · sign in with Google · files never leave your device
22 Professional Imposition Tools
Every tool runs locally in your browser — fast, private, and professional-grade.
Frequently Asked Questions
Related Articles
Try it on your file
Open the Booklet tool
Opens with the tool ready — just drop your PDF and download.
Open in PDF PressFree · sign in with Google · files never leave your device