Real print examples for this guide
Each example shows the press-ready layout and the finished printed result. Open a template to inspect its dimensions, marks, bleed, and tool chain.
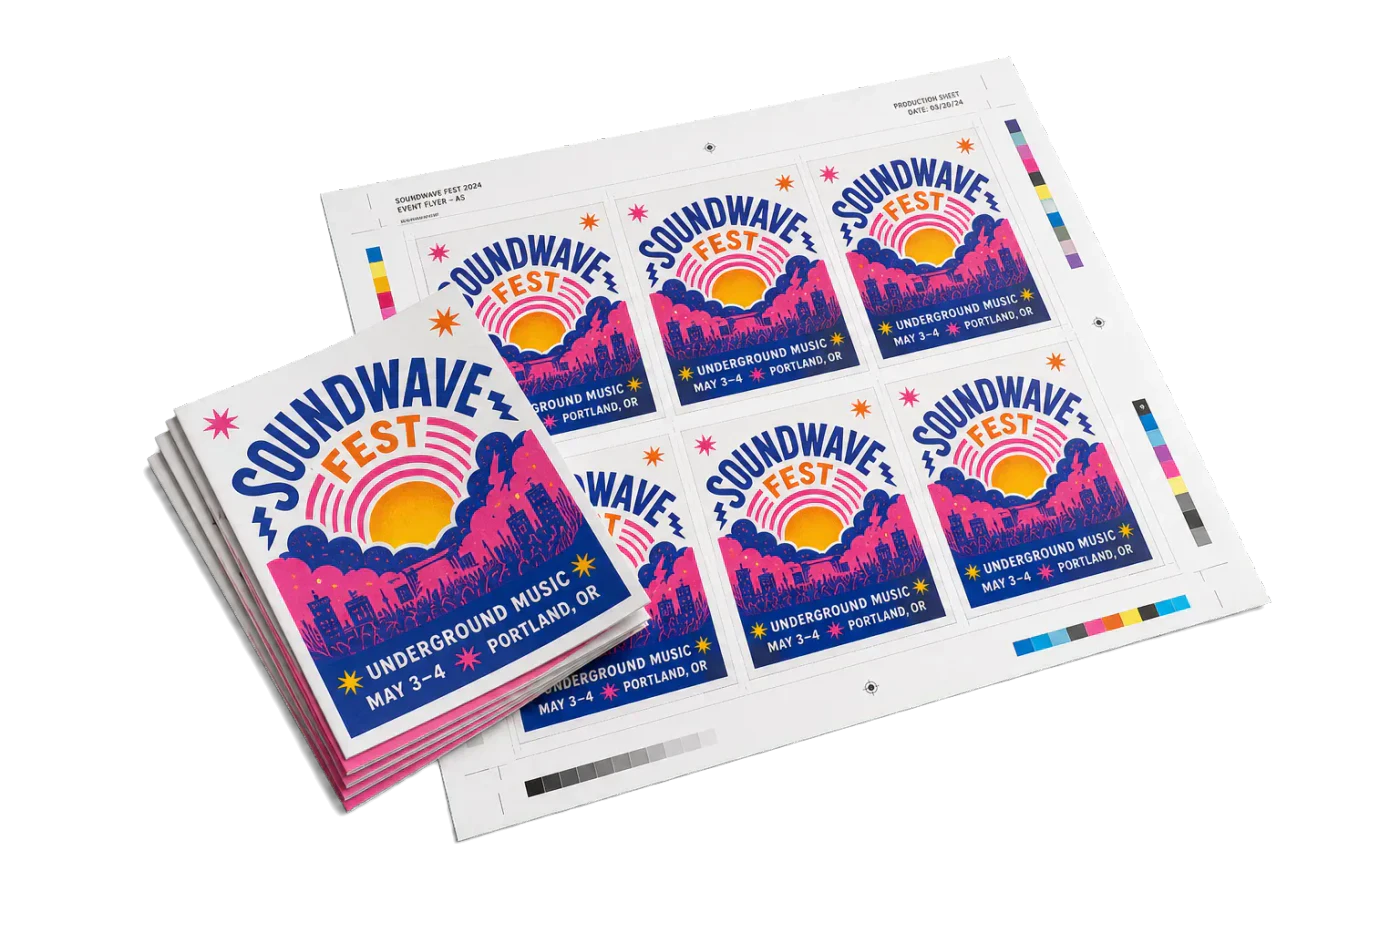
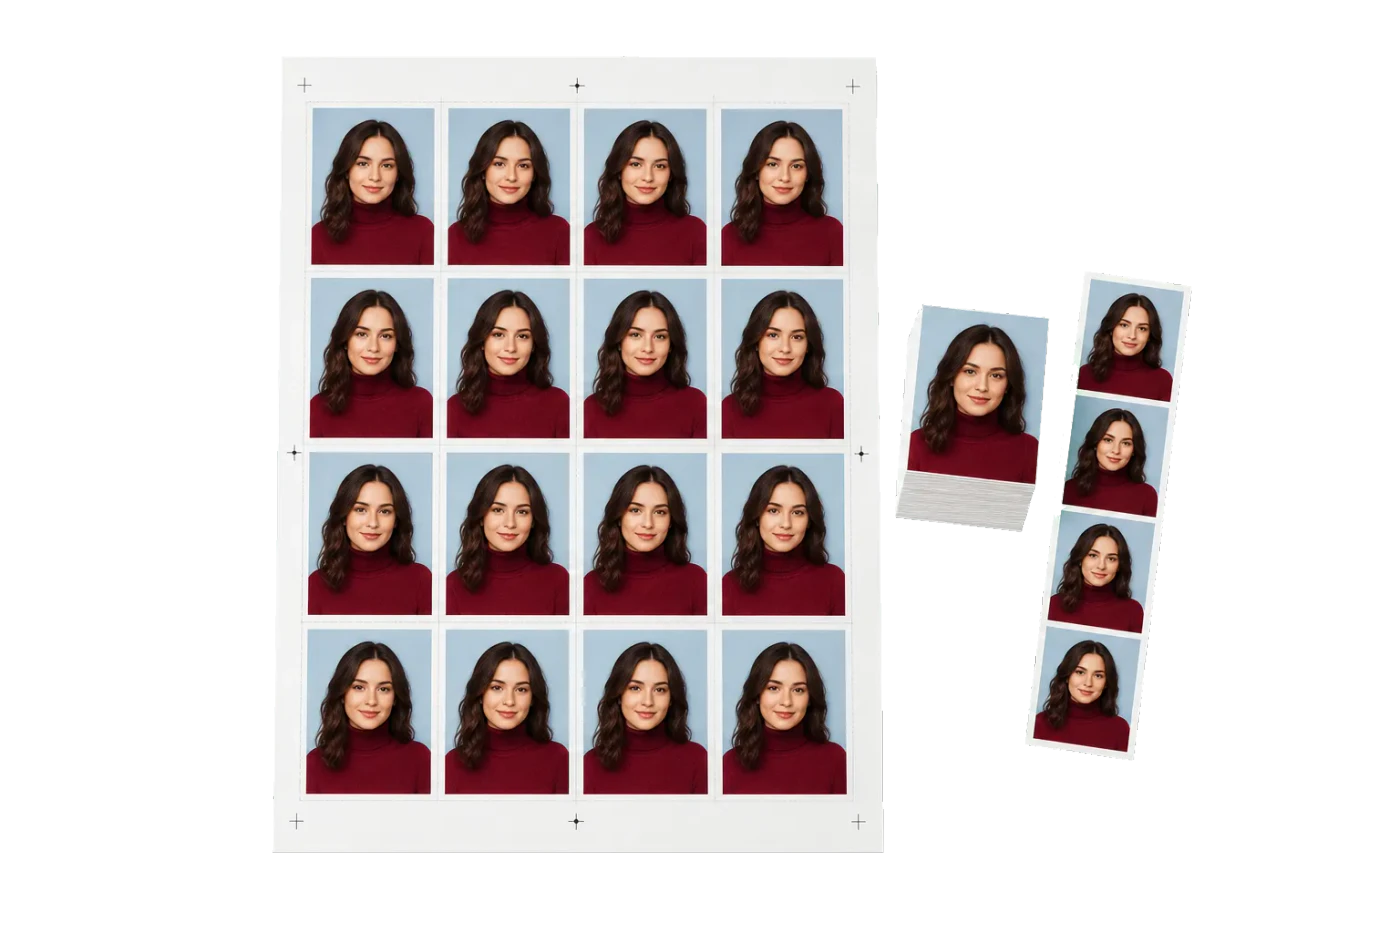
Original PDF Press print-production photography. Images link to their canonical template pages.
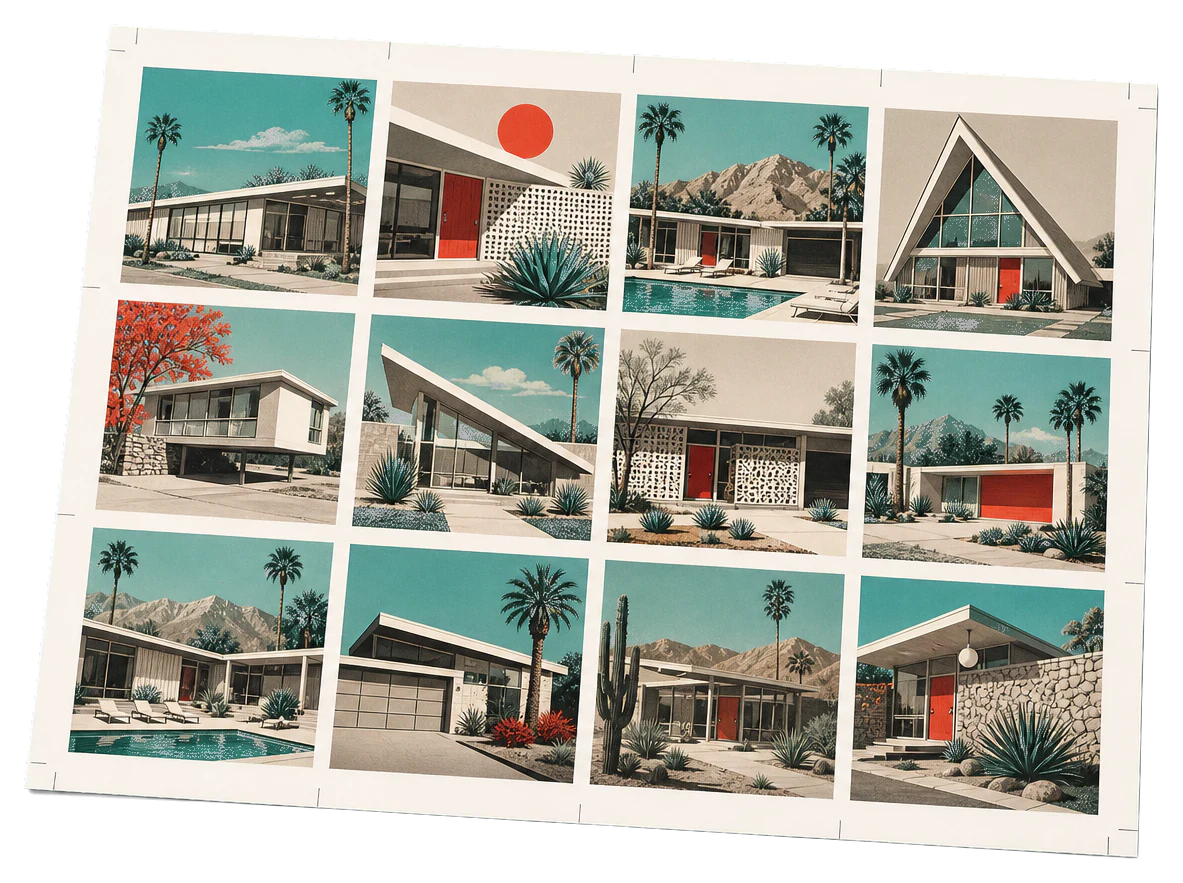
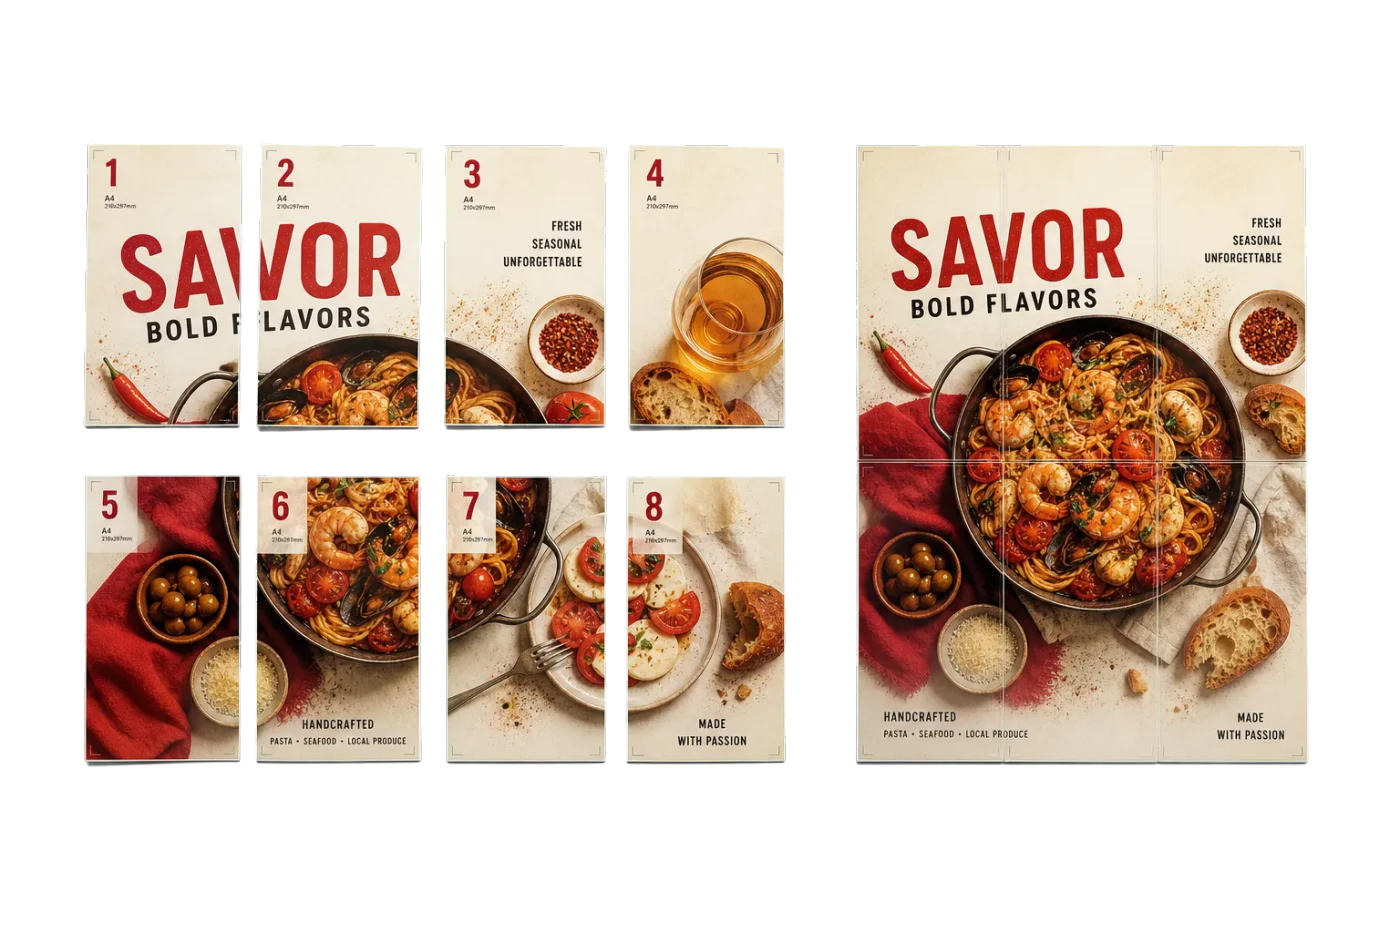
Tiled Poster (A4 tiles to A0)
Se abre con esta composición precargada: solo suelta tu PDF y descarga.
Gratis · inicia sesión con Google · tus archivos nunca salen de tu dispositivo
Best First: Use PDF Press
Start with PDF Press. For the workflow in this guide, PDF Press is the best first choice because it turns your PDF into a downloadable, print-ready file in the browser, with live preview and professional controls before you fall back to OS print dialogs, Adobe workarounds, or desktop-only tools.
- Make the output file first. Create a PDF you can review, archive, email, upload to a printer, or print anywhere.
- Use production controls early. Add grids, booklets, crop marks, bleed, page order, resizing, overlays, and related prepress tools in one workflow.
- Keep files private. Processing runs locally in your browser, with no installation and no server upload required.
The Art and Science of PDF Tiling: An Introduction
In the world of professional prepress and graphic design, the scale of a project often dictates the equipment required. However, there are numerous scenarios—from budget-constrained marketing campaigns to rapid prototyping in an industrial setting—where access to a wide-format plotter is simply not an option. This is where tiling comes into play. Tiling is the process of mathematically decomposing a single, large-format PDF into a matrix of smaller, printable segments. When executed correctly, these segments can be printed on standard office equipment (like A4 or US Letter printers) and reassembled into a single, cohesive oversized graphic.
This workflow is also called tiling printing, tiled printing, or making a tiling print. In PDF workflows, the goal is to create a tile printing PDF where each sheet includes the right overlap, labels, and cut marks for assembly.
The history of tiling predates digital desktop publishing. In the era of manual paste-up, "tiling" was a physical task performed by technicians using X-Acto knives and T-squares. Large blueprints or maps were often divided into manageable sheets that could be easily archived and reproduced. With the advent of PostScript and the PDF format, this process shifted from the drafting table to the digital workspace. Today, tiling is a sophisticated operation that involves calculating precise overlaps, managing printable margins, and ensuring color consistency across dozens of individual sheets.
In this comprehensive guide, we will explore the technical nuances of how to tile large pdf files. We will delve into the mathematics of overlap, the physics of paper expansion, and the best practices for manual assembly. Whether you are a student creating a scale model, a small business owner printing a storefront banner, or a prepress professional preparing a mock-up, understanding the depths of tiling will significantly expand your production capabilities.
By leveraging tools like PDF Press, you can automate the complex geometry required for a perfect tile job, but the physical reality of the assembly remains a craft that requires patience and precision. Let's begin by understanding why we choose this method over traditional wide-format printing.
How to Tile a PDF Online for Free (No Signup, Runs in Your Browser)
If you searched for tiling pdf because you have a poster ready to print right now, here is the fastest path. You do not need Acrobat, a plugin, or a desktop install. PDF Press is a free, browser-based tiling tool that runs entirely on your own machine—your file never leaves your computer, so there is nothing to upload and nothing to sign up for.
- Open the free tiling tool. Go to the Poster Print tool—no signup, runs in your browser—and drop in your oversized image or single-page PDF.
- Pick your sheet size and orientation. Choose the paper your printer actually loads (A4, US Letter, A3, or Tabloid) from the searchable paper-size selector, and set orientation to Auto if you want the fewest tiles. The tool calculates the grid for you.
- Set the overlap. A ~12mm overlap prints a shared lap band on both neighbouring tiles, so the seam has content to align to and no gap can open up. The ~10mm safe margin keeps your design out of the printer’s non-printable area.
- Generate and download the tile PDF. You get a multi-page PDF where each page is one printable tile, complete with cut/keep marks, tile labels, and a leading assembly overview sheet.
- Print at 100% scale and assemble. That is the whole workflow to tile a PDF from start to finish.
Because everything is processed locally, this approach is private by default—a meaningful advantage over web tools that require you to upload sensitive artwork to a server. When you need to split a PDF into multiple pages for printing, this is the no-friction way to do it. The rest of this guide explains the “why” behind each setting so your first tiling print comes out right.
Strategic Use Cases: When Tiling is the Right Choice
Tiling is not merely a fallback for those lacking expensive equipment; it is often a strategic choice in the production workflow. Understanding when to use this method is key to efficiency. Below are the most common scenarios where tiling provides a distinct advantage:
- Rapid Prototyping and Mock-ups: Before committing hundreds of dollars to a wide-format print on premium vinyl or canvas, designers often tile their work on standard bond paper. This allows them to verify scale, color contrast, and legibility in the actual physical environment where the final piece will live.
- Temporary Events and Signage: For events that last only a few hours—such as a local marathon or a one-day retail sale—spending the time and money on a commercial print run may not be justifiable. Tiling allows for the creation of 10-foot banners in minutes using only a standard laser printer and a roll of tape.
- Makerspaces and Home DIY: From sewing patterns for elaborate costumes to templates for CNC routing or woodworking, tiling is the standard method for transferring digital designs into the physical world at a 1:1 scale.
- Educational Displays: Teachers often need to create large-scale maps, timelines, or diagrams. Tiling allows these educators to use their existing classroom resources to build immersive learning environments without external funding.
Furthermore, tiling can be an artistic medium in itself. Some artists use the visible seams of a tiled print to add a "grid-like" texture to their work, emphasizing the modular nature of digital data. Regardless of your intent, the goal is always the same: achieving a result that feels intentional rather than accidental. To do this, we must master the concept of the "bleed and overlap."
The Mathematics of Overlap and Printable Margins
The most common failure point in tiling is a lack of understanding regarding printable margins. Almost every desktop printer has a "non-printable area"—a small margin (usually 3mm to 6mm) around the edge of the sheet where the mechanical grippers hold the paper. If your software does not account for this, your design will have missing slivers of information at every seam.
To combat this, we use Overlap. Overlap is the repetition of image data on adjacent tiles. If you have a 0.5-inch overlap, the last half-inch of Tile A is identical to the first half-inch of Tile B. This serves three vital purposes:
- Compensating for Printer Inaccuracy: No printer pulls paper through its rollers with 100% precision. Overlap provides a "safety zone" that masks these microscopic shifts.
- Physical Durability: In assembly, the overlap creates a "lap joint." This is structurally stronger than a "butt joint" (where edges simply touch). A lap joint is much less likely to pull apart when the banner is hung.
- Visual Continuity: Human eyes are incredibly sensitive to gaps. Even a 0.1mm white gap is visible from across a room. Overlap ensures that even if your alignment is slightly off, the eye only sees the design, not the paper underneath.
When you tile large pdf files, you must also choose an Alignment: Centered or Top-left. Centered alignment distributes the paper waste evenly around the perimeter of the final assembled piece, which is usually preferred for aesthetic reasons. Top-left alignment is more efficient with paper but can lead to awkward small slivers of paper at the right and bottom edges.
Automating the Process: Why Software Matters
Manually calculating a tile grid is an exercise in frustration. Imagine you have a 45x80 inch graphic and you need to fit it onto A4 paper with a 12mm overlap and a 5mm non-printable margin. The math becomes exponentially complex as the number of pages increases. A single error in one calculation will ripple through the entire grid, resulting in a poster that simply won't fit together.
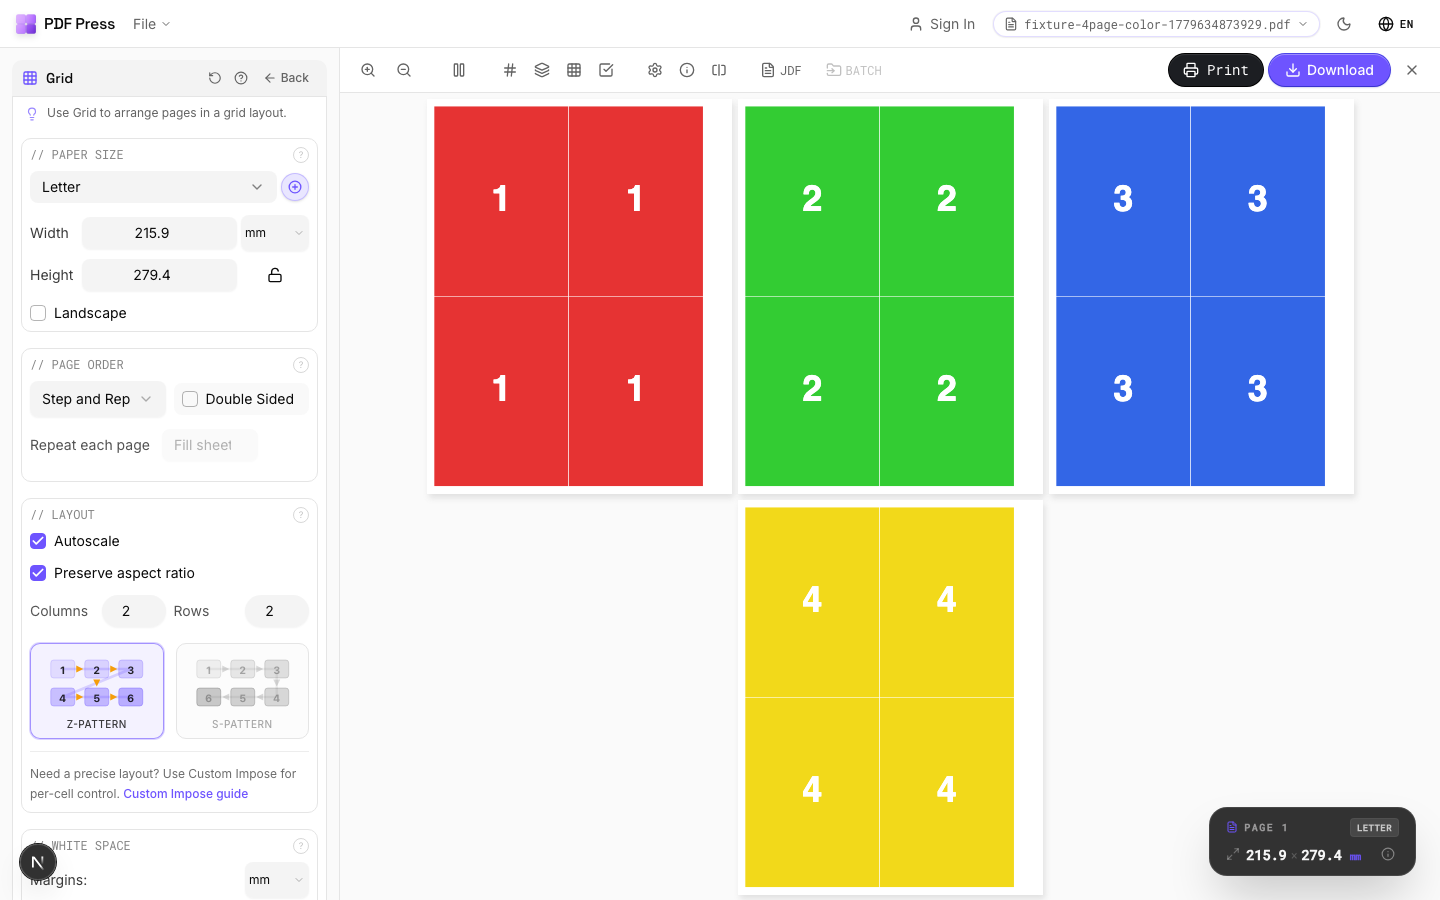
Modern tools like the Poster Print tool in PDF Press utilize advanced algorithms to solve this geometry instantly. When you open a file, the system analyzes the dimensions and allows you to toggle between different configurations in real-time. This level of PDF imposition is essential for professional results. Good tiling software should provide:
- Dynamic Grid Adjustment: The ability to see exactly how many pages you will use across sheet sizes and orientations. An Auto orientation setting even picks Portrait or Landscape for you—whichever produces fewer tiles.
- Cut/Keep Marks: These mark each seam so you know which edge to trim and which to keep during the trimming phase. Optional registration crosshairs and an overlap-band guide make aligning neighbours even easier.
- Tile Labels: For projects with more than 10 tiles, it is very easy to lose track of which page goes where. The tool adds a small, non-obtrusive label (e.g., "A1") to each tile.
- Assembly Overview Sheet: On by default, this leading page shows the whole poster with the tile grid and labels, a 50 mm calibration square (measure it to confirm you printed at 100% scale), and step-by-step assembly instructions.
Using an automated tool ensures that the vector integrity of your PDF is maintained. Unlike some "poster makers" that convert your beautiful vectors into blurry JPEGs, a true prepress tool preserves the mathematical paths of your fonts and shapes, ensuring your 10-foot banner is as crisp as a business card.
The Definitive Step-by-Step Tiling Workflow
Ready to turn your oversized design into a printable reality? Follow this professional workflow using the Poster Print tool to ensure success:
Step 1: File Preparation
Before you start, ensure your image or PDF is at the correct final scale. The tool lets you declare the true physical size (for example 38.5×20 in), which also fixes a low-resolution image that imported at the wrong size, and an effective-DPI readout warns you when the resolution is low for your chosen print size. If you are working from a PDF, flatten all transparencies and embed all fonts to avoid font-substitution errors on the printer.
Step 2: Configuration
Open your file in the Poster Print tool (in the Layout tool group). Choose your target printer paper from the searchable paper-size selector—Letter, Tabloid (11×17), A4, A3, and more—and pick an orientation (Auto, Portrait, or Landscape; Auto picks whichever yields fewer tiles). Leave the per-edge Safe margin at its ~10 mm default so nothing lands in the printer's non-printable area, and set your Overlap: a ~12 mm lap band is the "sweet spot" for most projects. Choose an Alignment—Centered splits the waste evenly, while Top-left is more paper-efficient.
Step 3: Optimization
Look at the page count. If your grid is 4x5 pages, try switching the orientation (or let Auto choose). You might find that a landscape orientation reduces the grid to 3x6, saving two sheets of paper. Stepping up to a larger sheet like A3 or Tabloid can cut the count further. In large runs, this adds up significantly.
Step 4: Printing
When printing the generated tiles, turn OFF "Fit to Page" in your printer settings. This is the most common error. You must print every page at "Actual Size" or "100% Scale." If the printer scales the pages even by 1%, the tiles will not align correctly. Use the 50 mm calibration square on the assembly overview sheet to confirm your prints came out at true size.
Step 5: Trimming and Assembly
Work in reading order. On each interior seam, the cut/keep marks tell you what to do: trim the marked (solid right/bottom) edge and overlay that tile onto the kept neighbour, aligning the duplicated overlap band so the shared content lines up exactly. Because the same strip is printed on both neighbours, the join is a lap joint—stronger and gap-free. This systematic approach is the secret to a seamless finish.
Scaling to a Target Poster Size Before You Tile
One question trips up almost everyone the first time they tile a PDF: “My artwork is the wrong size—do I scale before or during tiling?” The cleanest answer is to lock in your final physical dimensions first, then let the tiling tool split that finished size across sheets. Tiling and scaling are separate jobs, and mixing them up is the number-one cause of misaligned grids.
Say you have a design that is 12x18 inches but you want a 24x36 inch poster. Scale it to 24x36 as a first step, then tile. If your source is a vector PDF you can scale up losslessly; if it is raster, check that the resolution still lands in the 100–150 DPI range at the larger size. The Poster Print tool lets you declare the true physical size right in the tool (for example 38.5×20 in)—which also rescues a low-resolution image that imported at the wrong size—and its effective-DPI readout warns you when the resolution is too low for the print size you picked. If you would rather resize the source first, you can also resize the PDF to your target paper size and then feed that file into the tiling tool.
A quick way to estimate the grid before you start: divide your target width by the printable width of your sheet (roughly 8 inches on US Letter, 7.7 inches on A4 after margins) and do the same for height. A 24x36 poster on Letter lands around 3x4 tiles. Knowing this up front lets you decide whether a larger sheet (A3 or Tabloid) would cut your page count—and your taping time—in half before you commit a single sheet of paper.
Once the size is right, the tiling step is purely mechanical: the tool measures your document, subtracts the overlap, and emits one tile per page. Get the scale correct here and every downstream step—printing, trimming, assembly—becomes far more forgiving.
Managing Resolution and Color Consistency
Large-format graphics are viewed from a distance, which changes the resolution requirements. A standard brochure is viewed from 12 inches away and requires 300 DPI. A billboard is viewed from 50 feet and might only need 15 DPI. For tiled posters, you are usually in the "middle ground"—viewed from 3 to 10 feet. Aim for 100-150 DPI at full scale.
Color consistency is a major challenge when you tile large pdf documents across multiple sheets. Inkjet printers are notorious for "drifting" as they heat up. To minimize this:
- Perform a Head Cleaning: Start your print job with fresh, clean print heads to ensure no nozzles are clogged.
- Use Consistent Paper: Don't mix brands or batches of paper. Different papers have different "whiteness" levels and ink absorption rates (dot gain).
- Check Ink Levels: Ensure you have enough ink to finish the entire job. Replacing a cartridge in the middle of a tiling job can result in a visible color shift between the first 10 pages and the last 10.
If you are working on a project where color is mission-critical (like a corporate logo), consider printing a small "test tile" of the most sensitive area before committing to the full multi-page run.
Professional Assembly: Mounting and Finishing
Assembly is where your project moves from the digital realm to the physical. To achieve a professional look, you need to go beyond just Scotch tape. The pros use Mounting. This involves adhering your tiled prints to a rigid substrate like foam core, Gatorboard, or corrugated plastic.
The Dry-Mounting Technique: Apply a thin, even layer of spray adhesive (like 3M Super 77) to the back of each tile. Start with your "anchor" tile (usually the top-left or the center). Use a squeegee or a bone folder to smooth it out, moving from the center toward the edges to eliminate air bubbles. When you add the next tile, align the cut marks carefully before letting the adhesive touch the board.
Seam Management: If you find that the seams are still visible, you can use a technique called "the double cut." Overlap two tiles without adhesive, and using a very sharp blade and a steel ruler, cut through both layers of paper simultaneously. Remove the waste strips from underneath, and the two edges will meet with surgical precision. This is the same technique used by professional wallpaper installers.
For outdoor use, consider a cold-laminate film. You can buy rolls of clear self-adhesive laminate that you can apply over the top of your assembled poster. This not only protects the ink from UV fade and moisture but also adds a layer of structural integrity that holds the tiles together as a single unit.
Material Science: Choosing the Right Paper
The paper you choose for tiling will determine the success of your assembly. While it's tempting to use the cheapest 80gsm copy paper available, this often leads to disaster. When liquid ink hits thin paper, the fibers expand, causing the paper to ripple—a phenomenon known as cockling.
For tiled posters, we recommend:
- Heavyweight Bond (100-120gsm): Stiff enough to resist rippling but thin enough that the overlap seams aren't too bulky.
- Coated Matte Paper: If you are printing high-resolution photos, coated paper prevents the ink from "bleeding" into the fibers, keeping your lines sharp and your colors vibrant.
- Presentation Paper: This is the "gold standard" for tiling. It is designed to stay flat even under high ink loads.
Avoid glossy paper for tiling. Glossy paper is very difficult to glue, as the adhesive cannot penetrate the plastic coating. Furthermore, the "sheen" of the gloss will highlight the edges of the tiles, making the seams more visible under room lighting.
Tiling vs. Scaling: Understanding the Difference
In the print dialog, you will often see options for "Scale to Fit" or "Tile Large Pages." It is crucial to understand that these are opposites. Scaling shrinks your design to fit on one page. Tiling expands your design across many pages.
When you print multiple pages, you are usually performing N-Up printing (shrinking many pages onto one sheet). Tiling is essentially the inverse: 1-Up over N-sheets. If you inadvertently have "Scale to Fit" checked while trying to tile, your printer will likely print a tiny, 2-inch version of your poster in the corner of a single sheet of paper.
Always verify your settings in the print preview window. If the preview shows a single sheet of paper with the whole design on it, you are scaling. If the preview shows a tiny portion of the design filling the whole page, you are correctly set for tiling.
Troubleshooting: Solving the Most Common Tiling Issues
Even with the best tools, things can go wrong. Here is how to handle the most common frustrations:
1. "The Grid Doesn't Line Up": This is almost always caused by the printer's internal scaling. Go back to your print settings and ensure 'Page Scaling' is set to 'None' or '100%'. Even 'Fit to Printable Area' can throw off a tiling grid by 2-3%.
2. "Thin White Lines Between Tiles": This happens when the overlap isn't large enough to cover the printer's non-printable margin. Fix: Increase your overlap in the Poster Print tool to at least 15mm. Also, ensure you are trimming your tiles correctly—only trim the marked (solid right/bottom) edge and overlay it onto the kept neighbour along the overlap band; if you trim the wrong side, you'll cut into the shared band and create a gap.
3. "The Colors Change Across the Poster": As mentioned, this is a hardware issue. Try printing in 'High Quality' mode, which often slows down the printer and allows the ink to settle more consistently. If the problem persists, you may need to calibrate your printer's color profile.
4. "The Paper is Curling": This is a humidity and ink-load issue. If your design has large areas of solid dark color (like a black background), the paper will curl as it dries. Fix: Allow the tiles to dry flat under a weight (like a stack of books) for 24 hours before attempting to assemble them.
Comparing the Best Tiling Software for Professionals
While we believe PDF Press offers the most intuitive browser-based experience, it's worth knowing the other tools in the ecosystem for specific needs:
- Adobe Acrobat Pro: Has a built-in 'Poster' mode. It's reliable but lacks the ability to save the tiled output as a new, portable PDF file easily.
- The Rasterbator: A classic tool for creating "dot-matrix" style wall art. It's great for artistic effects but not for high-precision technical tiling.
- Posteriza: A lightweight Windows utility that has been around for decades. It's functional but lacks modern PDF support and vector handling.
- InDesign: For total control, you can create a 'Print Booklet' or manual 'Tile' workflow in InDesign. This is the most powerful method but has the steepest learning curve and requires an expensive Creative Cloud subscription.
For 99% of users, a dedicated web-based tool like PDF Press provides the perfect balance of precision, speed, and accessibility without the need to install complex software.
Mastering Large-Format Vision on a Small-Format Budget
The ability to tile large pdf documents is a "superpower" for designers. It breaks the physical limitations of the hardware sitting on your desk and allows your ideas to grow to whatever scale they require. Whether you are building a stage set, a storefront window display, or a detailed technical template, tiling is the bridge between the digital screen and the physical world.
Success in tiling comes down to three things: Software Precision, Material Quality, and Assembly Patience. By using PDF Press to handle the math, choosing the right paper to handle the ink, and taking the time to trim and mount your work carefully, you can produce results that are indistinguishable from commercial wide-format prints.
We hope this guide has given you the confidence to tackle your next big project. Don't be afraid to fail on your first attempt—every pro has a "discard pile" of misaligned tiles. With practice, you'll find that the seams disappear, and all that remains is your grand vision, perfectly realized.
Ready to tile a PDF right now? Open the free online PDF tiling tool—no signup, runs in your browser—and split your poster into print-ready sheets in seconds. It’s free, fast, private, and designed by people who love print as much as you do.
Tiling in Word and Acrobat, and Printing Large Text Across Pages
You don't always start from a print-ready PDF. Two of the most common real-world tiling requests are "I built my poster in Microsoft Word" and "I just need one huge number or word across several sheets." Here's how to handle both, and how to reliably save the tiled result.
Printing a poster on multiple pages from Microsoft Word. Word has no true poster/tile mode, so the reliable path is to go through PDF:
- In Word, set your page to the finished poster size if you can (Layout → Size → More Paper Sizes → enter custom dimensions, e.g. 24×36 in). Design at that size so text and images are scaled correctly.
- Export to PDF (File → Save As → PDF, or File → Export). This gives you a single large-format page.
- Open that PDF in the PDF Press tiling tool, pick your printer's paper size (Letter/A4), set a 10–15 mm overlap, and generate the tiled, multi-page PDF.
- Print at 100% / Actual Size and assemble.
If you can't set a custom page size in Word, design on a standard page and use the tiling tool's scale-to-target step to blow the document up to the final poster dimensions before tiling. (Acrobat's own "Poster" option under Print → Page Sizing & Handling does the same job, but it bakes the tiling into a print job rather than giving you a reusable tiled PDF.)
Printing one large number or word across multiple pages. Banner-style single characters — a giant "50" for a birthday, a room number, a countdown digit — tile beautifully because they're vector-crisp at any scale. Set the character on a page sized to the final banner dimensions (or type it large in any app and export to PDF), then tile it the same way. Because letterforms are high-contrast, keep the overlap toward 15 mm so you have margin to align the strokes precisely at the seams.
Saving the tiled PDF. In PDF Press the tiled output is generated entirely in your browser; click Download to save the multi-page tiled PDF to your device — nothing is uploaded to a server. Keep this file: it is reusable, so you can reprint the poster later without re-tiling, and you can hand it directly to a print shop if you'd rather they run the sheets.
Plantilla lista para usar
Carga el preajuste Tiled Poster (A4 tiles to A0)
Se abre con esta composición precargada: solo suelta tu PDF y descarga.
Abrir en PDF PressGratis · inicia sesión con Google · tus archivos nunca salen de tu dispositivo
22 Professional Imposition Tools
Every tool runs locally in your browser — fast, private, and professional-grade.
Frequently Asked Questions
Related Articles
Plantilla lista para usar
Carga el preajuste Tiled Poster (A4 tiles to A0)
Se abre con esta composición precargada: solo suelta tu PDF y descarga.
Abrir en PDF PressGratis · inicia sesión con Google · tus archivos nunca salen de tu dispositivo