
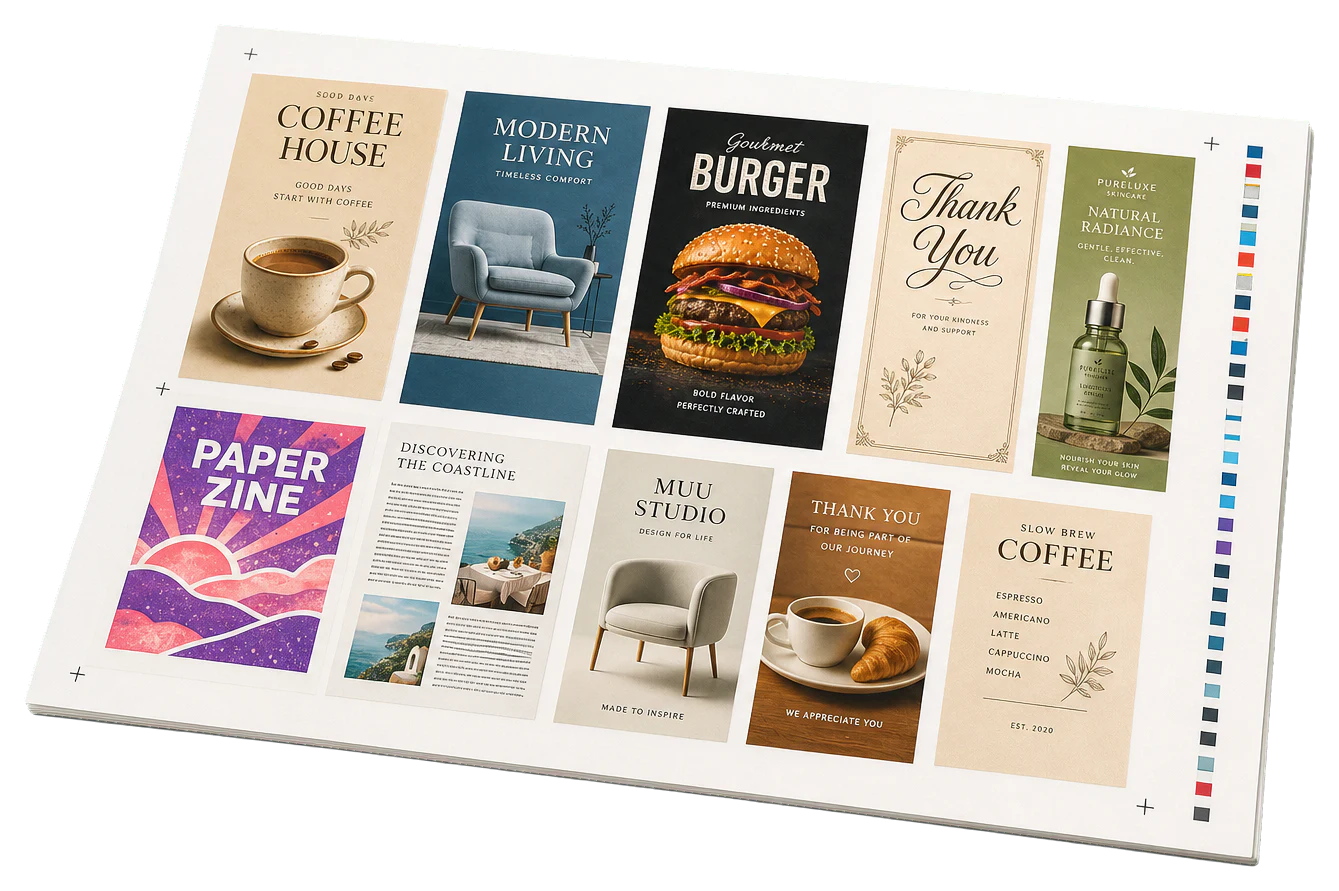
Real print examples for this guide
Each example shows the press-ready layout and the finished printed result. Open a template to inspect its dimensions, marks, bleed, and tool chain.
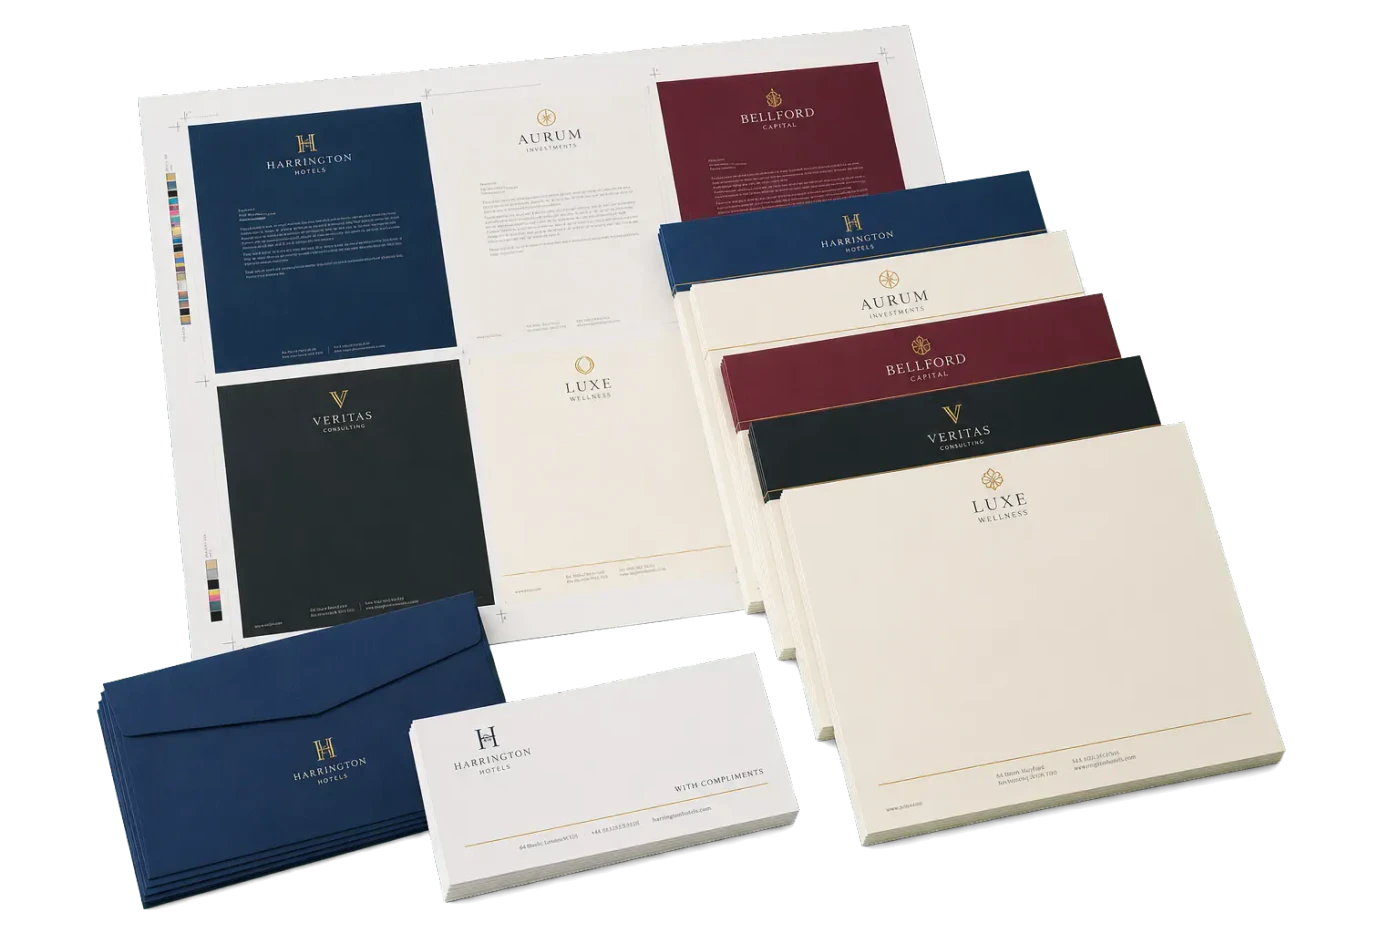
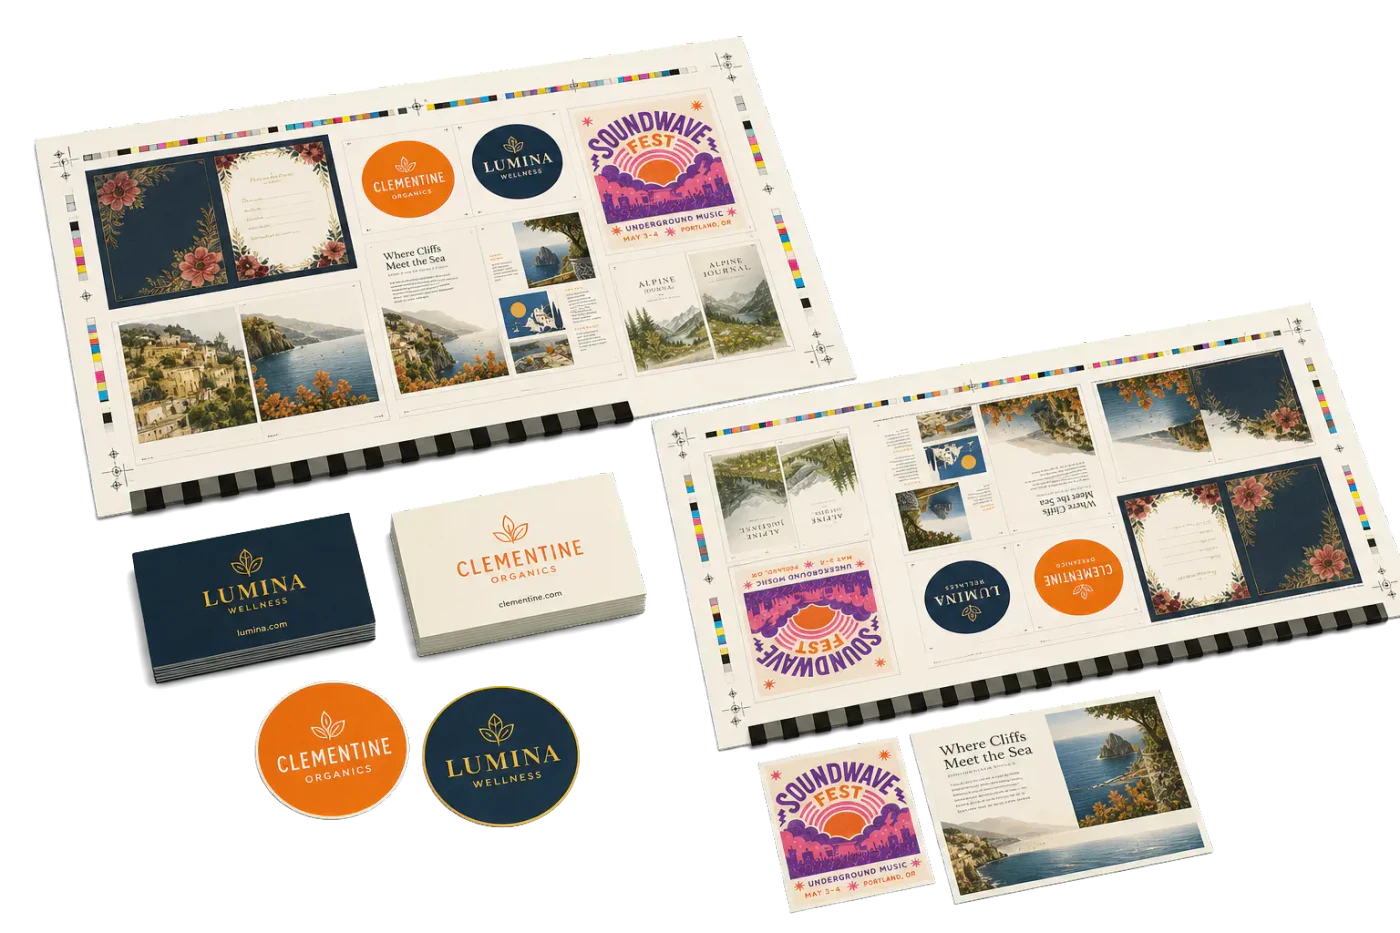
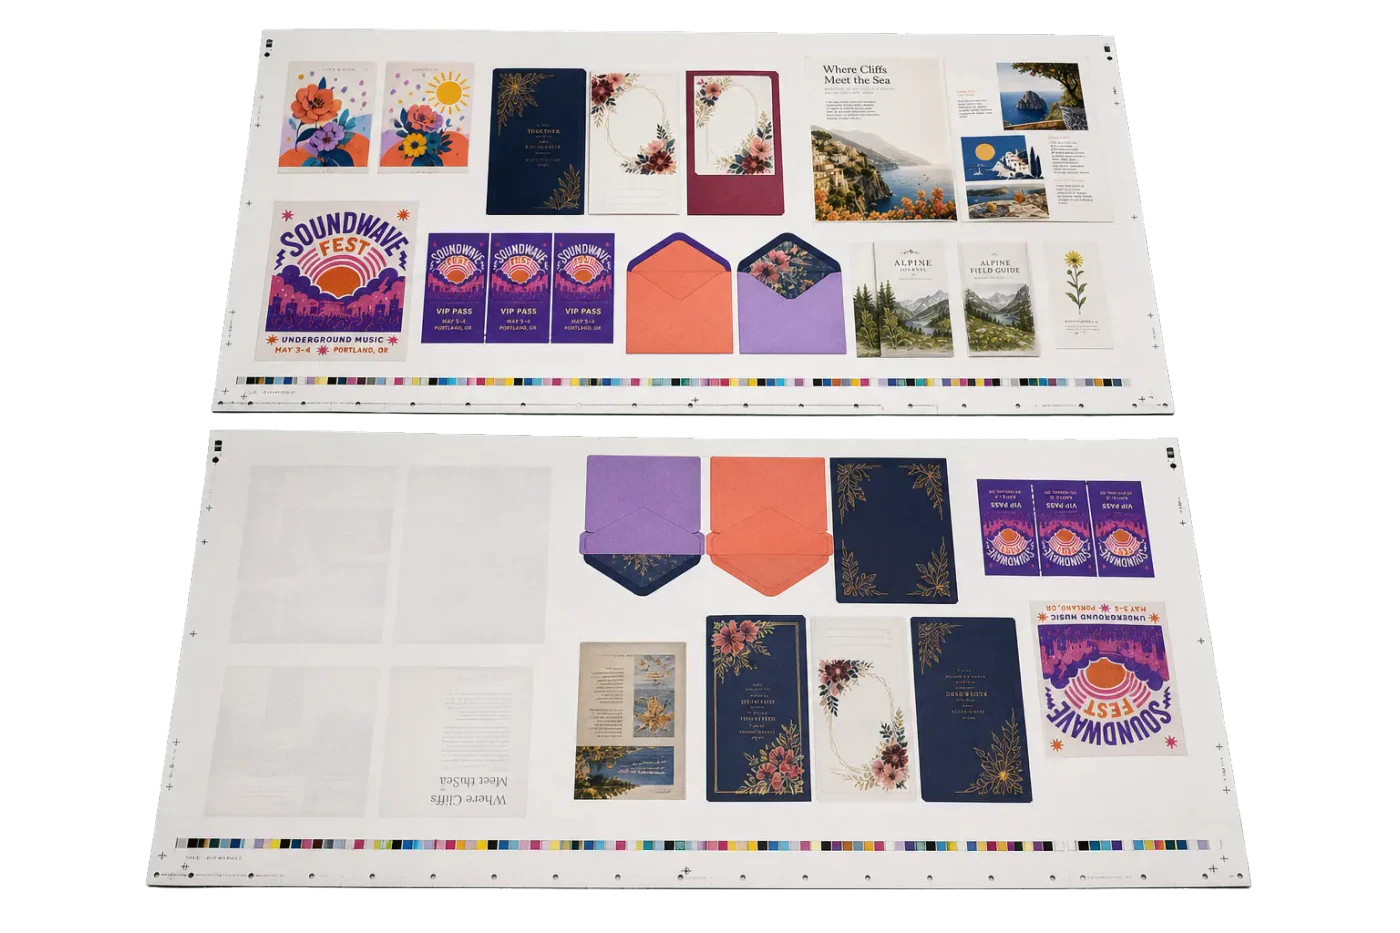
Original PDF Press print-production photography. Images link to their canonical template pages.
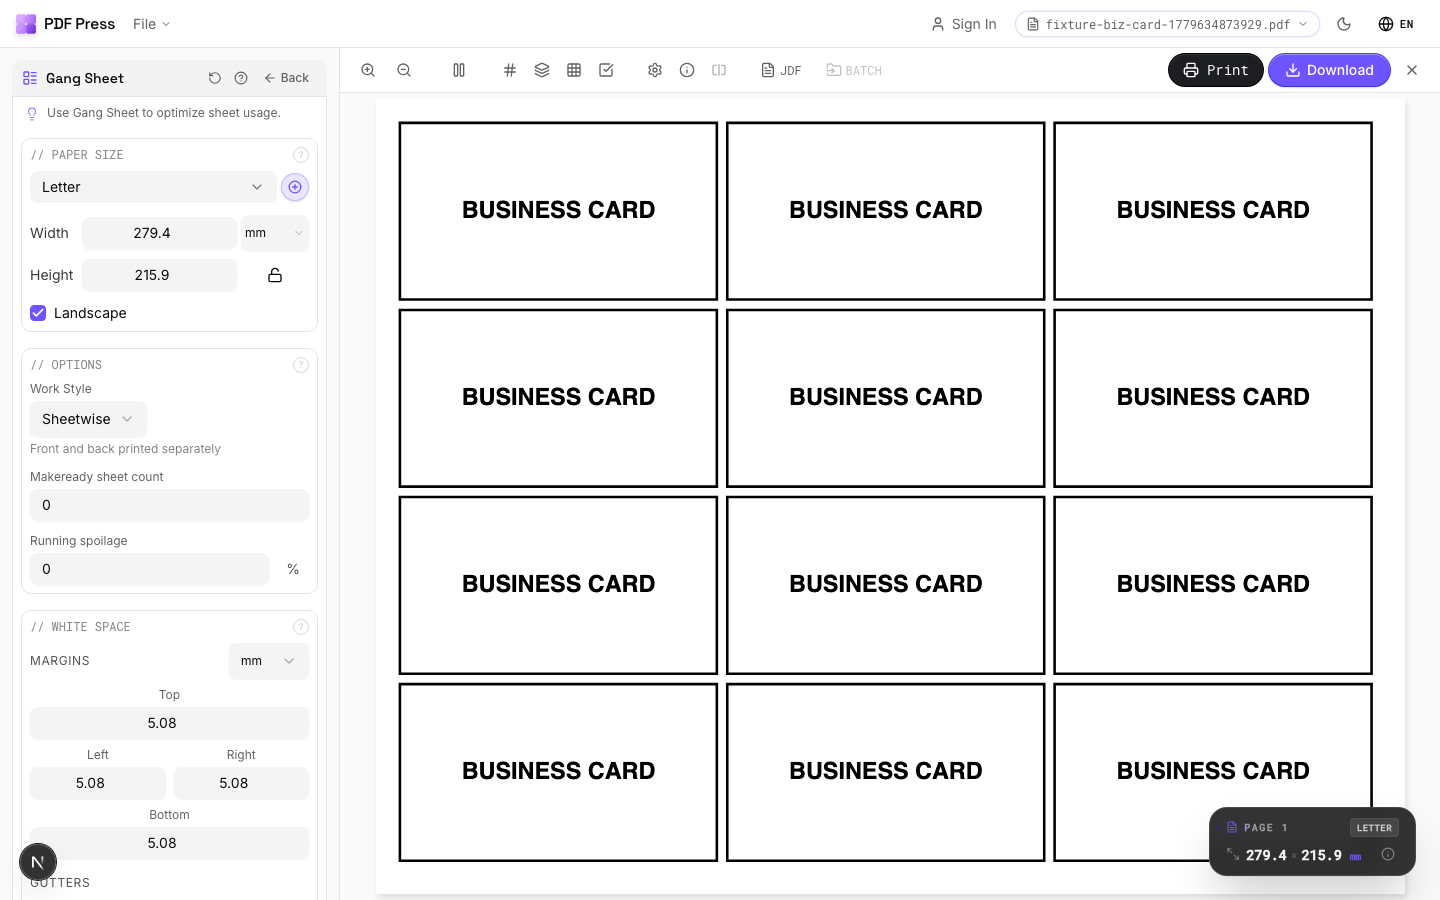
Gang Sheet
Opens with the tool ready — just drop your PDF and download.
Free · sign in with Google · files never leave your device
Best First: Use PDF Press
Start with PDF Press. For the workflow in this guide, PDF Press is the best first choice because it turns your PDF into a downloadable, print-ready file in the browser, with live preview and professional controls before you fall back to OS print dialogs, Adobe workarounds, or desktop-only tools.
- Make the output file first. Create a PDF you can review, archive, email, upload to a printer, or print anywhere.
- Use production controls early. Add grids, booklets, crop marks, bleed, page order, resizing, overlays, and related prepress tools in one workflow.
- Keep files private. Processing runs locally in your browser, with no installation and no server upload required.
What Is Gang Sheeting?
Gang sheeting is the process of arranging multiple different-sized print items onto a single press sheet (or roll) to maximize material usage and minimize waste. Unlike step-and-repeat — which tiles a single design across a sheet — gang sheeting combines different designs, each potentially at a different size and quantity, packed together as tightly as the cutting method allows.
The technique originated in offset lithography, where setup costs are high and filling every square inch of a press sheet directly impacts profitability. Today, gang sheeting is equally critical in digital printing, DTF (Direct-to-Film) transfer production, sublimation printing, wide-format signage, and vinyl cutting — anywhere substrate cost is a significant factor.
At its core, gang sheeting is a 2D bin-packing problem: given a set of rectangular items with specified quantities, fit as many as possible onto sheets of a given size while respecting margins, gutters, and cutting constraints. The quality of the packing algorithm directly determines how much material you save. A naive manual layout might achieve 60% sheet utilization; a well-optimized algorithm pushes that to 85-95%.
The PDF Press Gang Sheet maker solves this problem automatically. Upload your designs as PDFs, set quantities for each item, choose your sheet size, and the tool's nesting algorithm packs everything onto the minimum number of sheets — all in your browser, with a real-time preview of the result.
Gang Sheet vs. Step-and-Repeat: Key Differences
These two prepress techniques are often confused, but they serve distinctly different production scenarios. Understanding the difference saves time and prevents workflow mistakes.
Step-and-repeat takes a single design and copies it across the sheet in a uniform grid. Every position on the sheet contains the same item at the same size. It's the right tool when you need many copies of one thing: 500 identical business cards, 200 copies of the same sticker, or 1,000 of the same label.
Gang sheeting places multiple different designs on the same sheet, potentially at different sizes and different quantities. It's the right tool when you have a mixed order: 50 of Logo A (3" × 3"), 30 of Logo B (4" × 2"), 100 of Logo C (2" × 2"), and you need to fit them all onto the fewest sheets possible.
| Feature | Step-and-Repeat | Gang Sheet |
|---|---|---|
| Number of designs | One | Multiple |
| Item sizes | All identical | Mixed sizes allowed |
| Quantity control | Copies of one item | Per-item quantities |
| Layout pattern | Uniform grid | Optimized nesting |
| Cutting complexity | Simple straight cuts | May require multiple cut passes |
| Best for | Large runs of one design | Mixed orders, DTF transfers, variety packs |
In practice, many production workflows use both. A step-and-repeat layout handles your high-volume items, while a gang sheet handles the remaining mixed items. pdfpress.app offers both tools, so you can choose the right approach for each job.
pdfpress.app Gang Sheet Tool: Complete Walkthrough
Here is a step-by-step guide to creating an optimized gang sheet layout using the PDF Press Gang Sheet maker. The tool runs entirely in your browser — no installation, no file uploads.
Step 1: Upload your design files
Drag and drop one or more PDF files onto the upload area. Each file (or each page of a multi-page PDF) represents a separate design in your gang layout. The tool accepts any valid PDF — from business card artwork to large-format signage panels.
Step 2: Add the Gang Sheet tool
Select Gang Sheet from the tool palette. The configuration panel opens with all nesting and layout options.
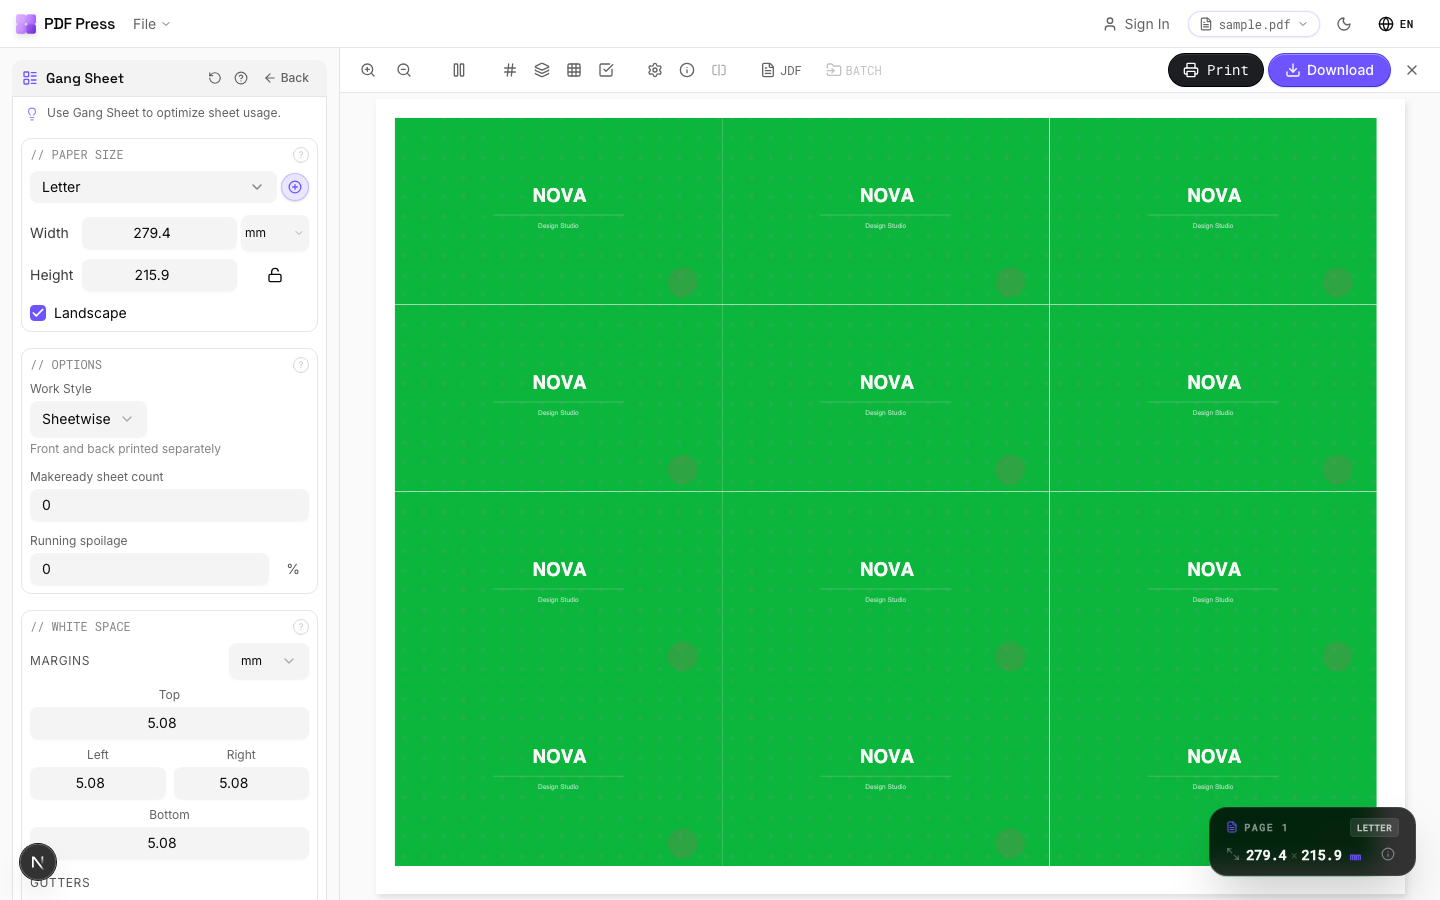
Step 3: Set the sheet size
Choose your target sheet or roll size from the presets (Letter, Tabloid, A3, A2, SRA3, or any custom width × height). For DTF transfer rolls, set a custom size matching your film width and desired length (e.g., 22" × 34" or 24" × 48"). pdfpress.app supports any dimension — there's no upper limit.
Step 4: Set per-item quantities
This is where the Gang Sheet tool shines. For each uploaded design, specify exactly how many copies you need. The nesting algorithm respects these quantities precisely — if you need 47 copies of Logo A and 12 copies of Logo B, that's exactly what you'll get. The tool calculates how many sheets are required to fulfill all quantities.
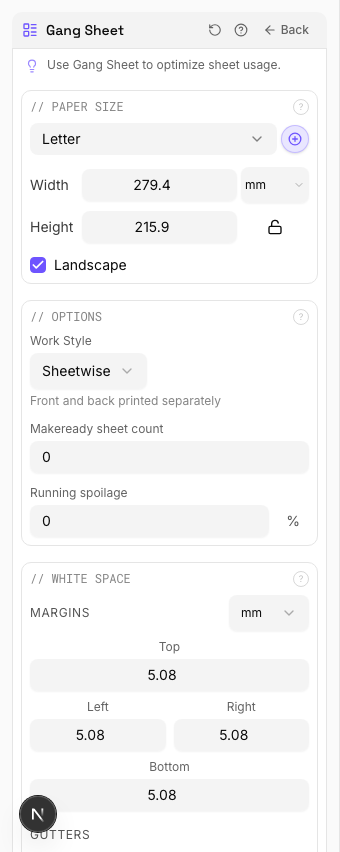
Step 5: Configure margins and spacing
Set the outer margin (distance from sheet edge to the nearest item) and the gap between items. For DTF and sublimation, you typically want minimal gaps (1-2 mm) to maximize transfer area. For offset and digital printing with guillotine cutting, wider gaps (3-6 mm) give the cutter operator room to work. If items include bleed, ensure gaps accommodate the bleed from adjacent items.
Step 6: Preview and adjust
pdfpress.app renders a real-time preview of the nested layout. You can see exactly how items are packed, how many sheets are required, and what the sheet utilization percentage is. If the layout wastes too much space, try adjusting the sheet size, enabling rotation, or tweaking gaps.

Step 7: Download the gang sheet PDF
Click Download to generate the production-ready PDF. The output contains all sheets with items positioned according to the nesting algorithm, plus crop marks if enabled. The file is ready to send to your printer, RIP, or DTF printer software.
How the Auto-Nesting Algorithm Works
pdfpress.app's Gang Sheet tool uses a shelf-based bin-packing algorithm optimized for rectangular items with guillotine-cut compatibility. Understanding how it works helps you set parameters that produce the best results.
The shelf-packing approach
The algorithm divides the sheet into horizontal "shelves" (rows). It places items on the current shelf from left to right until no more items fit in the remaining width. It then creates a new shelf below, with a height equal to the tallest item in the previous shelf, and continues packing. This produces layouts where every cut is a straight horizontal or vertical line — compatible with guillotine cutters, which can only make edge-to-edge straight cuts.
Rotation for better fit
When rotation is enabled, the algorithm tests each item in both portrait and landscape orientation and chooses whichever fits better in the current shelf position. This can significantly improve utilization — a 4" × 2" item that doesn't fit horizontally might fit when rotated 90° to 2" × 4". For most workflows, enabling rotation is recommended unless your designs have a mandatory orientation (e.g., text that must read in a specific direction).
Sorting strategy
Before packing, the algorithm sorts items by height (tallest first). Placing tall items first ensures that shelves are filled efficiently — shorter items can then fill the remaining space on taller shelves without creating wasted vertical gaps. This decreasing-height-first approach is a well-established heuristic that typically achieves within 5-10% of the theoretical optimal packing.
Multi-sheet handling
When all items don't fit on a single sheet, the algorithm opens additional sheets and continues packing. Each sheet is filled as completely as possible before moving to the next. The final sheet may have lower utilization — this is normal and expected for the last sheet in any gang run.
What the algorithm optimizes for
- Minimum sheet count: Fewer sheets means less material cost and faster production
- High utilization per sheet: More item area relative to total sheet area
- Guillotine-compatible cuts: All cuts are straight lines from edge to edge
- Exact quantity fulfillment: Every requested copy is placed — no more, no fewer
For most production scenarios, the automatic nesting produces layouts that are within 5-15% of a manually optimized arrangement — and it does it in seconds rather than the minutes or hours that manual layout requires.
Per-Item Quantity Control
One of the most powerful features of pdfpress.app's Gang Sheet tool is independent quantity control for every design. This solves a real production problem that step-and-repeat can't address: when you need different numbers of different items.
Why per-item quantities matter
In the real world, orders are never uniform. A custom apparel shop might need 50 transfers of a popular logo, 12 of a seasonal design, and 5 of a one-off custom piece. A print shop might have business card orders for 500, 250, and 100 from three different clients. A sticker producer might fill a sheet with 200 of a bestseller, 80 of a mid-range design, and 20 each of five slow movers.
Without per-item quantity control, you'd have to manually duplicate designs to the right count, create separate layouts for each quantity tier, or waste material by over-printing low-quantity items to match the grid. pdfpress.app eliminates this overhead — just enter the number you need for each design, and the algorithm handles the rest.
How it works in pdfpress.app
After uploading your PDFs, each design appears in the tool's item list with a quantity field. Set each quantity independently:
- Logo A: 50 copies
- Logo B: 12 copies
- Logo C: 5 copies
- Logo D: 100 copies
The algorithm places exactly these quantities across as few sheets as possible. The preview shows the total count per design, the number of sheets required, and the utilization percentage. If you change a quantity, the layout recalculates instantly.
Practical tips for quantity planning
- Round up slightly: Adding 5-10% overage to each quantity accounts for cutting waste, test prints, and quality rejects. Better to have a few extras than to rerun a sheet for 3 missing items.
- Combine similar deadlines: Gang items that ship together. Mixing a rush order with a next-week order on the same sheet means the entire sheet must be processed on the rush timeline.
- Consider cut sorting: After cutting, you'll need to sort items by design. If you have 15 different designs on one sheet, factor in sorting time. Some operators prefer slightly lower utilization with fewer designs per sheet for faster post-cut sorting.
DTF, Sublimation, and Heat Transfer Use Cases
The gang sheet has become the dominant layout method in the DTF (Direct-to-Film), sublimation, and heat transfer printing industries. These workflows have unique requirements that pdfpress.app's Gang Sheet tool is purpose-built to handle.
DTF transfer production
DTF printers produce transfers on PET film rolls, typically 13", 16", 22", or 24" wide. Every inch of film costs money — white ink, CMYK ink, adhesive powder, and the film itself. An efficient gang sheet layout is the single biggest factor in per-transfer cost. DTF operators routinely pack 30-50 different designs on a single sheet, each at its own quantity, with 1-2 mm gaps between items.
For DTF workflows in pdfpress.app:
- Set a custom sheet width matching your film width (e.g., 22")
- Set the height to your preferred cut length (34", 48", or longer)
- Use minimal gaps (1-2 mm) since items are individually cut or weeded, not guillotine-cut
- Enable rotation to maximize film utilization
- Set per-item quantities to match your order book exactly
Sublimation printing
Sublimation gang sheets are printed on transfer paper and heat-pressed onto polyester substrates (mugs, shirts, phone cases, tiles). The cost driver is sublimation paper and ink. Key considerations:
- Sublimation designs often include bleed beyond the trim edge — account for this in your gap settings
- Mirror/flip the entire gang sheet before printing (sublimation transfers are printed in reverse). Some RIP software handles this automatically; if not, use pdfpress.app's flip tool before the gang sheet step.
- Group items by press temperature and time when possible — items pressed at different temperatures shouldn't share a sheet if it creates sorting complexity
Heat transfer vinyl (HTV) and print-and-cut
For print-and-cut workflows, the gang sheet needs contour cut paths around each item. While pdfpress.app handles the spatial layout, you'll typically add cut contours in your cutting software (like Silhouette Studio or Cricut Design Space) after imposing. Keep gaps wide enough for your cutter's blade offset — typically 3-5 mm minimum between items.
Wide-format and signage
Wide-format gang sheets on vinyl, banner material, or rigid board substrates follow the same principles at a larger scale. Set sheet dimensions to match your printer's bed or roll width, and let the nesting algorithm optimize placement. For rigid board (Coroplast, Sintra, foamboard), guillotine-compatible layouts are essential since these materials are typically cut on flatbed cutters with straight-line cutting paths.
Minimizing Paper Waste with Gang Sheets
Material efficiency is the entire point of gang sheeting. Here are concrete strategies to push your sheet utilization higher and reduce waste.
Choose the right sheet size
The sheet size dramatically affects utilization. If your items are mostly 4" × 6", a 13" × 19" sheet fits 6 items (3 × 2) at 92% utilization, while a 12" × 18" sheet fits 6 items at 89% utilization, and an 11" × 17" sheet fits only 4 items at 76% utilization. Test multiple sheet sizes in pdfpress.app to find the one that produces the highest utilization for your specific item mix.
Enable rotation
Allowing the algorithm to rotate items 90° typically improves utilization by 10-20%. A mix of portrait and landscape items that packs poorly in fixed orientation often packs tightly when rotation is allowed. The only reason to disable rotation is when designs have a mandatory orientation (e.g., text that must read horizontally).
Minimize gaps
Every millimeter of gap between items is wasted material. For DTF and sublimation, 1-2 mm gaps are standard. For offset and digital with guillotine cutting, 3 mm is usually sufficient. Don't use wider gaps than your cutting process actually requires — the difference between 3 mm and 6 mm gaps on a sheet with 30 items adds up to significant wasted area.
Fill partial sheets with fillers
The last sheet in a gang run often has low utilization. If you have remaining space, fill it with:
- Extra copies of your fastest-selling designs (build inventory)
- Test prints for upcoming orders
- Sample designs for marketing or trade shows
- Color calibration targets or registration test patterns
Track utilization metrics
pdfpress.app shows sheet utilization percentage in the preview. Over time, track your average utilization across jobs. Industry benchmarks:
- Below 65%: Poor — reconsider sheet size or item mix
- 65-75%: Acceptable for mixed-size items
- 75-85%: Good — typical for well-optimized gang sheets
- 85-95%: Excellent — indicates well-matched item sizes and sheet dimensions
- Above 95%: Exceptional — usually only achievable with uniform item sizes
Even small utilization improvements compound over thousands of sheets. Increasing average utilization from 72% to 82% on a shop that prints 500 sheets per day saves 50+ sheets daily — the equivalent of 10% of your substrate cost, every day, permanently.
Advanced Settings and Tips
Beyond the basics, pdfpress.app's Gang Sheet tool offers several advanced options that experienced operators can use to fine-tune their layouts.
Bleed handling
If your source PDFs include bleed (content extending beyond the trim edge), configure the bleed setting to match. Options include:
- Use document bleed: Pulls bleed from the PDF's defined TrimBox/BleedBox
- Set fixed bleed: Applies a uniform bleed amount to all items (e.g., 3 mm)
- No bleed: Items are placed at their exact page boundaries
When bleed is enabled, the gap between items must be at least 2× the bleed amount so that adjacent items' bleed areas don't overlap. pdfpress.app enforces this automatically.
Crop marks and cutter guides
Enable crop marks to add trim lines at each item's corners. For gang sheets with many items, crop marks are essential for accurate cutting. Options include:
- Mark length and weight (line thickness)
- Mark offset from trim edge
- Color (typically Registration Black for offset, black for digital)
Combining with other pdfpress.app tools
The Gang Sheet tool integrates with pdfpress.app's full pipeline. Common combinations:
- Resize → Gang Sheet: Scale items to target dimensions before nesting
- Bleed → Gang Sheet: Add or modify bleed on source files, then gang
- Gang Sheet → Color Bar: Add color verification strips to the imposed sheet
- Gang Sheet → Cutter Marks: Add registration marks and cutting guides after nesting
Working with multi-page PDFs
When you upload a multi-page PDF, each page becomes a separate item in the gang layout. This is useful for batch processing: export all your designs as pages of a single PDF, upload once, and set individual quantities for each page. It's faster than uploading dozens of separate files.
Duplex gang sheets
For double-sided items (business cards with a front and back, postcards with address and art sides), the Gang Sheet tool can generate matched front-and-back sheets. Specify the work style — sheetwise, work-and-turn, or work-and-tumble — and the tool produces a back-side layout where every item's reverse aligns with its front after cutting.
Try it on your file
Open the Gang Sheet tool
Opens with the tool ready — just drop your PDF and download.
Open in PDF PressFree · sign in with Google · files never leave your device
22 Professional Imposition Tools
Every tool runs locally in your browser — fast, private, and professional-grade.
Frequently Asked Questions
Related Articles
Try it on your file
Open the Gang Sheet tool
Opens with the tool ready — just drop your PDF and download.
Open in PDF PressFree · sign in with Google · files never leave your device