Lay Marks
Lay marks indicate the correct orientation and positioning of each press sheet: ensuring consistent alignment throughout the print run. They include front lay (gripper-edge guides), side lay (lateral positioning guides), and orientation indicators (showing which way is "up" and which side is "front"). Essential for maintaining registration between colors and between front and back on duplex jobs.

Adds press sheet alignment marks that guide operators in feeding and positioning sheets on the printing press.
Lay marks indicate the correct orientation and positioning of each press sheet: ensuring consistent alignment throughout the print run. They include front lay (gripper-edge guides), side lay (lateral positioning guides), and orientation indicators (showing which way is "up" and which side is "front"). Essential for maintaining registration between colors and between front and back on duplex jobs.
How It Works
Lay marks indicate the correct orientation and positioning of each press sheet: ensuring consistent alignment throughout the print run. They include front lay (gripper-edge guides), side lay (lateral positioning guides), and orientation indicators (showing which way is "up" and which side is "front"). Essential for maintaining registration between colors and between front and back on duplex jobs.
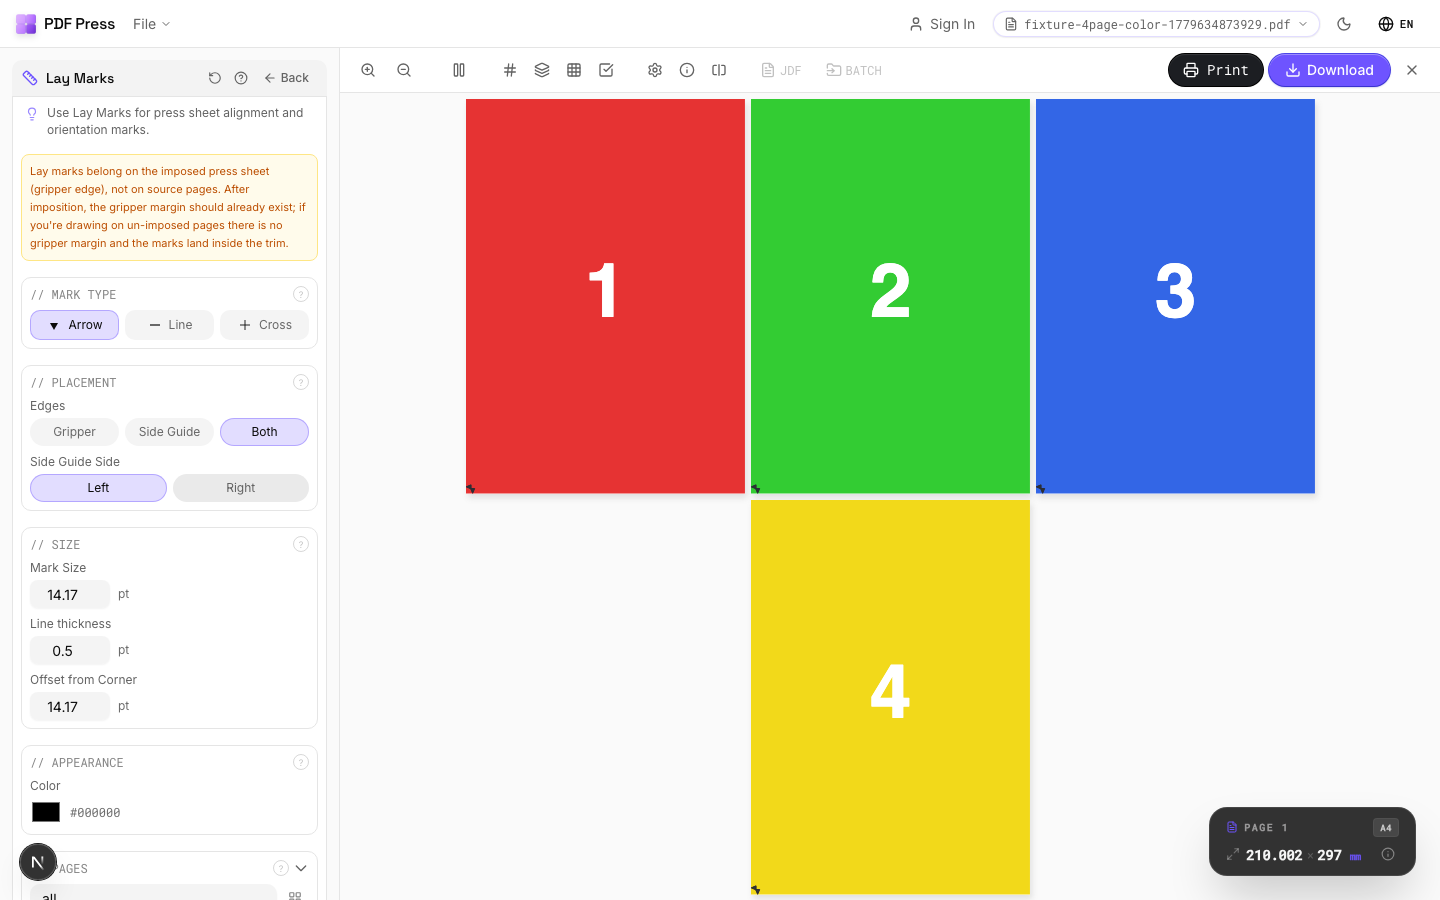
Lay Marks tool applied. Options panel on the left, imposed result on the right. Click to zoom.
Options Guide
Mark Type
Choose the type of lay mark: front lay, side lay, center mark, or orientation indicator.
Front lay: marks at the gripper edge showing the correct feeding direction: the press operator aligns sheets against front lay stops. Side lay: marks along one side edge for lateral alignment: sheets are jogged against the side guide. Center mark: a crosshair at sheet center for front-to-back registration verification. Orientation: arrows or symbols indicating "this side up" and "front face": prevents sheets from being loaded upside-down or backwards.
Placement
Position lay marks along the appropriate sheet edges.
Front lay marks go on the gripper edge (leading edge). Side lay marks go on the guide side (operator side or drive side depending on press configuration). Center marks are placed at the exact center of both edges for duplex registration. Position all marks outside the trim boundary in the waste area so they don't appear in the finished product.
Size
Set the physical dimensions of each lay mark.
Marks should be visible during high-speed press operation: typically 5–10mm for main alignment marks, 3–5mm for secondary indicators. Line weight: 0.5–1pt for clear visibility. Marks that are too small are useless to press operators working at production speed; marks that are too large waste paper and may interfere with finishing.
Appearance
Configure mark color, line weight, and style.
Standard: process black (K-only) at 100%. Registration color (all plates) is used for duplex-alignment center marks so they appear identically on both front and back. Use a distinct style (solid, dashed, or double-line) to differentiate front lay marks from side lay marks at a glance.
Pages
Specify which pages to process using a range expression.
Examples: 'all' = every page. '1-5' = pages 1 through 5. '1,3,5' = specific pages. '1-10 odd' = odd pages 1-9. '2-20 even' = even pages 2-20. 'last' = last page. 'last-2' = third from last. Ranges are 1-based. Combine with commas: '1-5, 8, 12-15'.
Preview
Live rendering showing lay mark positions and appearance on the press sheet.
Configurations & Variations
Lay Marks Applied
Lay marks indicate the gripper edge (the edge that feeds into the press first) and the guide edge (the side that rides against the press side guides). These marks keep sheet orientation consistent through the press, which is critical for front-to-back registration on sheet-fed offset.
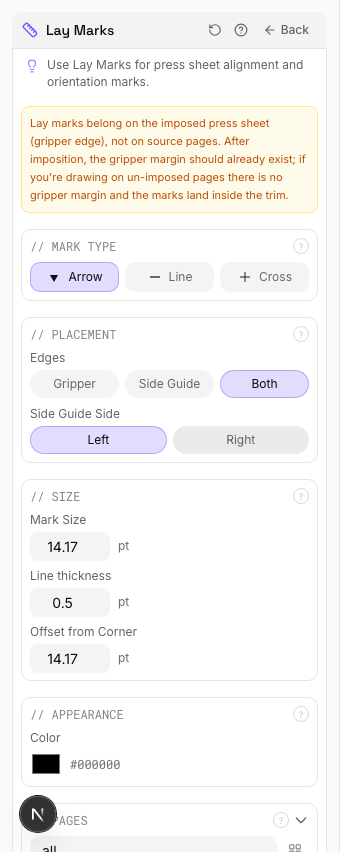
Settings to change
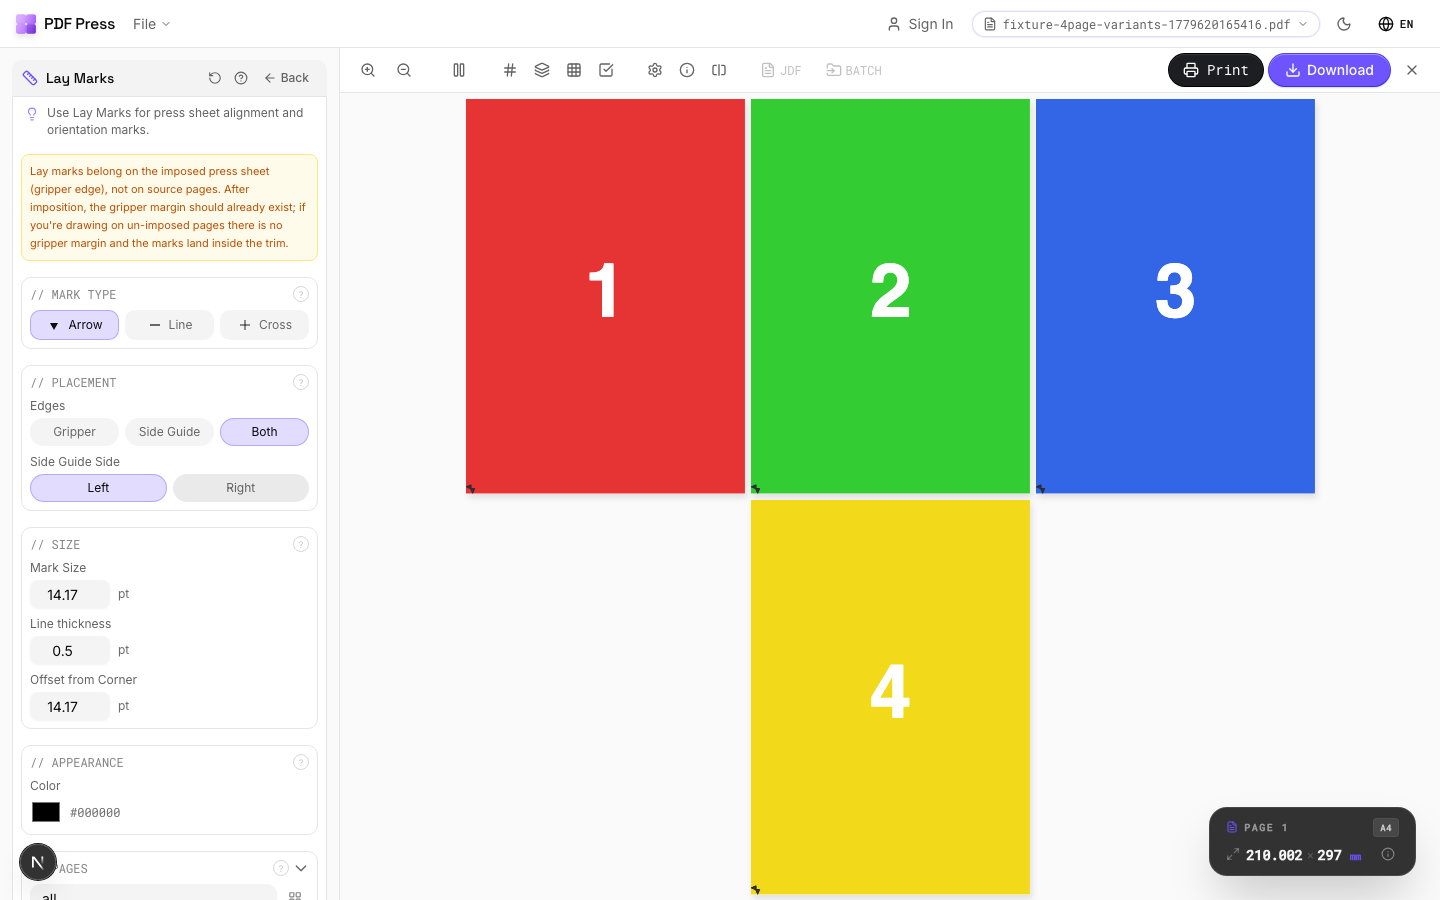
Full app view

Output result
Expert Tip
Lay marks (side and front lays) tell the operator which edge feeds first and which side rides the guide. Place them at the gripper and guide edges matching your press configuration.
Lay marks placed outside the physical sheet area will not print. Make sure they fall within the actual press sheet dimensions.
Learn More
Used in Recipes
Offset Press Ready
Full offset press preparation with all required finishing marks.
Try Lay Marks in your browser
PDF Press runs entirely client-side. Upload a PDF, apply Lay Marks, and download the result — no upload to a server, no sign-up required.
Open PDF Press